Lucky SHD100

Lucky SHD100 is one of those Chinese films that you can sometimes find really cheap. When I was in Bejing a few years ago it cost 2USD a roll in a film shop (that was unfortunately closed when I was going there to buy some).

It has in general a bad reputation, due to lacking quality control and probably due to it being a Chinese made emulsion.

The history of the Lucky brand, and its company, Lucky Group Corporation, is a bit difficult to find good information about. Based on their web site, it seems they are doing mostly B2B stuff. Their English site is pretty thin on information, but if you use Google Translate on the Chinese site you can find more information.

Here is a list of their product categories

I found this piece of information on the English site:

China Lucky Group Corporation (herein after referred to as “China Lucky”) is the wholly-owned subsidiary of China Aerospace Science and Technology Corporation. China Lucky, formerly known as Baoding Cinefilm Manufacturing Factory was founded in 1958.

China Aerospace Science and Technology Corporation is a state-owned corporation for the Chinese space program, so my guess is that whatever knowhow China Lucky had, was crucial for the Chinese space program so they just “bought” it. It is not a small company, according to the Chinese site:

The annual production capacity of silver salt film is 20 million square meters

1 square meter of film is around 17 rolls of 135/35 film, so I think just a small fraction of that coating is 35mm film for cameras. My guess is that most of it is X-ray film.

This is what they say about SHD100 themselves:

Lucky's new generation SHD100 is a full-color medium-speed black and white film with high definition and large latitude. It has good physical and mechanical properties, can meet the requirements of use under high temperature and high humidity conditions, and has strong anti-adhesion and scratch resistance. Widely used in indoor and outdoor professional and amateur photography, such as portrait photography, advertising photography and other artistic creation photography, landscape and travel photography. The use of a new type of silver halide grain emulsion enables the film negative to be magnified at large magnifications and still achieve excellent clarity and ultra-fine grain effect. With Lucky black and white painted statues or other similar photographic papers, good results can be obtained.

Alright, enough back story. I’ve shot 3 rolls of the stuff, recently expired, refrigerator stored. My general feeling is that this is s a very good film for the price. Much better than all the Agfa Aviphot rebrands that are circulating these days. Dare I say, better than Fomapan too. I shot all rolls at box speed and I think that’s a pretty accurate speed for this film. Maybe go down to EI 80, and reduce the development time a tiny bit. The highlights can block up pretty easily.

The main downside to this emulsion is that the anti-halo layer is really weak. Bright skies will give a halo in areas of high contrast. That might be part of the charm in some cases though.

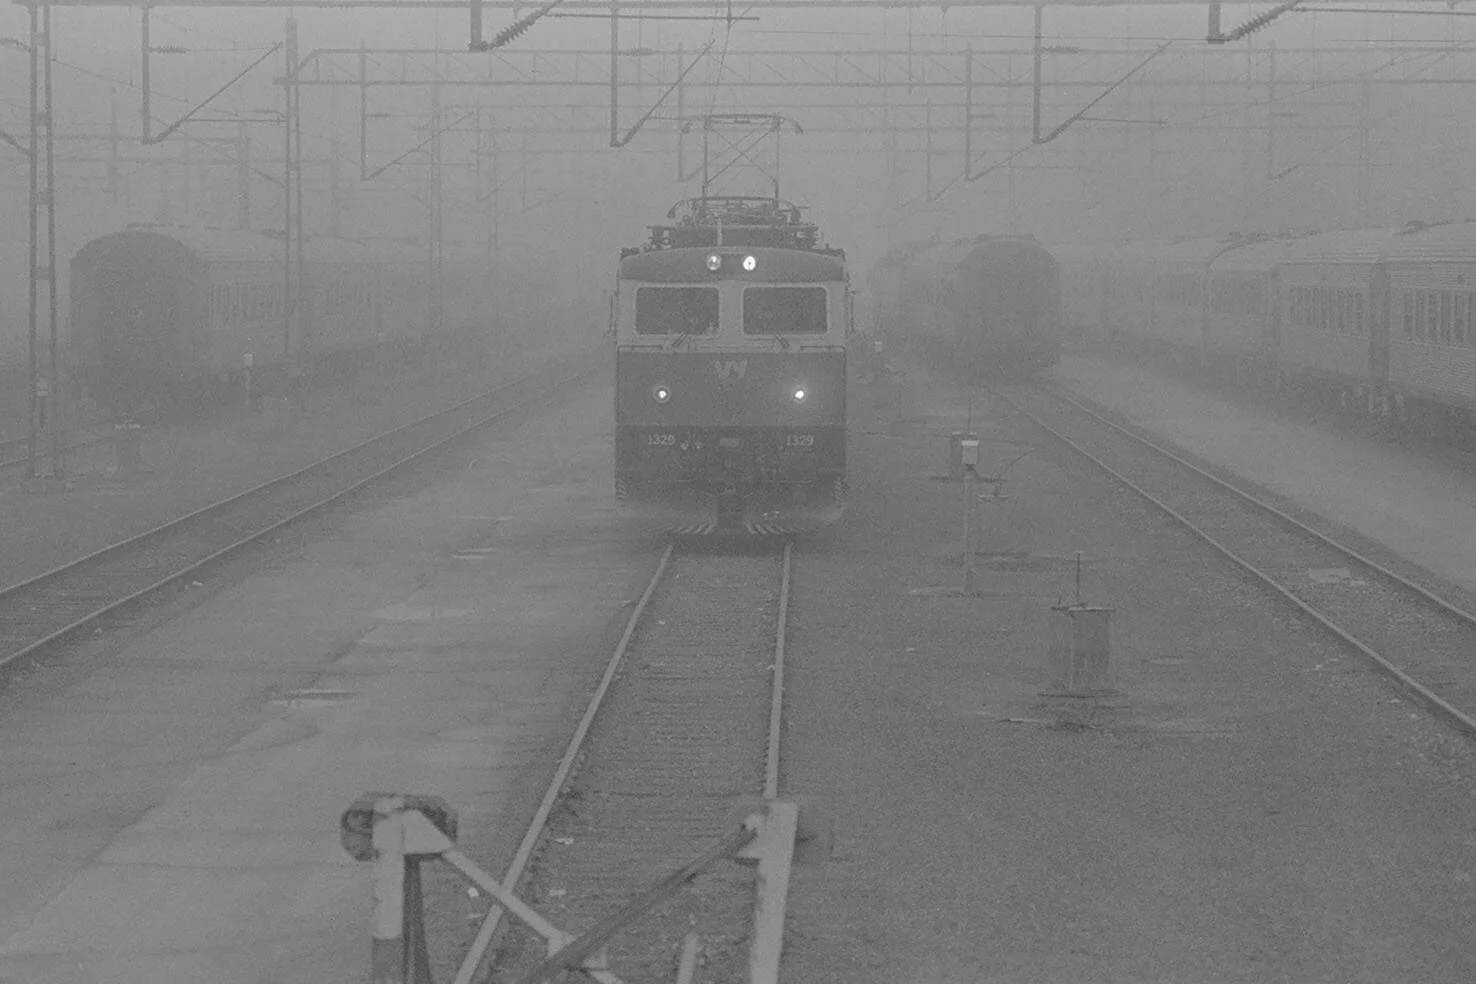
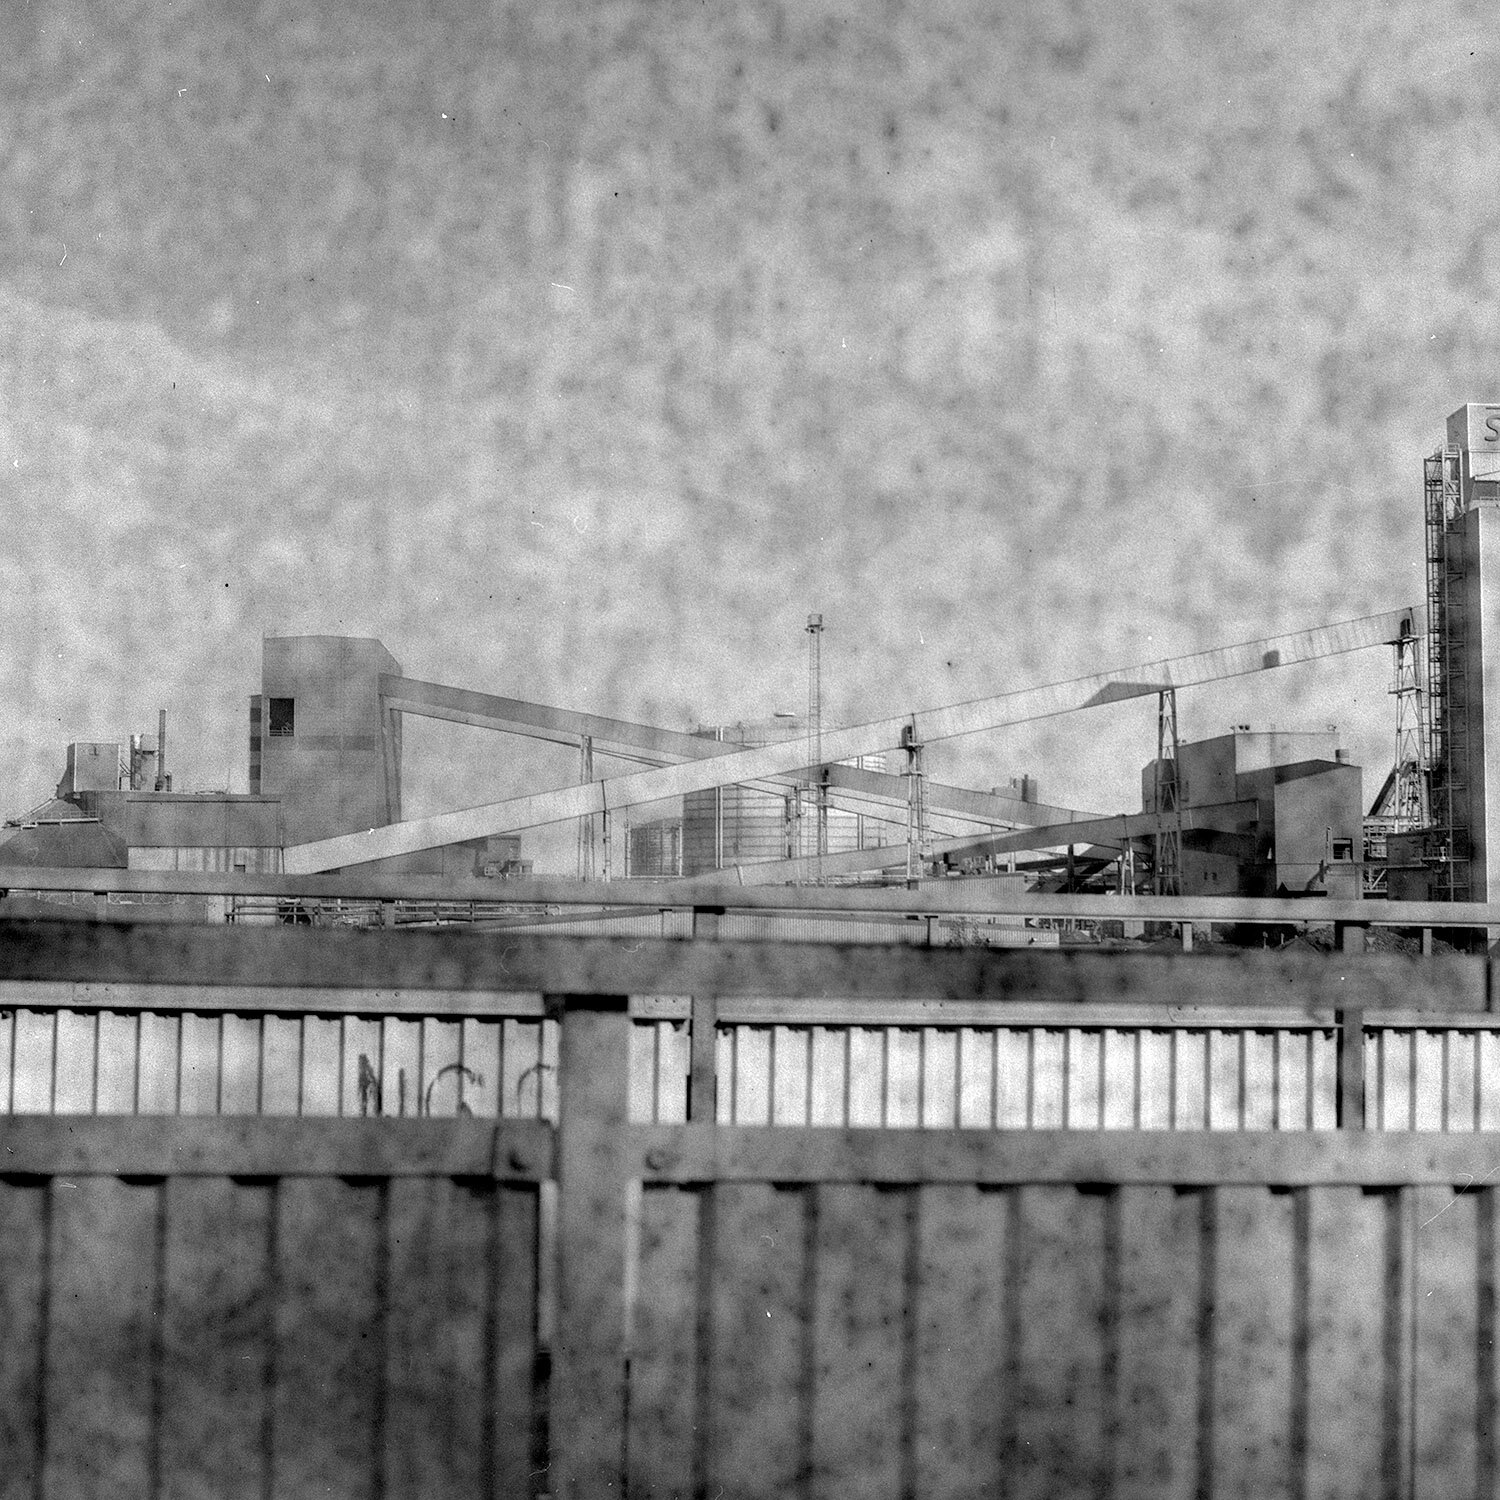
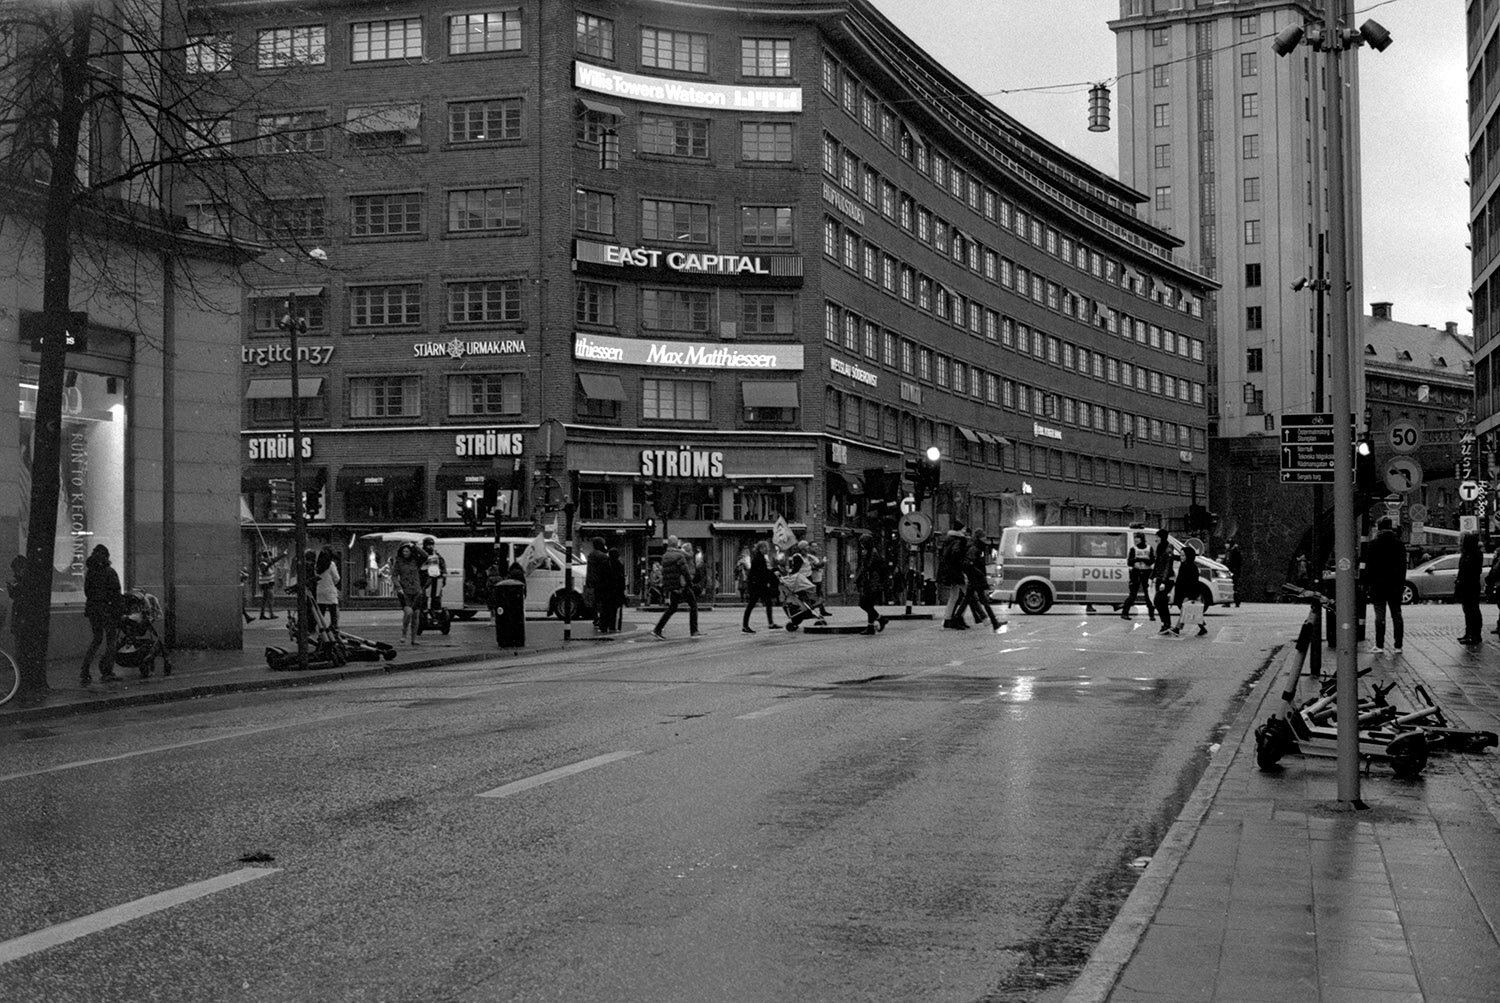
Here is an example of what I am talking about:

Lucky SHD100, Pentax LX, SMC-M50/1.4, Adox FX-39 II, 12min 20c

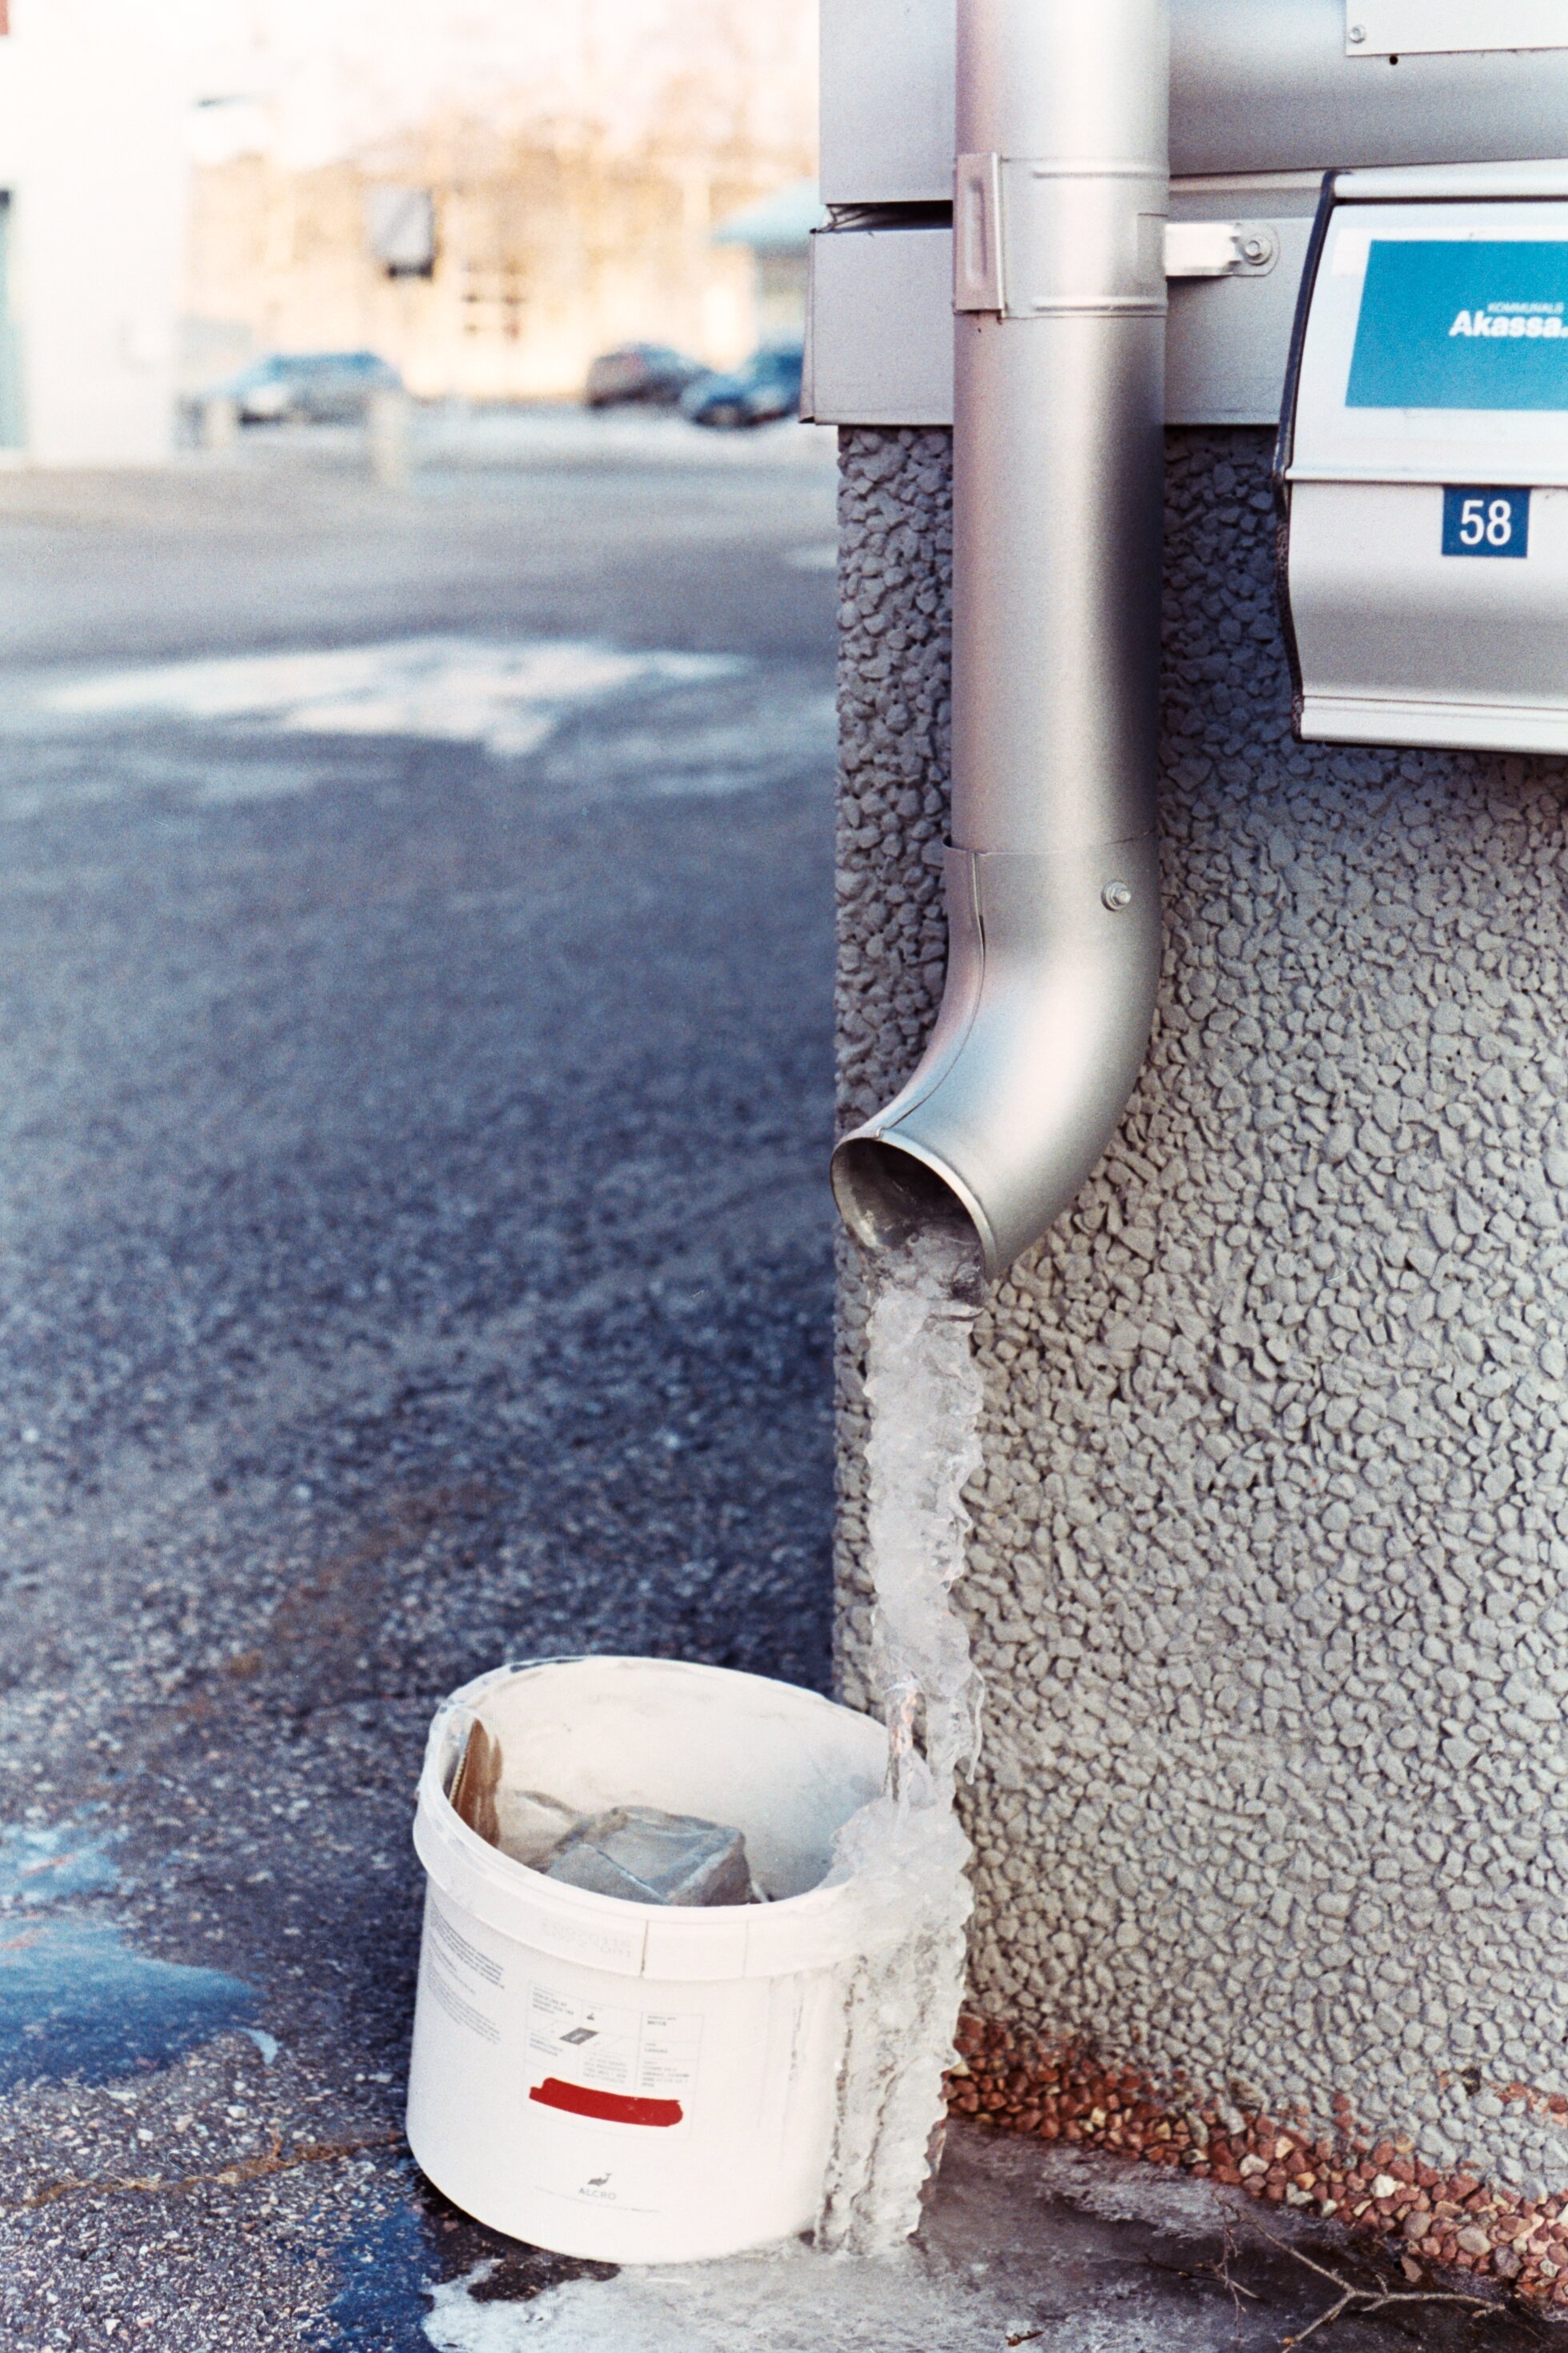
Something that is positive is that this film is actually pretty sharp. I thought the results were particularly good in FX-39. The grain is not “in your face” but it has a very nice pop to it in areas with lots of micro-contrast. Example of this is here, if you look at the dogs fur:

Lucky SHD100, Pentax LX, SMC-M50/1.4, Adox FX-39 II, 12min 20c

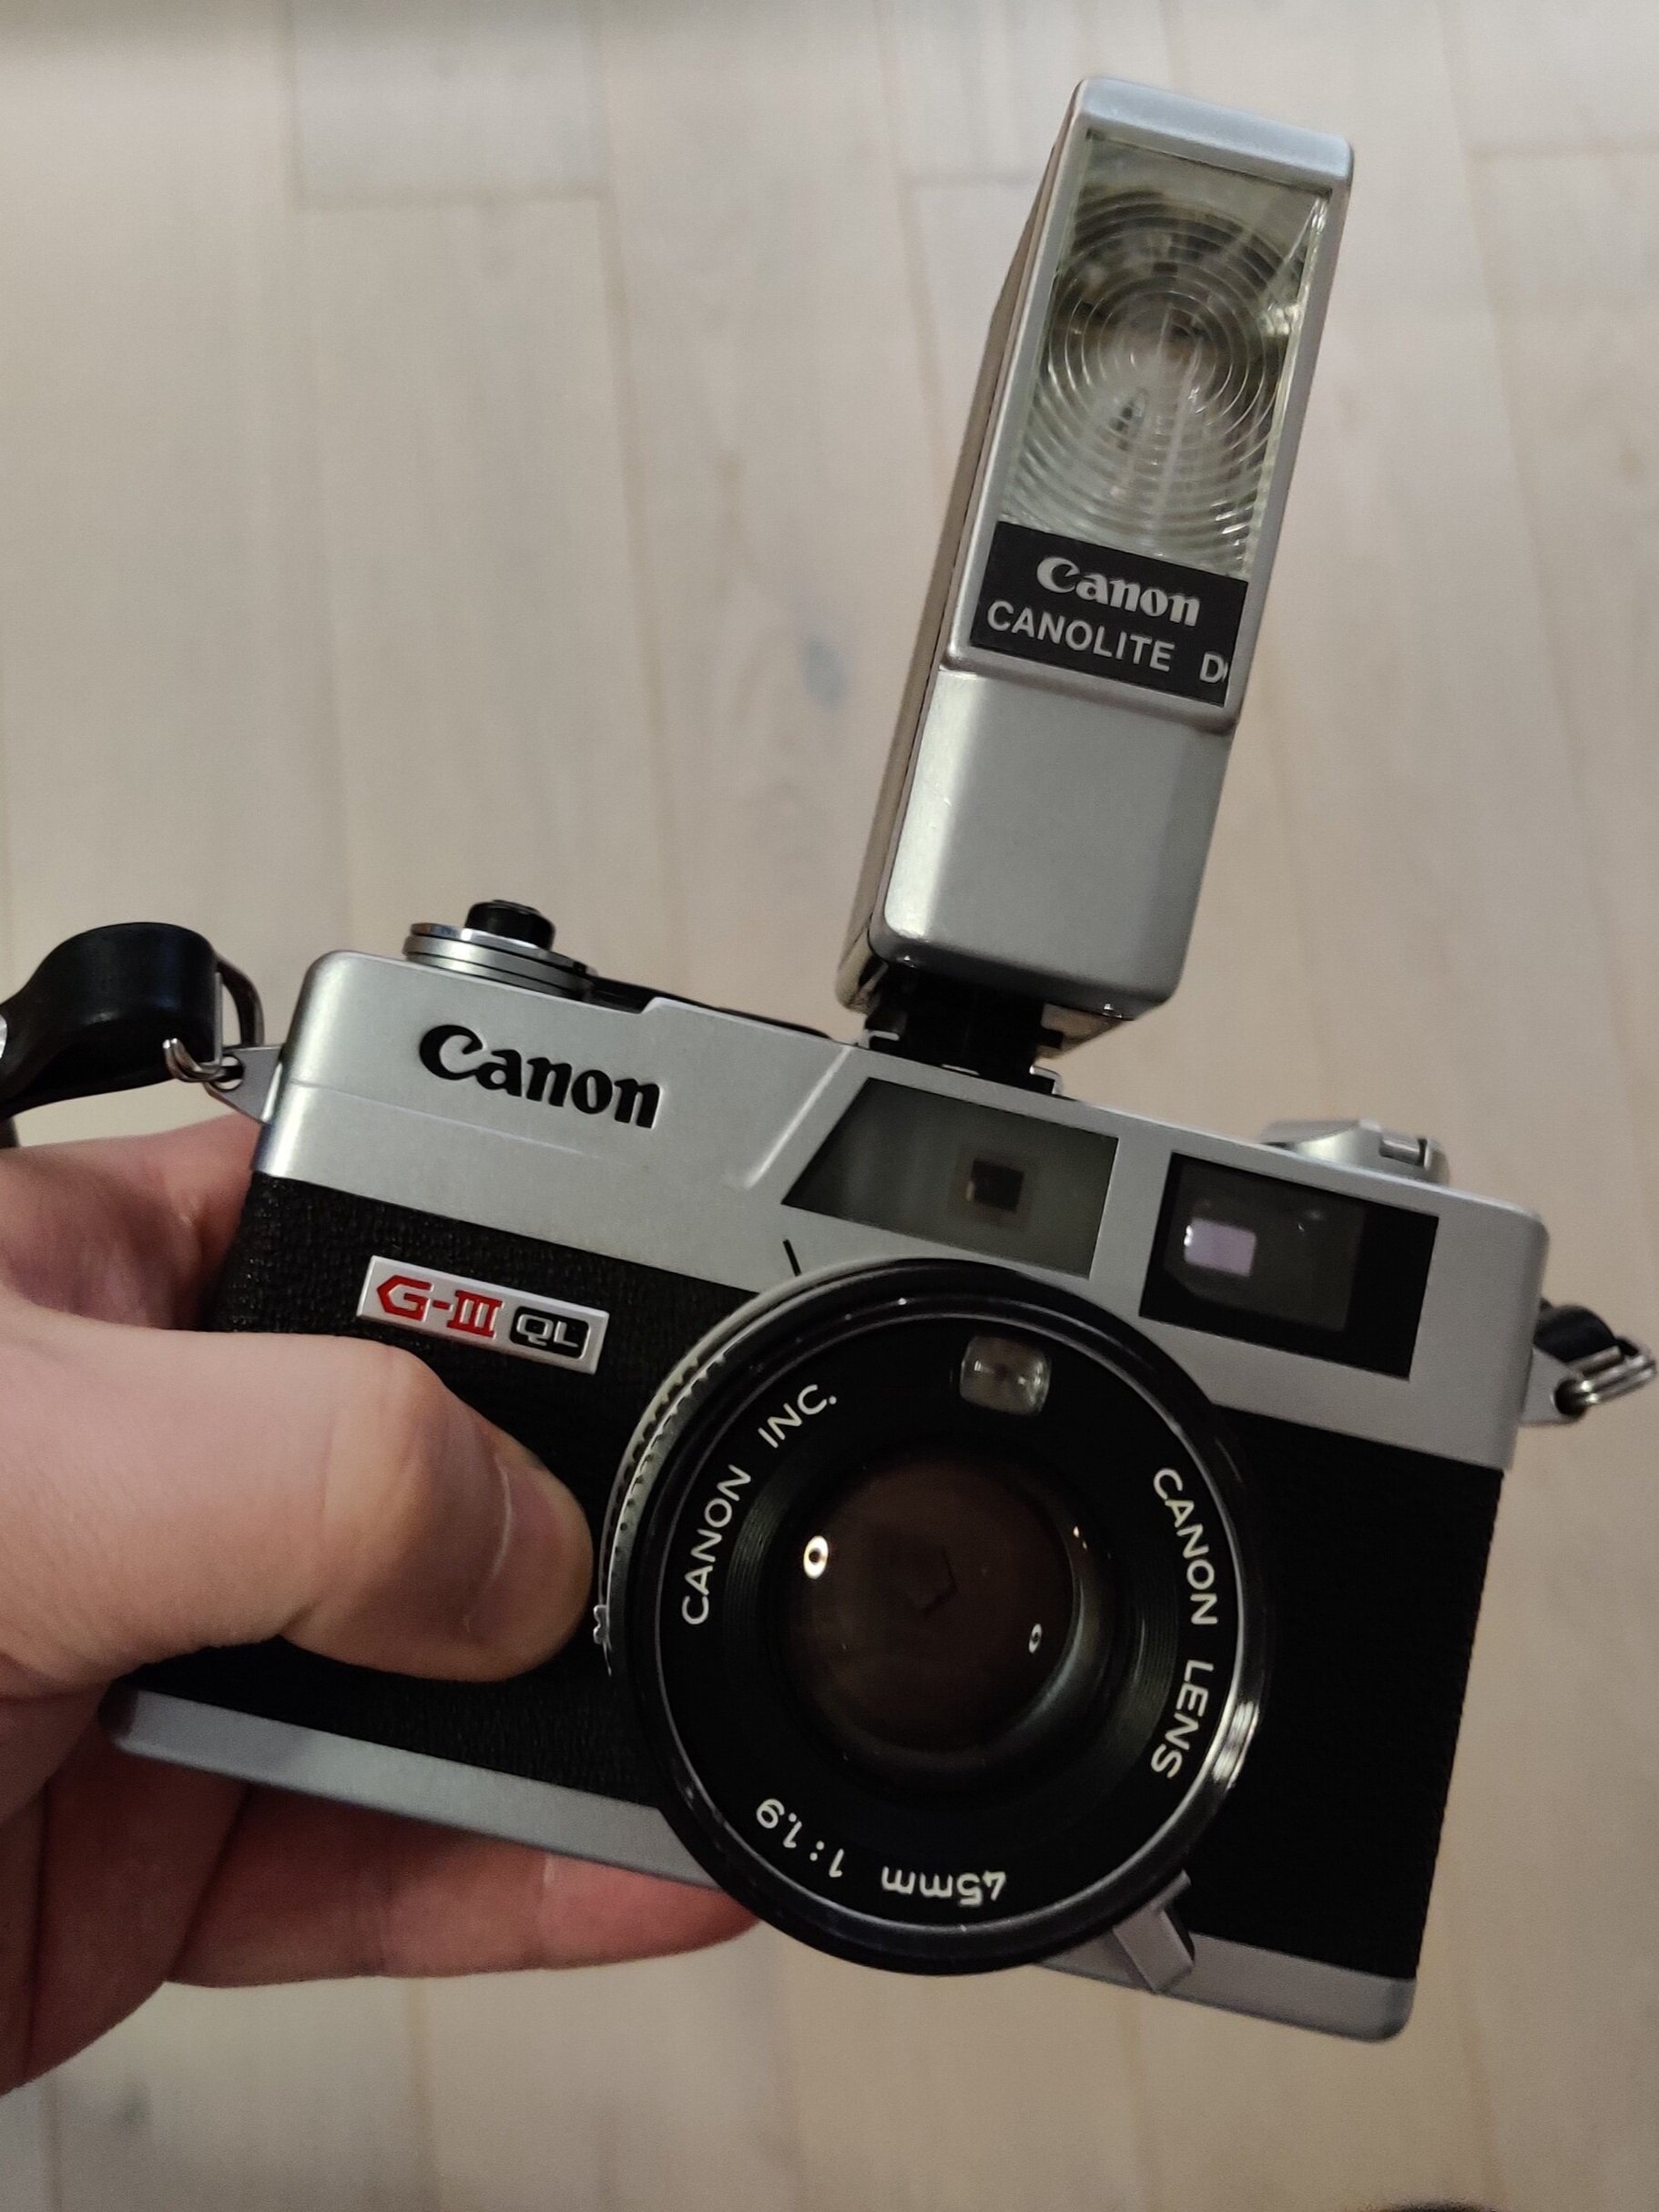
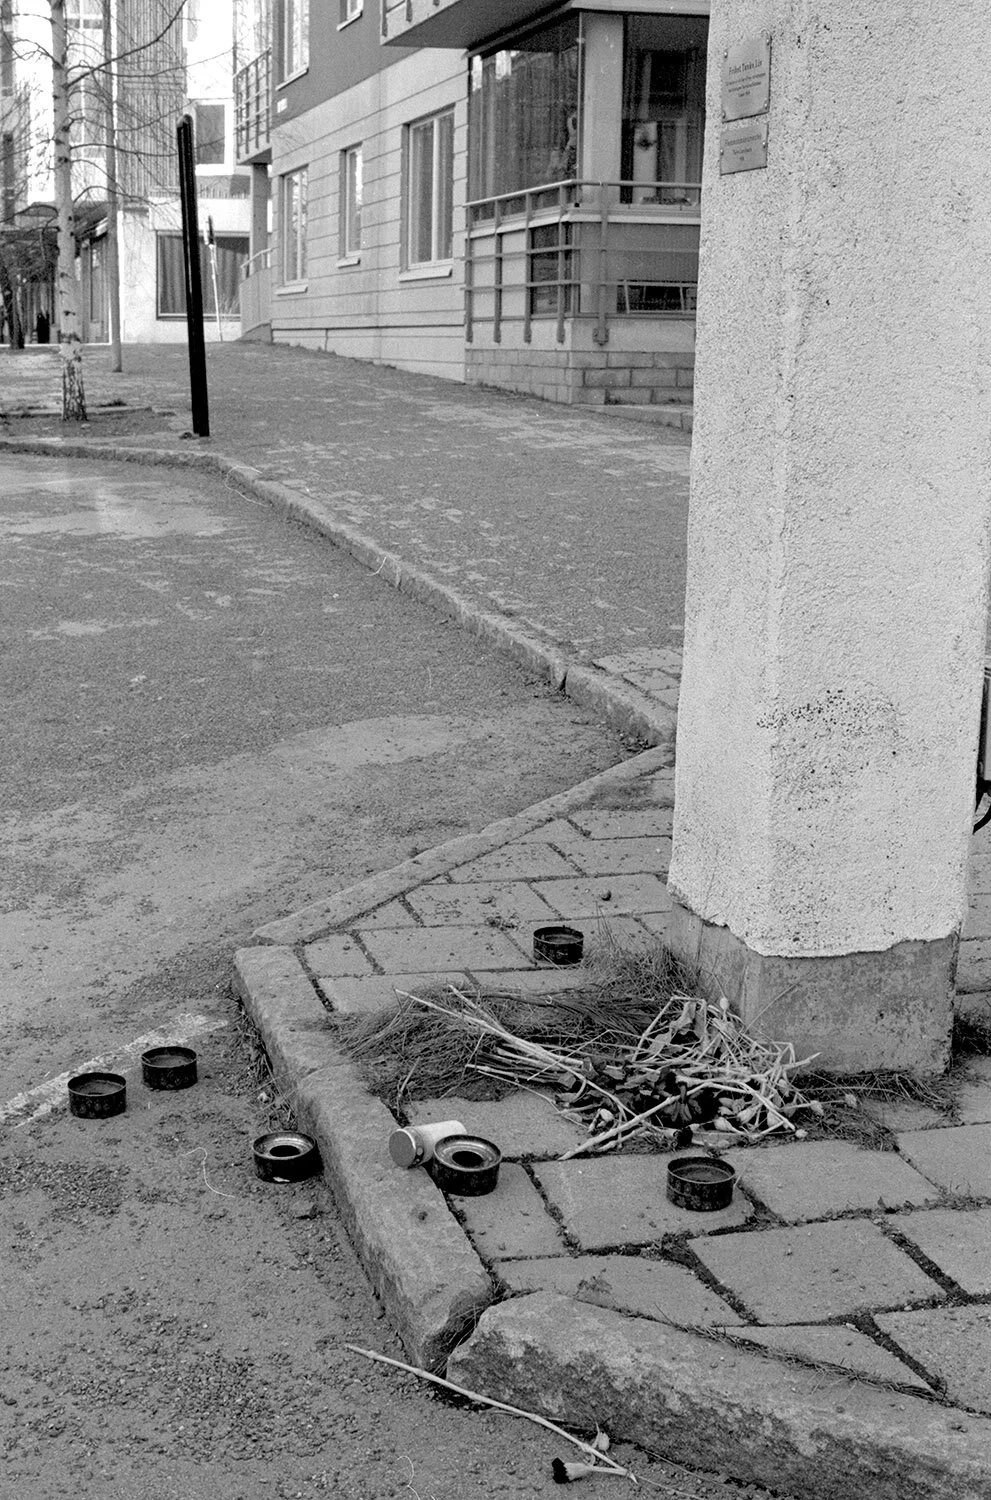
Here are some more example shots. First two are with an Lomo LC-a and the rest of them are with a Canonet G3 QL19. All developed in XTOL 1+1 for 8min. I’d say that the XTOL time was a little on the low side and my FX-39 1+19 time of 12min was a little on the long side. I would probably increase the XTOL time with 30-60sek and reduce the FX39 1+19 time with the same amount, next time I develop this film.

If I ever come across this film for 2-3USD/pcs again, I would not hesitate to buy a brick or two. This is an excellent low-cost film for every day shots. The three rolls I have shot had zero defects or quality issues. There is very very little base fog in my rolls, no weird scratches, nothing like that. It seems though that Lucky does coating runs quite rarely, and you never know when you can get hold of any. Macodirect sometimes has some, but with a quite steep markup compared to getting it locally in Asia, at 5€/pcs.

There exists also a Lucky SHD400, but it is very rare. I have never seen any rolls of it for sale, anywhere. With the current film resurgence, let’s hope Lucky start doing more coating runs and maybe reintroduce the 400 speed film.

Alright, that is it for this time. Let me know if you have any questions, and please take a look at the shop if you find something you like.

Orwo N74 aka Lomography Berlin in D96

Since I have a bottle of D96 I got for my Double-X experiment I decided I should get some more bw cine films to try out with it.

So I grabbed the two Orwo films that Lomography sells, Berlin and Potsdam. Lomography Berlin is actually Orwo N74 and Potsdam is UN54.

The company behind Orwo, Filmotec, is actually selling the next gen version of N74 now called N75 but I think Lomography got a good deal on an expired bulk roll or something because there is some serious base fog on this film.

I rated the film at EI 250-320, and I think 320 is pretty close. 250 was okey but depending on metering, it was at pushing midtones slighly too high up in my opinion.

I developed the film for 8,5min at 20c. Would I do it again I would go for 9-9,5min. It was ever so slightly underdeveloped. Missing a little bit of zing in the highlights.

It was probably a fluke but I had to fix the roll a second time after washing and drying. I usually fix for 5 minutes but I had some milky residue left around the sprocket holes. 99% sure it has nothing to do with the film itself, but anyway, these blogs are my also my personal notes too about these films..

The images are very grainy for a Iso 400 film. It is much grainier than ex HP5 while being 1/3-2/3 stop slower. It has a nice acutance, the images feel sharp and crisp but they feel a little bland.. at least when scanned. I haven’t done any wet prints yet.

The price is not great if you get the Orwo films branded as Lomography. If you got bulk rolls it would be around half price which is much more reasonable. Honestly, Hp5/Fp4, Delta 100/400, Tmax 100/400 are all so much better films than this.

If you want grain, and a certain cinematic look, this could be something worth trying. But for the general bw shooter, I would not recommend Orwo N74.

Alright, here are sample shots. Take a look in the shop if you see something you like and please support my blog!

Adox XT-3 review

This is going to be a short blog post.

So a quick recap of what has happened so far in the XTOL story:

  • Xtol was and is a beloved film developer with great tonality and grain

  • Kodak sold their chem dept to a Chinese firm called SinoPromise

  • The Chinese fucked up something and put the two parts into bags not air tight

  • People bought bags of the developer which then turned out to have oxidized so you got lumps of chemicals that was hard to dissolve, or didn’t dissolve at all

  • People got thin negatives and complained, Sino Promise promised replacements which most people still have not gotten

  • Adox looked at the situation from the sidelines and noticed that the “new” Xtol was different from “old” Xtol that people liked

  • They decided to make their own version with Captura dust-free technology and with ingredients that were up to modern standards to reduce health hazards

  • They matched the curves exactly to old Xtol which they had at hand, released it and called it XT-3

So, development times are exactly like Xtol times, and results are exactly like Xtol. No point in me showing example pictures. What is different however is that with the Captura dust binding tecnhology you will no longer taste Xtol in your mouth after mixing a batch. It is quite cool actually, how everything just slides out from the bag with zero dust.

I also found that it was easier to dissolve, it didn’t take as long to mix into the developer liquid.

After developing a couple of rolls I will confirm that the negatives look exactly as the used to do with Xtol.

Alright, I can’t think of anything else to say about this.

IMG_20210409_174417.jpg

35mm in a Mamiya Press or MamiPan

I’ve had an idea for a small project for a while, I wanted to shoot some 500T in a panoramic format during the night around here in my hometown.

But I could never get it to work in my Mamiya 6 MF without the adapter, which is now very very expensive of course. The XPan is incredibly overpriced currently and so is that Fuji version of it, the TX-1/TX-2.

But after doing my review of the Mamiya Press I had a brainwave. This old beast lacks all interlocks and things that make using 35mm in a Medium format camera difficult. Also, it is 6x9 which gives even more panoramic aspect ratio.

After struggling for a long while to get the film loaded and spooled up in a 120 roll, I went out and shot the roll only to find out when I got back home that the 35mm leader had gotten loose so I had just shot all the frames on the same frame. On the second try I got it to actually wind the film, and off I went.

So to get the correct length between frames you need to have something to increase the thickness of the 120 roll you wind the 35mm onto, since the film back is counting on a certain amount of paper being there when you start shooting, and also that the roll gets thicker as you go along.

After 8 shots, you’re on your own, and just try to wind an amount that feels reasonable. I didn’t wind enough, and ended up with a bunch of half frame double exposures.

Alas, it is now May, and up here in the north we are going into the midnight sun season. We don’t really have darkness anymore at night, maybe for an hour somewhere around 2am.. but my plan of shooting some long exposures with 500T will have to wait until autumn comes. But I shot the roll anyway during daytime, to get a feel of what kind of images I could expect. And there is a certain, je ne ce quoi, with this wildly wide aspect ratio. Composing is hit and miss, and you have to be perfectly level when shooting, otherwise you will lose a bunch of negative when straightening up the image in post.

Alright, enough writing, here are the sample pics from that roll. Now you at least know it can be done, if you’re interested in wide panoramic hacks yourself!

Oh yeah, and the roll was developed in ECN2, as per usual. Don’t ruin nice Vision3 film in C41 please..

If you like my blog, please consider supporting it by buying something from my shop. Link up in the menu!

Mamiya Press review

There is a flea market here in my home town that I check almost on a weekly basis, because I have found surprising camera gear there several times. This time I came across a Mamiya Press. A bit funny since I pretty recently got my first Mamiya (the Mamiya 6) and now I have two.

IMG_20210421_143157.jpg

The Mamiya Press was introduced in 1960, a range of medium format rangefinders with various lenses and backs. It is called a press camera because it was meant for.. photographers working in press. So magazines basically (newspapers already used 35mm). The magazine photographers previously used 4x5 and this was a much smaller and more portable camera. With a roll film back you got a 6x9 negative, which was large enough now that film emulsions had gotten much better. At the end of the 1950s both negative and positive color films made big leaps in terms of sharpness and quality and the need for the big sheet film sizes started to reduce.

By todays standards, the Mamiya Press is clunky, cumbersome, difficult to operate and barely fits any camera bag. It’s not a bad camera by any means, but it is very clear that the design stems from a different era.

Small stuff like the huge handle, no shutter button (shutter is operated by a release cable that you can attach to the handle. Almost no plastic is used so it is very heavy too.

Anywho - so I found the camera very cheaply, bought it and got a bag full of gear. The camera, the kit 90mm lens, the handle, two 120 6x9 film backs, the ground glass addon and a couple of sheet film holders (6.5×9 cm). I haven’t tried sheet film yet, only the roll films backs.

Loading the film back was a bit tricky. First off, the film goes from right to left. Make sure the two triangles on the knob are aligned. Do NOT engage the switch on the knob. If you do, you have to turn it all the way around which takes a long time. Load film, turn the knob until the arrow on the paper and the back align. Do not press paper down, just eyeball it. Close the back, and NOW engage the switch. If you don’t engage the switch and start turning the knob you have to start all over. Open the film back in a dark bag and roll back the film. I have done all these mistakes!

Second issue to note, the lens is retractable. It is barely noticeable, but you can twist the lens and push it in to save you about a centimeter of less space. If you however have the lens retracted, all of your shots will be very blurry. I have made this mistake!

IMG_20210421_143203.jpg

Third issue to note. Remove the dark slide before you start shooting. No need to put it back in until you have finished the roll. I have made this mistake too!

Fourth issue. There is nothing to prevent you from accidental double exposures. Every time you take a shot, get into the habit of advancing the film at once. Engage the switch and turn the knob until it won’t turn more. You guessed it, I did some double exposures.

Fifth issue. Remove lens cap before shooting. Because it is a rangefinder you won’t notice that it is on. This one I have not done yet.

As you see, there is very little in this camera to prevent you from mistake. Very unlike the Mamiya 6 that has an extreme amount of interlocks.

Even though I sound very negative, it is a nice camera anyway. It has historical significance, it reminds us of a different time and forces you to be more careful, meticulously perhaps. And a 6x9 negative is pretty huge. The lens is old, but very sharp anyway. So you will get very sharp images with a Mamiya Press.

At first I was convinced I would sell this camera as soon as I wrote a review, but now I am actually thinking that this maybe has a place in my camera collection. Not for every day use, but something to pull out a few times a year. If you are a beginner or someone looking for your first medium format camera, I do however not recommend a Mamiya Press. Get something easier to work with, something more modern.

Here are a couple of example shots. Some exipred Tri-X developed in Xtol 1+1.

That’s it for this time. Write a comment if you want to know something else about the Mamiya Press. And please check out the shop for some zines and stuff!

Kodak Double-X 5222 in D96

Finally I managed to score some D96 developer (thanks retrocamera.be!). It is a bottle of Bellini D96 that I got just for trying out Double-X with the developer it was meant for.

D96 is supposedly a lower contrast developer than D76 for example, which might explain why this is a good match. D96 is a developer made for motion picture film (which Double-X is). D96 is used as a stock solution (meant for replenishment systems) so you just reuse the solution until exhausted.

I found that Double-X in Xtol was a bit too hot. The contrast worked pretty well for street photo style pictures, but I prefer to add contrast with higher paper grades or after scanning, rather than having high contrast negatives to begin with. Information that was never recorded can never be recovered, and it’s much easier to add contrast the way you want than to remove it. Kind of like salt in food, you need to have some, but if you add too much before it’s on the plate you can’t save the dish.

Here is what I wrote about Double-X in XTOL 1+1 a couple of years ago. Since I wanted this to be a fair comparison, I rescanned that roll since I scanned it last time with a Plustek. Here are example pictures of Double-X in XTOL 1+1, developed for 9,5min, 20c:

Alright and finally here’s some sample pictures. D96, 6,5min in 20c. Scanned with the Kodak Pakon F135+, my custom 16bit workflow.

In my eyes, it has more grain when developed in XTOL. Also, it feels like there is an S-curve when developing in XTOL, the darkest shadows get crushed Look at the umbrella the man is holding, and look shadowy part of the ceiling in the walkway.

Now compare to the roll developed in D96, look at the ice, or the snow next to the men working on the truck. Look at the shadow side of the phone. The tones are nice and long, with lots of midrange. Also, the images look almost grainless in D96, they’re not in reality, Double-X is very grainy compared to other modern emulsions of this speed range, but in these scaled down pictures there is almost no detectable grain.

That’s it for this time. Let me know your thoughts, and check out my shop for issues of my zine. Any support is appreciated, all money will go into keeping this site running.

Kodak 2254 aka Kodak Superslow ISO1.6 in C41

Time for another experimental film. I got two rolls of this stuff from my friend Nathan last year (or was it the year before?) It has been on my todo-list for a while now, but since the film is so incredibly slow it is difficult to shoot during autumn or winter up here in the north where we get so very little daylight during those seasons.

Kodak 2254 is actually something called an “intermediate film”. This is how wikipedia defines it:

An intermediate is produced by exposing film to the original camera negative. The intermediate is then used to mass-produce the films that get distributed to theaters. Color grading is done by varying the amount of red, green, and blue light used to expose the intermediate. This seeks to be able to replace or augment the photochemical approach to creating this intermediate.

The full name of the emulsion at hand is “VISION3 Color Digital Intermediate Film 5254 / 2254”, so it is a color film, and made for making digital intermediates. Instead of exposing the original film on this film, you scan the original negative, make your changes and then make another negative with a laser printer. So this stuff is never meant to be shot in a camera, or in daylight. Take a look at the data sheet for more information about it.

For those reasons, the film has no remjet. It is an ECN2 film, so it is actually cross processed in this experiment. In my experience processing ECN2 films in C41 gives you a little bit extra contrast and also some wonkyness with colors. But as you will see, this film has some weird colors to begin with, so it is not a big deal in this case.

Looking at the curves from the data sheet, we can already guess a little bit about what it will look like:

Capture.PNG
Capture.PNG

As we can see in the spectral sensitivity curves, the three layers have very different sensitivity. The yellow layer (which gives blue tones) is higher than the magenta layer (which gives green tones) and we have very little sensitivity in the cyan (red tones). The B and G curves also go very close together in the shadows and midtones which will probably lead to some color crossover in blues and greens, especially in C41 (but i am not an expert in this so I might be wrong here)

After developing in my Fuji Hunt C41 kit, I scanned the roll with my Kodak Pakon F135+ with the integrated PSI software. The pictures came out very very blue at first, the color correction software probably had no idea what was going on. The orange film base is also much more red than normal color negative films. I did color corrections and adjustments to try to get the images as close to real life as I could.

It does have a special kind of look, some colors are very muted and desaturated while blues have a lot of pop. Also since a normal exposure in sunlight is much longer than usual, you also get some interesting effects. Clouds go blurry, people and cars are blurry, and there is something “weird” with the light that sticks out for me.

So do I like this film? I think it’s another of those gimmick films that are so popular these days. Companies buying short ends from film labs, putting them in cartridges and making a few bucks. Nothing wrong with that really, but I wish people would not be so much in search of gimmicks and experiments, and instead shoot more professional films like Fujifilm 400H so that those could survive. Every new film shooter goes directly to the experimental films, pushing bw films ten stops, doing stand development in coffee and beer, etc etc.

What is interesting with this film though is the very slow speed. You could for example shoot in a studio with high power strobes and still shoot wide open apertures. Or do reaaally long exposures in broad daylight. Or several hour long exposure at night.

Alright, that’s it for this time. Check out my shop for issues of my film photography zine (and maybe other stuff if you are reading this in the future).

Tech pan in Technidol LC

Kodak Technical Pan is one of those films that has interested me for decades. I remember reading about it back in 2003-2004 and of it’s extraordinary sharpness and smoothness. But, it was also famous for being difficult to process and having difficult to tame contrast.

Last year, in 2020, I managed to find several bottles and a couple of pouches of the equally legendary developer for Tech Pan, Technidol. It came as a liquid developer (called just Technidol) and as a powder (Technidol LC). I have not yet tried the liquid developer but shot 2 rolls last summer that I developed in the LC version.

The negatives blew me away. Grainless, sharp, and with excellent tonality. I immediately started looking for more rolls of Tech pan and now have a small collection of it in my freezer. The issue is of course finding more of this special developer. And is my liquid verison still okey? I don’t know. I will at some point try to develop it in C41 which I have heard gives excellent results (just the developer, dont bleach the negatives or you’ll have nothing left).

Here is a selection of images from the two rolls I have developed. Scanned with the Pakon F135+, with my custom workflow detailed in the previous blog post.

Anywho, if you decide to try Tech Pan in Technidol I do recommend you read the published docs about it, the Kodak P-255 is the one you want. You should be able to google it and find the pdf somewhere. The thing to note is the chapter on processing. When you pour in the developer you want to SHAKE the tank. No nice agitation allowed, just shake it violently and then give it taps to dislodge any air bubbles. 9 minutes in 20c for Technidol Liquid developer, 15 minutes in 20c for Technidol LC. Both at EI 25.

Preferrably you should pour the liquid in the tank FIRST, and then drop in the reels loaded with the films. The first seconds of development are critical for avoiding streaks. I did not do it this way though but I poured in the developer as quickly as I could. I did not get any streaking on my negatives.

I have a dozen or so rolls left, and 8 small jars of the liquid developer, so that is something that is coming up in the blog.

That’s it for this time, please take a look in the shop if you see anything that interests you. Any support is greatly appreciated..

Getting nice 16 bit black and white/slide scans from the Kodak Pakon F135+

I remember when I was about the get the Pakon, I couldn’t really find any good information about black and white scans. There was some Matt Day video from way back where he showed how he did his scans, but to my eye they looked way contrasty and annoyingly sepia toned. Was there some other way to get good scans?

I experimented for a while, researched what other people have found out, and saw that some people had gotten good slide scans with TLXClientDemo. There was a hack to get the Black and White and Slide film options un-greyed from the film type selection radio buttons, and it was also possible to get raw files from this scanning software.

Looking into the raw files, and how to convert them, I couldn’t find anything that did what I want, the way that I wanted. And having software development as my main day job, I just wrote a raw file converter myself. (You can find the source code for it here). The difference with my converter compared to the ImageMagick one that is circulating is that I have support for b/w and slide film and I have some.. maybe “color science” is the wrong word, but I have added some tweaks that I found useful. It tries to find a suitable black and white point and adjusts color balance for a more neutral tone. Unfortunately it only works on Windows right now.

Here is my previous blog post about the Kodak Pakon F135 Plus.

Anyway, in this blog post I wanted to detail my current way of scanning Black and White negative and positive slide film.

So first off, I don’t use PSI (Pakon Scanning Interface?) anymore. I use the TLXClientDemo one instead. It is ugly and the user interface is confusing, but it is more powerful. Use the AutoIt snippet for enabling positive and BW options, and select BW. Select Base16 and skip all the other options.

Let it scan as usual, and when it’s done click Save. If you want to use my converter, don’t rotate any images in this stage as it expects the files to be in the default orientation. In the Save dialog window, skip all the options again, make sure you have original width and height, select “To Client Memory and the Planar with header option”. Go ahead and save, and move the files from the xp machine to your workstation.

On your workstation, start the converter, check the “Bw Negative” option for Bw negative and leave it unchecked for positive slide film. Sorry for the UI, I am a developer not a designer. Then drag the files to where it says “Drag images here”. Let it do its thing, when it’s done you have the raw files and some new png files in the folder where you put your raw files. You can go ahead and delete the raw files at this point, the png files are your new “raw files”.

Go ahead and look through your images, rotate them if needed, and then the ones you want to use, open up in Photoshop or light room. From here onwards it’s mostly a matter of taste, but I like to set the black and white point a little more aggressively and then adjust the midpoint in levels to something that looks nice. If the image looks flat at this point I go into curves and give it a slight S-curve to boost midtone contrast.

But remember, always save your files as 8 bit RGB files, even when they are black and white. So change the image format from 16 bit to 8 bit, and then to RGB from Greyscale.

Then you are done, at least if you are following my work flow. Image is done, looking nice, enjoy.

Having the 16 bit files to make contrast adjustments in makes a big difference, especially if you have very contrasty or very flat negatives. However, this is a much slower workflow than using PSI. You have to decide if it is worth the extra time and effort. But considering how fast the Pakon is doing the actual scan, from start to finish it is still not a huge amount of time we are talking about. I always scan my negatives before cutting them up, so it is less than 10 minutes.

Let me know if you have any questions about the Pakon, it is difficult to find information.

Also, please take a look in the brand now shop part of this website that I just launched. If you see anything you like, please consider supporting this site and blog so I can keep it up and running.

Mamiya 6 Review

If you read my previous blog post you know that I have been searching for something light weight, easy to bring along. Maybe a rangefinder? I often wish that I would shoot more 120 film, but my Hasselblad 500C/M is a beast to carry around. It is so heavy, and it takes up so much space in the bag that I just leave it at home.

And that has been, up until now, my only medium format camera (if you don’t count Holgas and Dianas, which I have plenty of). At first was looking for a Mamiya 7, but realized two things. First off, my enlarger in the darkroom only does up to 6x6, so I wouldn’t currently be able to print the negatives from that camera. Second, they have gotten insanely expensive. I also looked at maybe going 645? The Bronica RF645 looks really nice.. but it is also an expensive and rare camera.

Maybe a Fujica GS645? Collapsible.. now we are talking, maybe this is what I am looking for. But then I decided on going the Mamiya 6 route instead. They are pretty modern, people know how to repair them, they are quite sturdy and don’t have lots of weird electrical issues etc.

After a couple of months of searching I found one here in Sweden for a good price, so I jumped on the chance.

IMG_20210215_213326.jpg

Let me tell you, I haven’t regretted it for a minute since. This camera is all, and more, I was hoping for. It ticks all the boxes you want in a professional camera, the lens is probably the sharpest lens I have ever used (and let me tell you, I have plenty of sharp lenses), the shutter is silent and accurate, the camera is easy to use. But what really makes this camera are these things:

  • The rangefinder is EXTREMELY clear and crisp. When you align the rangefinder-patch perfectly you get a pop in contrast and you just know at once that you have nailed the focus. Complete opposite of the Canonet, you’re not gonna miss focus with this one

  • AEL, that is, Automatic Exposure Lock. This is how I am used to shooting, I take a meter reading towards shadows, away from the sun, and that is what I want to shoot with. So I point the camera down, press the shutter half way, point the camera at the subject, and click. I love having a good reliable light meter in the camera.

  • Clever features to stop you from making a mistake. It has a bunch of interlocks preventing you from shooting if you don’t have film loaded, if you have the darkslide engaged, etc etc.

As you can see, I have the Mamiya 6 MF version. MF stands for multi-format, and it has 2 extra things compared to regular Mamiya 6.

A 645 adapter kit that is totally useless and a waste of money since it crops horizontally and does NOT give you extra frames to shoot with.

And a 35mm panoramic kit that lets you shoot panoramics on 35mm film, and rewind the film in the camera. This is something I am looking for, but they are quite rare and costly. But I really want to shoot some 35mm panoramas! Regular 120 to 35mm adapters don’t work since the camera has above mentioned clever features that will not let you shoot the 35mm film because it doesn’t detect the film being loaded.

IMG_20210215_213318.jpg

I remember when I got my Pentax LX a few years ago.. I sent it in for a CLA and when I started to use it properly it was a special feeling. It felt like I had graduated from finicky cameras that kinda sorta worked, “hobby cameras”, for taking pictures that didn’t really matter. And instead I had this professional machine that I could actually rely on. A camera that was built for taking thousands of rolls over the span of decades. And every cog was doing its job properly, every spring was ready for action. I have the same feeling today with this Mamiya. It takes wonderful pictures, because it is a camera I want to bring along on walks and trips. It is light weight, fits nicely into my smaller camera bag, has a great bright viewfinder and a great built in light meter.

I give it 5 out of 5 cameras and it goes straight into top position that it shares with my Pentax LX.

Here are a couple of random shots I’ve taken with this one. That’s it for today, thank you for reading!

Canonet QL19 G3

A long time ago I bought a Canonet QL19 (non-G3) and I liked it a lot. This must have been around 2003-2004. It was however very heavy for such a small camera, used non-standard batteries, and it quickly got forgotten.

Fast-forward to 2019, I realized I like smaller cameras, that I can have in my jacket pocket. I started having an itch again for a rangefinder.

I was thinking about all sorts of rangefinders, mainly Medium format, but then I came across a mint Canonet QL19 G3. I bought it thinking that this might be a great complement to my favourite travel camera, the Lomo LC-A. The LC-A is great, but it’s not very sharp or.. great in any way when it comes to image quality.

IMG_20210120_152842.jpg

So I loaded it up with some film (Lucky SHD100, more about that in a later post) and went out to shoot with it for a while. My first impressions were.. not great. The rangefinder patch is not very bright and not very large. Focusing was actually kind of hard. Sometimes I was so way off so it looked like I was right in focus so I shot several frames that were extremely out of focus.

The light meter was equally a bit finnicky. It is only on in shutter priority mode, and if you move it out of automatic mode, the light meter shuts off. This is also the on/off switch for the light meter, if you leave it on auto mode and forget to put the lens cap on, it will drain the batteries.

Yeah, and the batteries.. they are that ancient mercury kind that are impossible to get hold of these days. Or well, I have a few in my fridge, so I could load up a fresh one, but still. How will modern batteries work? Will the difference in voltage change the light meter reading? Maybe, I don’t know, but dealing with stuff like that sucks. Since I also shoot slide film, I have to be able to rely on good meter readings. Sure, I have an external meter, but if I have to carry that around together with the Canonet it loses it’s entire point, which was to have a sharp travel camera.

My kit came with the Canonet flash that has some sort of TTL functionality when paired with the camera. It worked pretty well, which is impressive enough, but it has no tilt or swivel, just a small flash straight forward and that is not something I ever use really. Very harsh looking pictures.

I also shot a roll of TMax 400 with the camera, and I have to say that the lens sure is nice. Very sharp and contrasty. The coatings seem to be pretty modern since it could deal with backlight well enough too. But in the end, I am going to part ways with this camera. It just wasn’t what I was looking after, and the Canonets are over-hyped for some reason. Don’t get me wrong, they are great little pocket cameras, but they are just not worth the money they are costing right now.

Here are some sample photos. First 3 are TMax 400, second 3 are Lucky SHD100.

That’s it for this time. I have loads of blog posts in the works for the upcoming months, I have just been too busy to finish them and not enough photography opportunities now during the year of the corona. Stay safe everybody and see you again soon.

Fortepan 100 and 200

Forte is one of those companies that is dearly missed. It used to be a big company that produced photographic paper and film. It got started in 1922 when Kodak decided that they were gonna start up a subsidiary in Vác, Hungary. At their peak they produced 3 million square meters of paper and 1 million square meters of film, every year. They had around 60 different papers and three different films (possibly four, I am uncertain). Fortepan 100, 200 and 400. The fourth one, is something called Portraitpan. I quote: “The main difference between the portrait film and standard Forte Pan 100 is the film coating. Both the base and the emulsion sides of Portrait Pan have a matte retouching surface” (source)

So as I have understood it, Portraitpan is just the regular Fortepan 100 but both sides of the film had a matte surface so you could retouch it. Portrait films went out of fashion when retouching negatives went out of fashion.

I have been for the past year or so trying to find some fresh-ish rolls of Fortepan but it has been difficult. Fortepan was also sold as Orwopan and I found a couple of rolls of Orwopan 100. After opening the box I can confirm that this is indeed Fortepan, exact same backing paper etc.

I shot a couple of rolls of 100 and 200 each, in 120. For some reason this film doesn’t age very well. They seem to have lost a lot of speed even though both are expired at -95 (which is a while ago sure, but not THAT bad). I exposed my first two rolls at ISO25 and this was way optimistic it seems. The ISO200 roll was probably better stored since it had almost no base fog, but everything was way underexposed nevertheless.

Also the emulsion seems to filled with specs and dust, which I cannot explain any other way than it was already there when it came from the factory.. so quality control was probably not the highest priority over at Fortepan in the early 90s.

Here are a few shots from the ISO25 shots. Fortepan 100 was developed in HC110 dil. B for 4,5min and Fortepan 200 for 7,5min. I added 5ml of BZT 1%, which was probably too much at this rating. The Fortepan 100 roll has some base fog, the other roll was very clear.

Next, I tried another stop of exposure, so E.I. 12 together with prolonged development time. I did Hcc10 dil b for 6min for Fortepan 100 and 8min for Fortepan 200. I skipped the BZT this time, and now the negatives are looking much better. The base fog on the ISO100 roll is clearly visible now, but on the ISO200 roll it is nice and purple. However, there are backing paper issues on these rolls too. It reminds me of expired Shanghai, which also gets totally destroyed when it is expired or stored in humid conditions.

Here are some example shots. From Fortepan 200:

And here are some shots from Fortepan 100:

Tonality-wise, both of these look pretty nice. They aren’t super grainy, very creamy nice midtones. But the backing paper feels like Shanghai backing paper, ie. very bad quality. And as I said, there is dust and specs in the emulsion. It is also the curliest film I have ever experienced. It curls so much, every time I open my negative binder the sheet with the Forte200 in it will just jump out and become a roll. It is a shame that Forte doesn’t exist anymore, but these three issues would probably prevent me from having this as my go to film emulsion.

I have 2 rolls left of Fortepan 200 in 120 format, both expired 1992. If anybody wants to give these a try, I will give them to you for free if you pay the postage for it.

This blog post took me over 6 months to complete. I am happy to have it done, it was a hassle to find film to shoot and shoot 4 rolls of film. And none of the images are really usable, it did not feel worth all the effort. I just hate the look of backing paper stuck to the emulsion. Oh well, hope this benefits somebody out there at least. That’s it for this time, please write a comment with your thoughts!

Shanghai GP3 aka CatLABS X 80

Alright here is another blog post that has been long in the working. Last year I got myself a 4x5 camera, and was looking around for cheap film to learn the camera with and fell on Shanghai GP3 straight from China. I don’t remember exactly what I paid but I remember it was not very much compared to other alternatives.

I also got a few FRESH rolls of GP3 in 120, as the previous time I tried it the rolls were a few years out of date and totally destroyed by backing paper issues and fogging.

The emulsion is the same in sheet film and medium format, but Shanghai has the absolutely worst quality backing paper. It is too thick, so you get fat rolls, too large spacings, and you will often times lose the last frame due to this. Then the adhesive on the strip is weak, and often the entire thing will just pop open in your backpack, and then you will ruin some more shots. There is often times defects in the film too, like dirt, dust, or unevenness in the emulsion.

All this is also true for the Catlabs “version”, which is exactly the same film but in a nicer box. For some reason the Catlabs people have said that oh no this is not the same film, they just produce it for us, but there is no doubt in my mind that it is just GP3. I doubt the chinese have the capacity to produce more emulsions, and Catlabs does not have the expertise to develop a new one.

The sheet film obviously doesn’t have any problems like this. They come in nice boxes, the sheets are nice and thick, I don’t have much to complain about really!

I would rate these films at ISO80, so not far off box speed really. I have developed in XTOL, Fuji SPD and the emulsion does seem to work nicely with pretty much everything.

As for the image quality, I actually really like the way GP3 looks. There is something “creamy” about the midtones that I enjoy. The grain is what you would expect for an ISO100 film, it is sharp enough, the film prints easily in the darkroom. If the backing paper was slightly better I could easily see myself shooting more of this. And as for large format, I recommend it for sure. It is a cheap way to get into large format without breaking the bank. You can afford to do some mistakes with this film instead of say, Portra which will cost you an arm and a leg for a box of 10 sheets.

Here are my development times:

120 - Fuji SPD 1+1 @ 20c - 7min 15sek
120 - XTOL 1+1 @ 20c - 10min
120 - Rodinal 1+50 @ 20c - 15min
4x5 - XTOL 1+2 @ 20c - 14min

Here are some pictures (square ones are 120, other ones are 4x5):

Alright that is what I had for you this time. Let me know in the comments what you think.

Lomography Metropolis 35mm

I recently shot a roll of the new Metropolis film, and thought I’d write a short review.

Metropolis is an actually NEW new emulsion instead of rebadged cinefilm or pre-flashed films. It has been coated by Inoviscoat, a spin off from the old Agfa team. So ignoring whatever I think of this film, it is really good that stuff like this is going on and that Inoviscoat is keeping busy. This is the kind of action that will keep film alive for real. Finding some old dusty master roll of expired arial photo and lying about its actual ISO value will have no long term benefit. I wonder what the famous blogger will do once that master roll runs out..

Anyhow, Lomography themselves say about the Metropolis that it: “desaturates colors, mutes tones and makes contrasts pop.” I find marketing speak like this confusing. How can something both be desaturated and muted and also make contrasts pop? I don’t understand..

I shot this roll at ISO320, Lomography themselves say that is is ISO100-400 (which again is confusing, am film can only have one true speed, which is unknown). I think that this is probably really closer to ISO200 since several shots looked quite grainy and weak. Shots that were slighly overexposed looked better when rated at 320. However highlights were VERY quick to block up, so the latitude is less than one would expect with a color negative film. I would not give this another stop and rate at ISO100, I imagine you will have totaly white highlights everywhere.

For a ~200 speed film, this is really really grainy. So keep that in mind.

The colors then, which are the main point of this film. They are desaturated as stated, everything tends to get a cyan/blue tint. Since it is such an unnatural color palette, depending on how you scan you will get different results. Your scanner might try to color correct for this blue cast, and you will end up with much more normal looking images. (Also a problem when doing cross processing)

My Pakon did this to an extent I think, because several of the images lacked any weird color shits.

I think this film might look cool for portraits with “attitude”. I see no point in using this for landscapes, normal portraits, architecture, etc. It’s fun to try different stuff once in a while, but it will probably take a year or two before I will shoot this one again.

Here are some example pictures:

That’s it for this time. Stay tuned for another film review of a new Ilford offering..

Oriental Seagull 400 in Xtol 1+1

Did another roll of Oriental Seagull 400, aka rebranded Kentmere. I could not find any times for Oriental Seagull in Xtol so I did the time stated for Kentmere 400. Lo and behold, it was perfect. No surprise there really. Anywho, I often hate on Kentmere, but it is a cheap film and honestly there is nothing wrong with it. It’s just that there are better films out there.

But here are some Pakon scans from that roll:

For a previous post about Oriental Seagull 400 see here.

Alright that’s it for this time, just a short update.

Lupo M3 enlarger review

If you google for the Lupo M3 you will only find information about a car. It seems this is not a very common brand or model of enlarger.

Lupo is an Italian company that still exists today, they were founded back in 1932 and manufactured equipment for photo studios until the 90s, when they shifted to manufacturing studio lights instead.

I have an M3 enlarger that I use in my darkroom. Why did I get that exact model? Well, because I got it for free. And when it comes to enlargers, my philosophy is that it doesn’t really matter that much. An enlarger is just a camera in reverse, so it is a box with a light in it. And as with camera bodies, it doesnt influence the quality of the end product much at all. The thing that matters the most both when it comes to cameras and enlargers is the lens.

Sorry for the mess

Sorry for the mess

The M3 is basically a copy of the Durst M305, does only 35mm, and for my purposes I think it’s great. Operating it is dead simple, you have a lever to raise and lower it, a knob for setting focus, and well what more can an enlarger really do? Sure you can tilt the head and stuff like that, but who ever does that?

As a lens I use a Rodenstock Rodagon 50/2.8 which I also think is great. As I said, what matters most when it comes to image quality is having a good lens, so if you are just starting out and have a choice, better to get a cheap enlarger and a good lens instead of the other way around.

IMG_20200508_100024.jpg

Now I just need to find an enlarger for medium format.. Just a short post about this for now, mostly because I could barely find anything about the Lupo enlargers online! Write a comment if you have any specific questions about it and I’ll try to answer.

Kodak Pakon F-135 PLUS Film Scanner


For a while I have been searching for a scanner that has a better workflow than the Plustek 8200. The Plustek is such a pain in the ass since it doesn’t do any type of batch scanning. At first I tried getting a Nikon Coolscan 5000 but failed 2 times on ebay. Scammers tried to scam me instead of send me a scanner. (No worries, I got my money back).

So then I decided to try the Pakon route instead. It is a famous scanner for people like me, so you probably know this scanner too. It came out in the early 2000s as a minilab scanner. The thing that makes it really nice is SPEED. It is fast like nothing else, at least if you’re compared to slow consumer scanners. But it is old, difficult to find in good condition, and needs Windows XP to run..

Of course I don’t have an XP machine just lying around, so I went with the virtual machine route. And boy was it a rough ride. I kept getting an error that just said 1003. Googling gave me very little results, something about sync being lost. After much digging around, it seems it is a problem with the data stream, which means that something is getting a hiccup when transferring bits from the scanner to the virtual machine. USB problem, cable problem, virtual machine problem, it could be any number of things.

For some reason, a lot of people have had good success with Virtualbox, but I did not. I tried with VMWare instead and now everything worked perfectly from the software side of things. Scanned a roll of C41 and boy is it fast. And colors were perfect out of the box.

Then I tried to scan a roll of BW, at first glance, not bad. At second glance, every frame has a dark stripe going through it. Goddamn it..

Well, I’ve seen this type of issues before. All scanners are pretty bad, no matter what you do. You can either have convenient and deal with issues like this, or have something super complicated to setup to get rid of possible dust/banding/quality issues.

Here is an example of the stripe.

AA006.jpg

If you look at it carefully, you can see that the line does not have hard edges. The softer the edges, the more “out of focus” the issue is. A very “in focus” banding issue is not good, because that probably means you have hot or dead pixels in your CCD sensor, and that can not be fixed. However, this one is very soft, so most likley it is something between the film and the sensor, on the other side of the focusing lens.

The Pakon is pretty easy to open, it has 4 screws beneath and you can lift the top off. If you attempt to do a cleaning routine like this yourself, be careful.. The enclosure with the motor can be lifted off with another set of 4 screws, but you have to be very precise when you put it back together. Otherwise you will fuck up the focusing.

Okey, so now everything is working.. all this took me probably around 10 hours to accomplish. This is not a scanner for somebody who does not know their way around a computer. Nor is it a scanner for somebody who shoots a few rolls of film every now and again. The interface is clunky as hell, but fast to work with once you get the hang of it.

Capture.JPG

What this scanner loves though is C41 color negatives. With ICE enabled you get dust and speck free negatives with perfect colors.

Here is a random selection of pictures I have scanned so far. No editing, straight from the scanning software.

Let me know if you have any questions, finding good information about Pakon scanners is difficult these days, there is a famous facebook group but they are not accepting any new members into it for some reason. Probably the admins just gave up on the entire group and now nobody is there to click accept..

Santa Rae 1000

As my regular readers probably know, I like to test different new, old and obscure emulsions. Another one that recently popped up from the kamerastore guys was Santa Rae 1000. As usual with “new emulsions”, they are secretive as to who produced it and what it actually is. There are very few manufacturers who can coat film any more, so usually these are some sort of aerial film that are being repackaged. See for example the Silberra films and JCH Streetpan that are Agfa Aviphot emulsions.

The problem with these “new emulsions” that are actually Aviphot et. al., is that they were made for different circumstances. They are thin as holy heck, on PET so they attract dust like magnets, scratch easily, you get light piping issues, etc etc. And all of this is true with the Santa Rae too.

What makes Santa Rae stand out however is the speed. ISO 1000 is probably pushing it with the contrast, but even if it was a true ISO800 film or possibly an ISO1000 emulsion that is a few years expired, it is not an Aviphot because there never was an Aviphot that fast. So what could it be? Most likely a traffic surveillance film. But did Agfa ever produce a traffic film this fast? Ilford had some SP-films for traffic surveillance and Kodak had their Hawkeye-line. Also, there is Tasma in Kazan, Russia. Finland has Russia as a neighbour, and Tasma is still coating film for industrial purposes.. If anyone knows anything more, please let me know.

So what about the images then? As usual, the ISO rating is a bit jacked up, I shot two rolls at ISO 1000 and I would probably go down to ISO 800 for the next too. Not too bad anyhow, not like JCH Streetpan that is probably closer to ISO 200 in reality. The grain is not too bad to be honest, it is a grainy film but the grain structure is not “lumpy” like with Aviphot. The tones look pretty decent, pretty normal. And I say that as a good thing, I’m not a huge fan of the extended red sensitivity commonly seen with aerial films, it makes skin look weird in sunshine..

I developed these two rolls in XTOL 1+1 at 20c for 13,5 minutes, and shot at ISO 1000. Next time I will probably go down to ISO800 and develop for a minute less.

The rolls say they contain 24 shots per roll, but I got 20 per roll due to the first 3-4 frames being totally light leaked from loading in daylight. So if you want actual 24 shots, I recommend loading and unloading your camera in semi-darkness.

Here are some example pictures:

Thanks for reading, please leave a comment below!

Fujifilm Venus 800

One of the Japan only film stocks that Fuji used to have was Venus 800. It was pretty much the same as Superia 800 used to be, but not quite. Exactly what the difference is, seems to be difficult to figure out, especially since the datasheet for Venus 800 is nowhere to be found any longer. But according to Jim Gray who just a couple of weeks ago thought about the same issue, I guess the Venus datasheet was still available back then, the curves do not line up so the stocks are different in the end.

I have bought a couple of rolls of Venus 800 during my trips to Japan, and honestly this is one of my least favourite film stocks I have ever shot. It is too bad that it got axed, since there is a need for higher speed films too, but probably they are more expensive to produce, which means they are at a higher price point, which then means sales are going to be really really low. Kids these days don’t care about high quality, they want just cheap shots that look very 80s and disposable camera.

My main gripe with Venus 800 is that everything just looks so brown. The palette is very earthy, which does suit some situations, and it is very natural and not too contrasty, so in difficult lightning conditions you will get something you can work with pretty much every time. So that’s great. But for my tastes, I’m just disappointed every time with the look.

If I had to shoot something in color and need something faster than 400, I would currently go for the Lomography 800 which actually is not bad at all. Shoot it at 400 and you get nice punchy images. It is probably based on some old Kodak emulsion (VR1000 is my guess).

Anyhow, I don’t have too much else to say about this emulsion, but here are some sample images I have shot and developed. Let me know if you have any questions. If you find any rolls of this stuff out there, give it a shot while you still can, don’t let it sit in the fridge, fast films do not hold up well past their expiration date..