Vision3 cine films developed in ECN-2 developer

Cinefilms are all the rage. During a time which film is getting more and more expensive, people who are willing to experiment have started looking for other means to get cheap color photography done.

The idea is not new, Seattle FilmWorks had the same idea back in the late 70s already, what if you took cine film, bought it in bulk, and sold that instead. The problem is that cine film is made for a different process, and the film is covered on one side by a carbon layer, called rem-jet, which will mess upp regular film development machines.

Fast forward to the past few years, and another situation arose, where we no longer had access to Tungsten based c41 film. Tungsten film is color balanced differently, basically for studio lights which are warmer (more yellow), so to compensate for this the film is cooler (more blue). This can give cool effects with regular photography, but also suits particularly well for taking night time pictures of stuff in cities, where you are surrounded by lights with different color temperature.

Cinestill got the great idea of removing this remjet before putting the film in the package, so it could be developed by regular machines, and this became a big hit. The problem was, that the remjet layer that now was removed, also served as an anti-halo layer, so every time you had a very bright light in shot, the light would “bleed” into the surrounding area as a big red blob. For me, this looks really bad, and I do not care for this “halo” look.

Other issues were that they had a lot of QC issues, people all over the world complained about weird streaks in their shots that spanned the entire roll of film. Also, since it was cross processed, the tones were a little bit off, you get a slight cyan cast to everything that is difficult to fix in post.

But the idea still intrigued me, the cine films sure can be found cheaply, especially in bulk.. and I have seen lots of fantastic looking pictures taken with cine stocks.

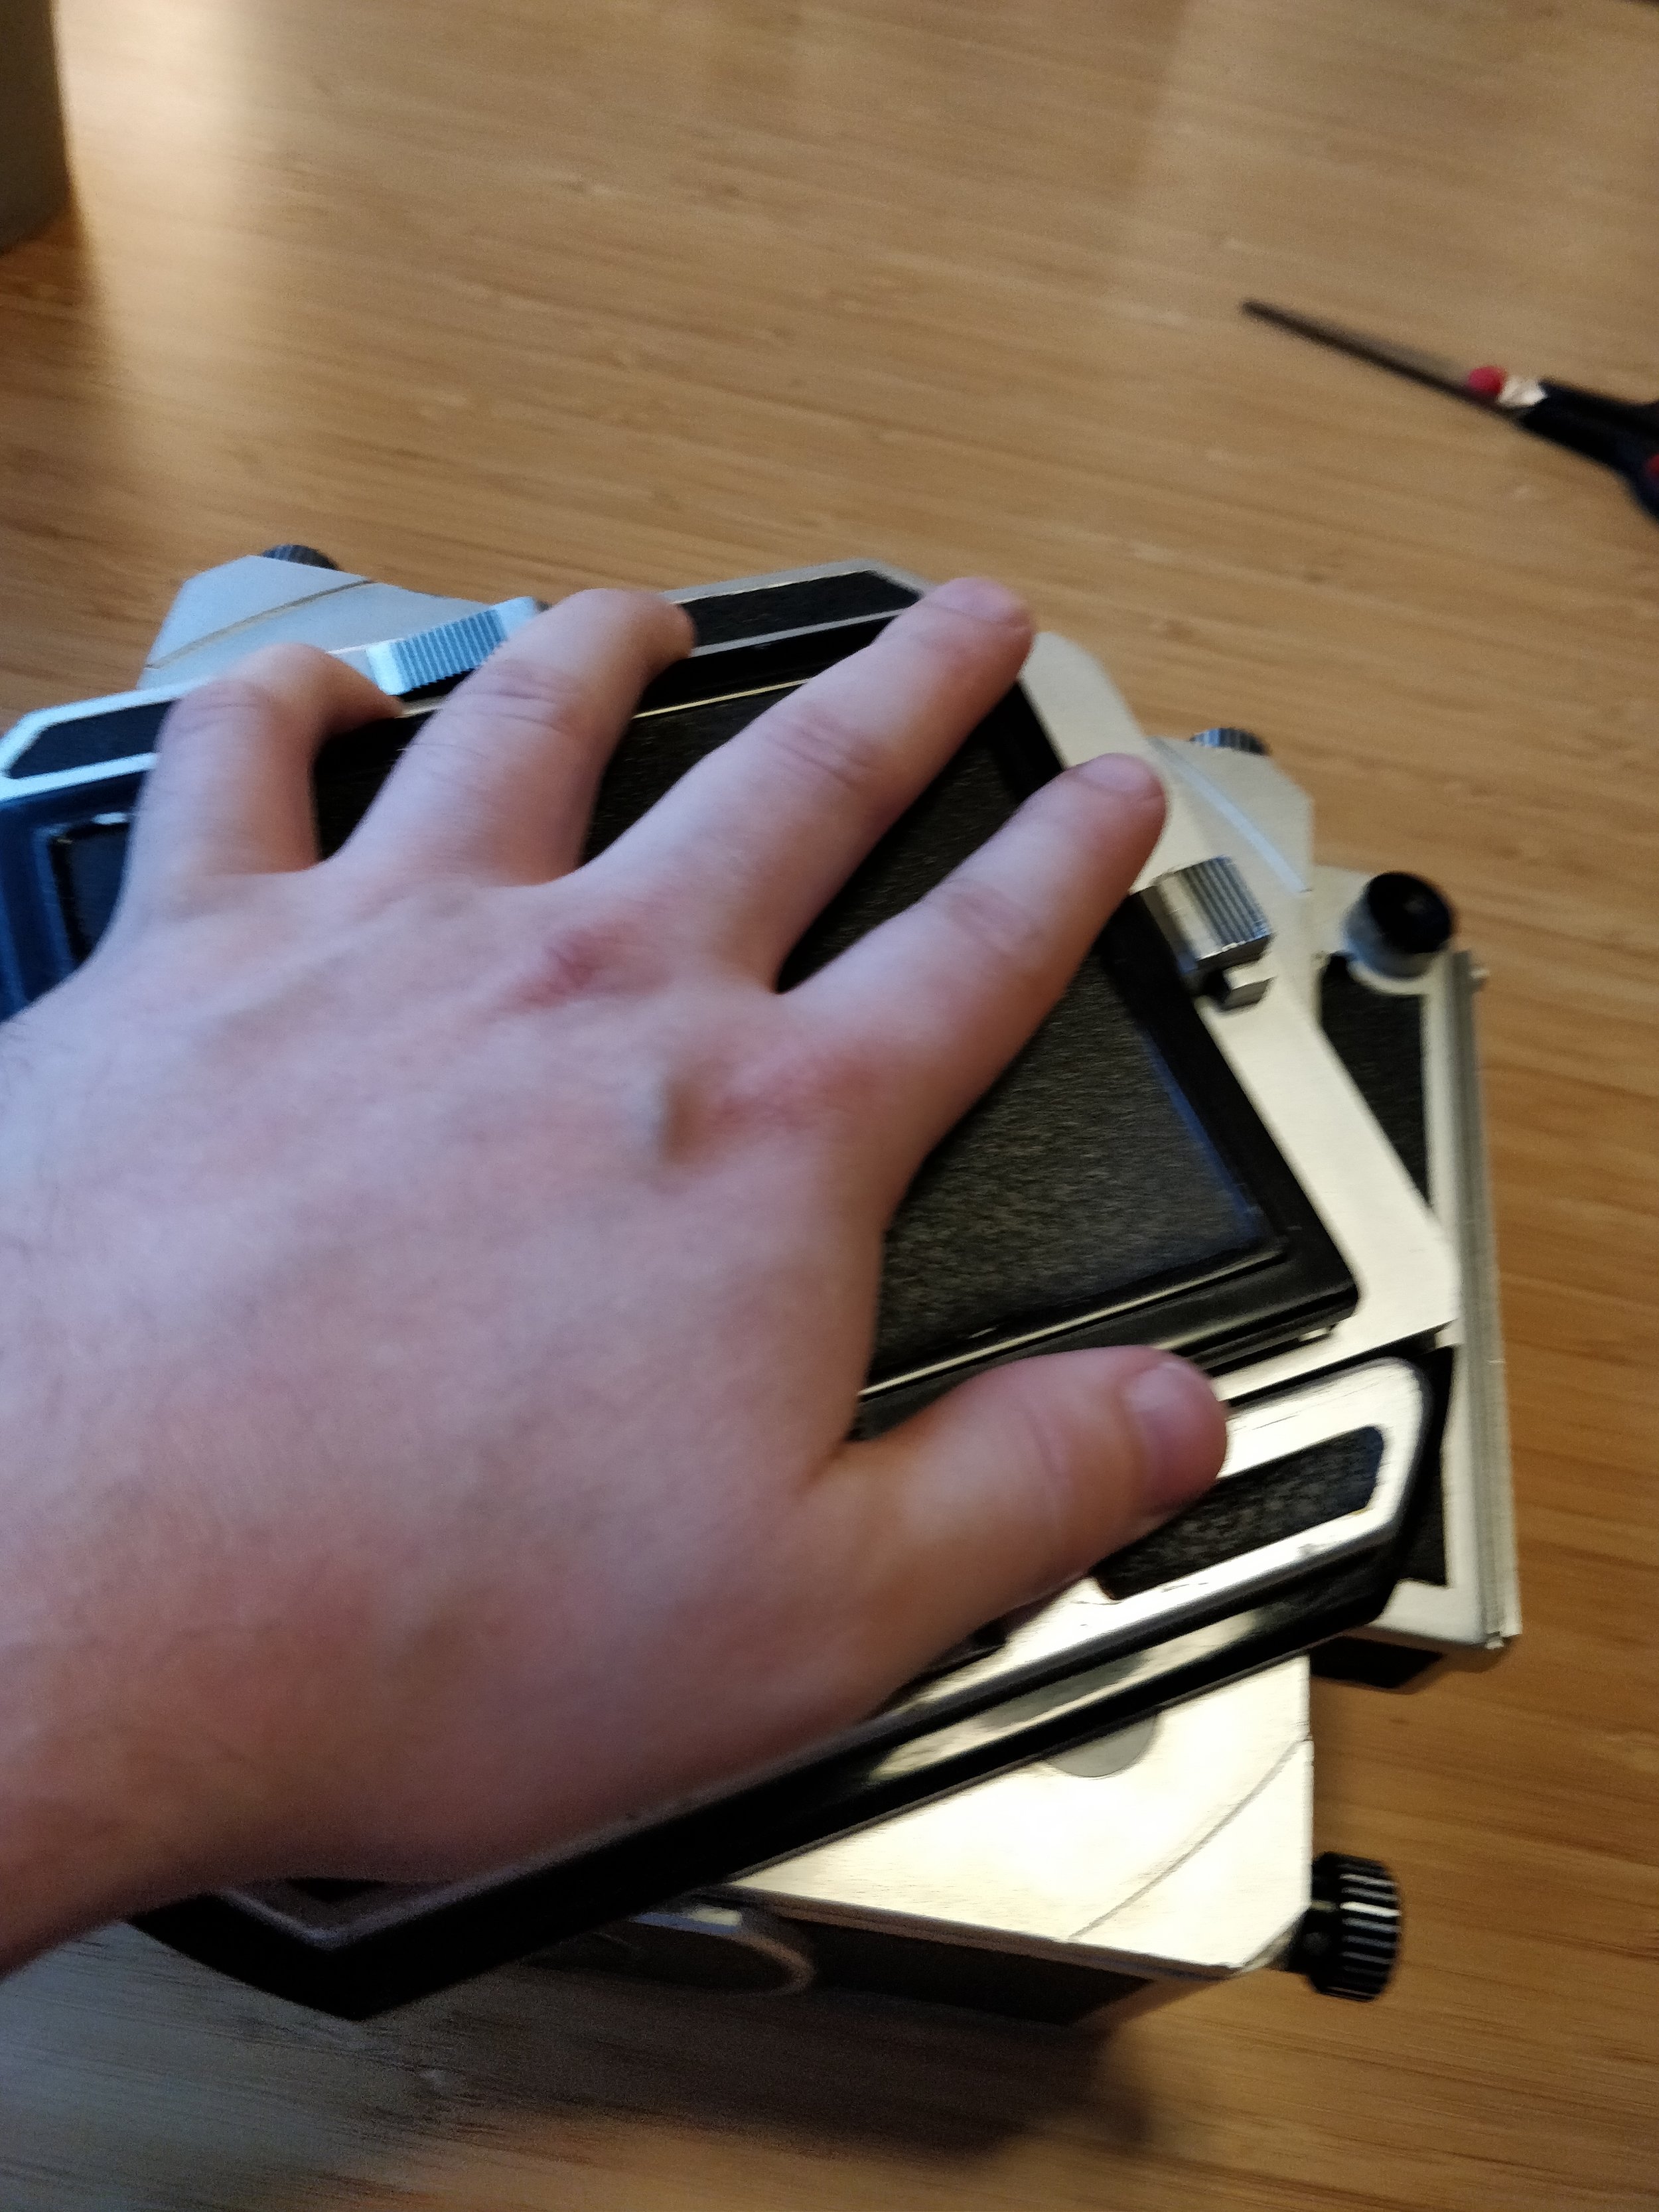
While I was in Taipei earlier this year I came across a photo store that sold various cinefilms for even less than I have seen on ebay, so I decided to buy a little bag of them, maybe some 15 rolls. Then when I came home I started looking for ways to get hold of smaller quantities of ECN-2 developer. Actually, it seems, that getting hold of the various chemicals and mixing it up yourself is not that difficult. The per liter price of doing it this way would be around €2/l, which is very cheap, considering the film already to begin with is cheap.

However, I found a kind gentleman in the UK who had the real Kodak stuff in a very large container who was willing to send me a couple of smaller batches so that I can mix up 500ml at a time, so I will look into making my own developer at a later date. I think I need a good ph meter for example, and some ph-adjusting chemicals to get it right..

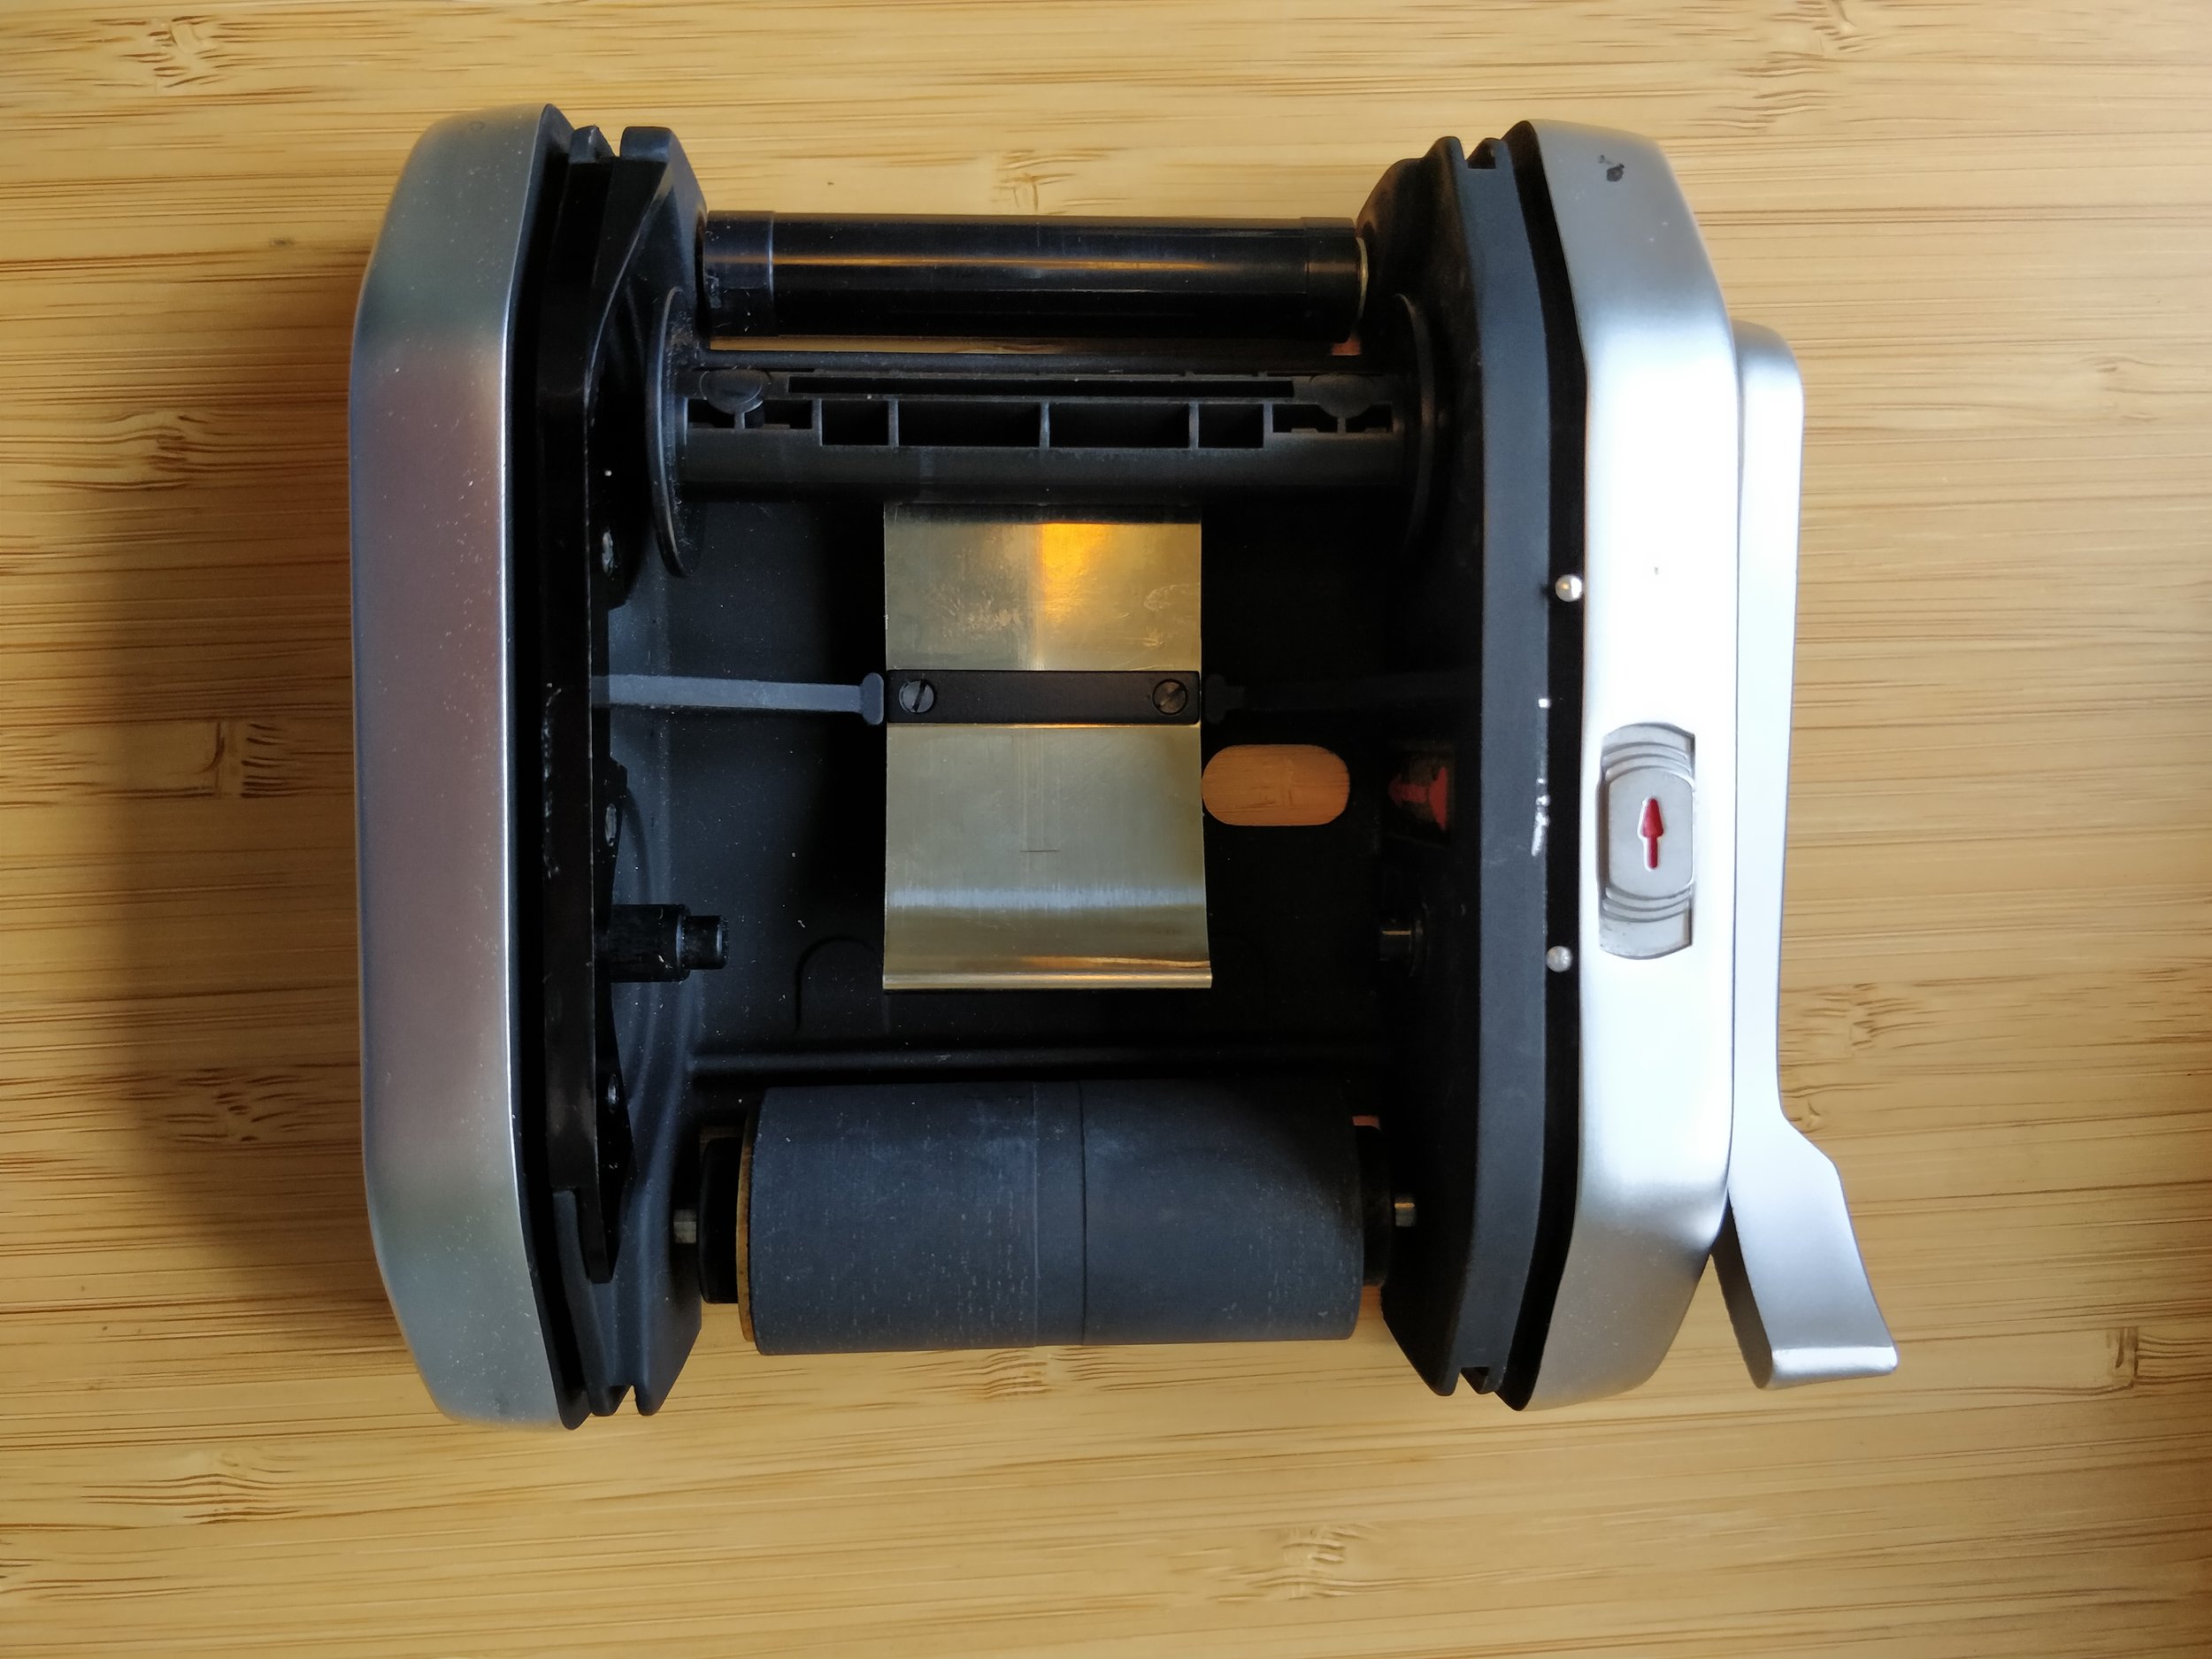
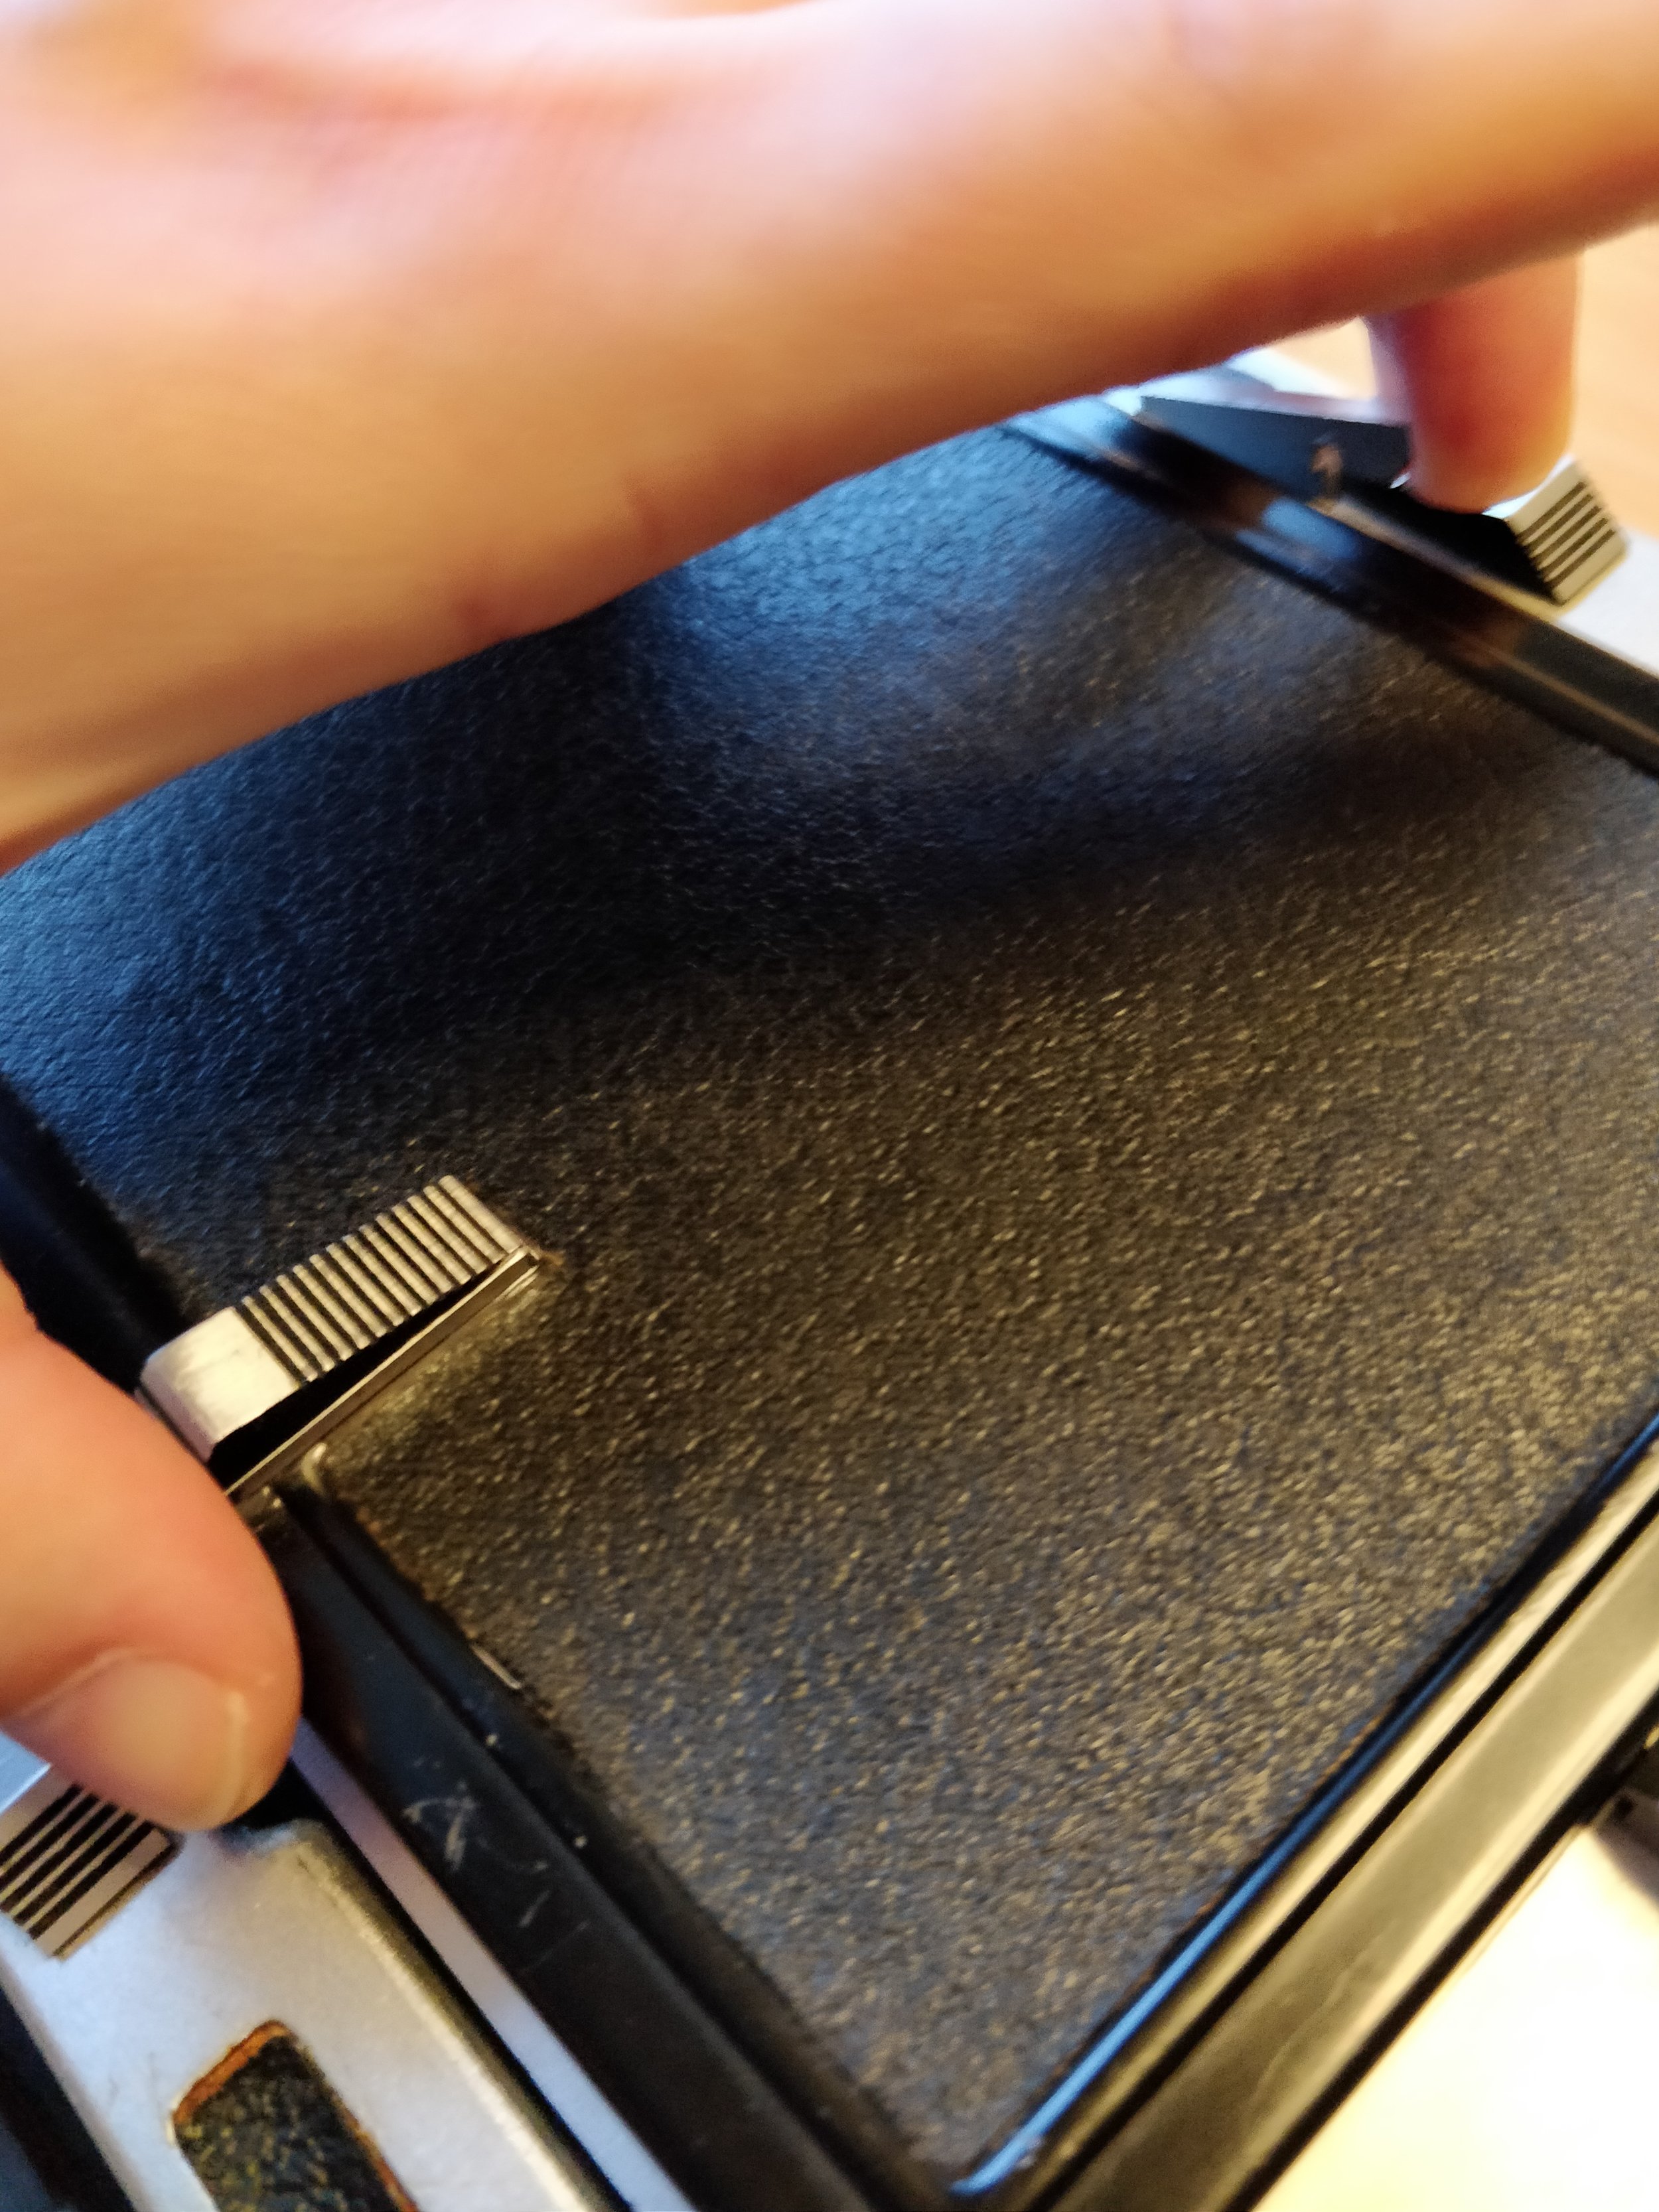
The prewash I bought last year from Nik and trick, it seems to be working just fine still, I just filter the liquid through a very fine metal mesh after use so I get rid of the gunk that collects in it.

Bleach, fix and final rinse I used from my C41 kit, just at the correct ECN2 temperatures instead of C41 temps (I dont know why they are different, but best to stick to the real process).

And now, I had a kind of good enough ecn2 process to try to develop some Vision3 films with. And I have to say, it was a very positive surprise. The negatives came out nice and thick, no real remjet residue left, scanning was pretty easy (although silverfast does not come with a suitable negafix profile, you have to find something that is close enough for your tastes. I liked the ProImage 100 or just Other/Standard.

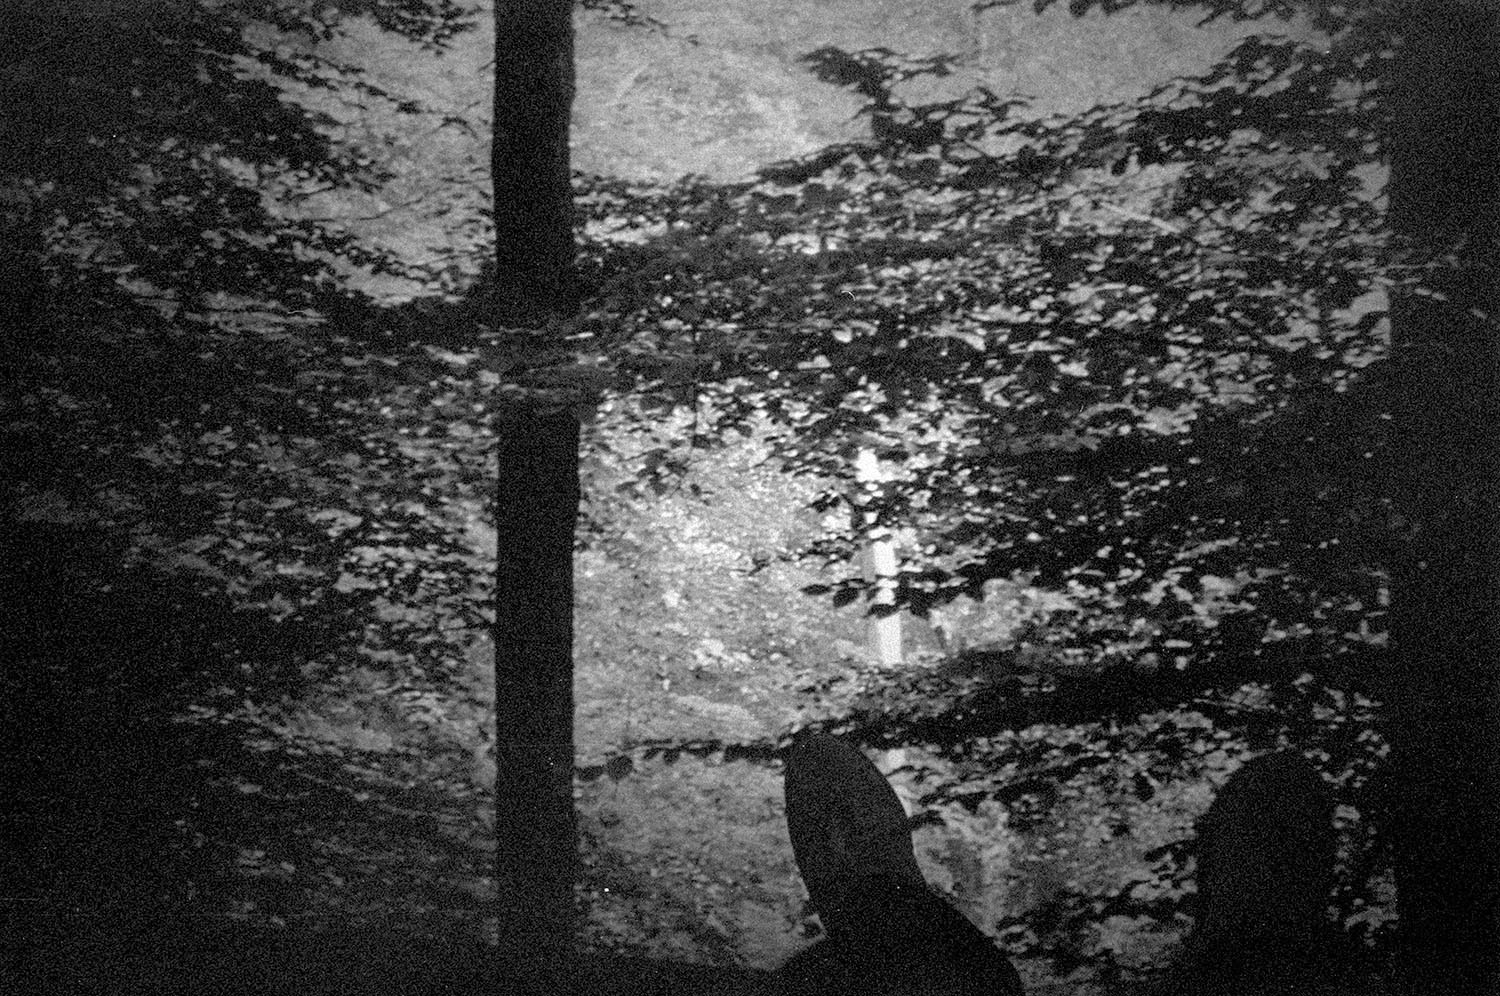
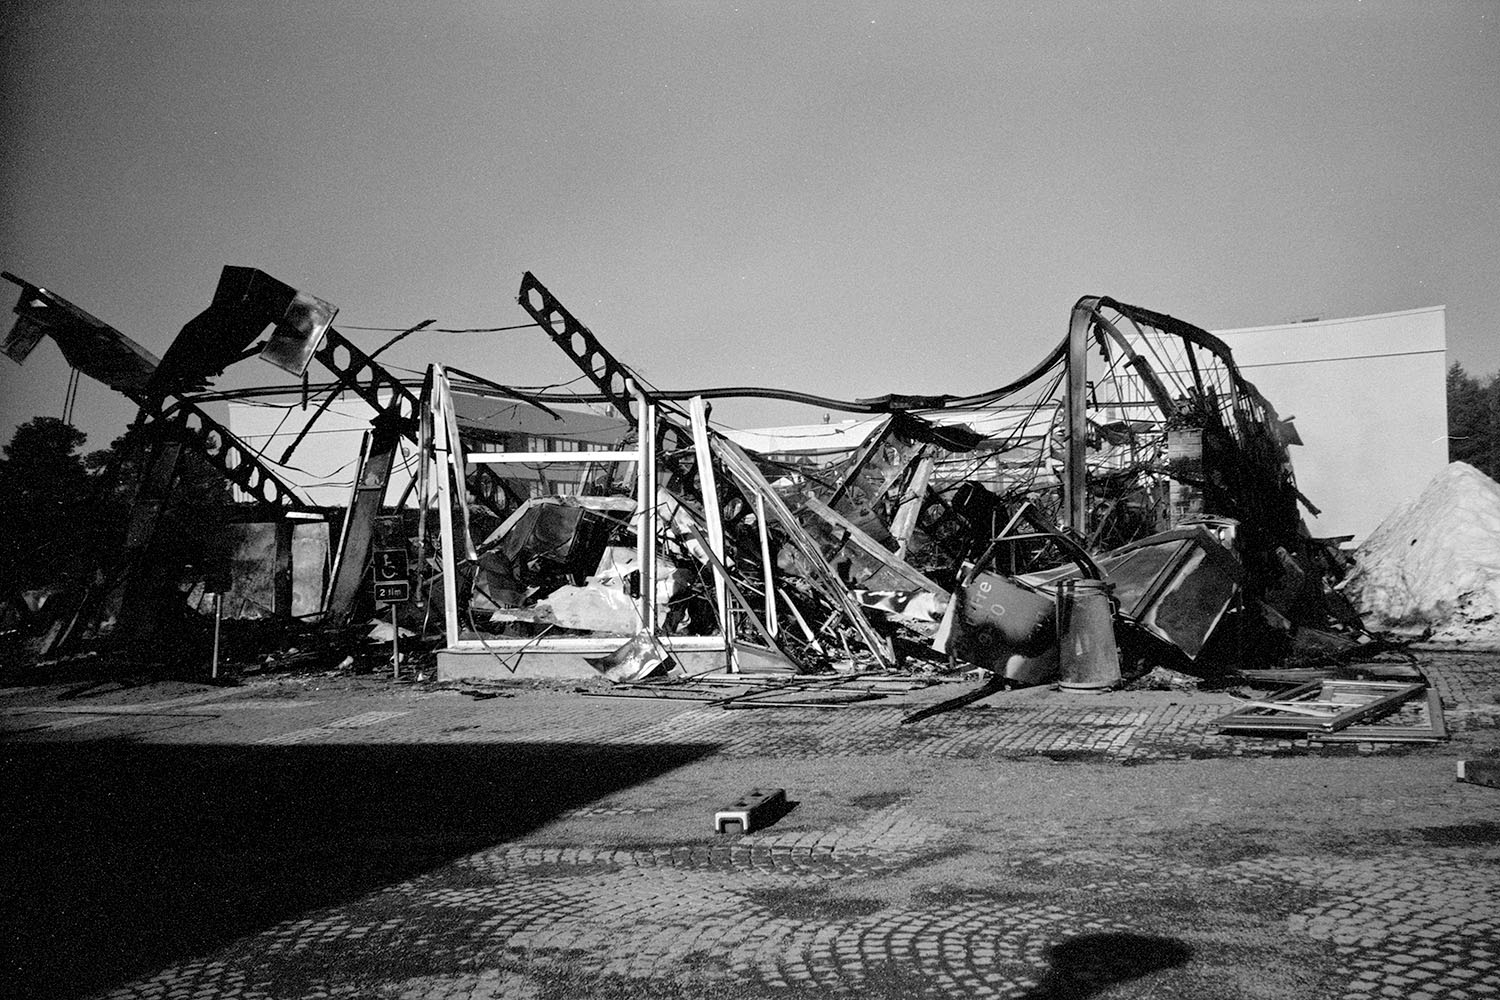
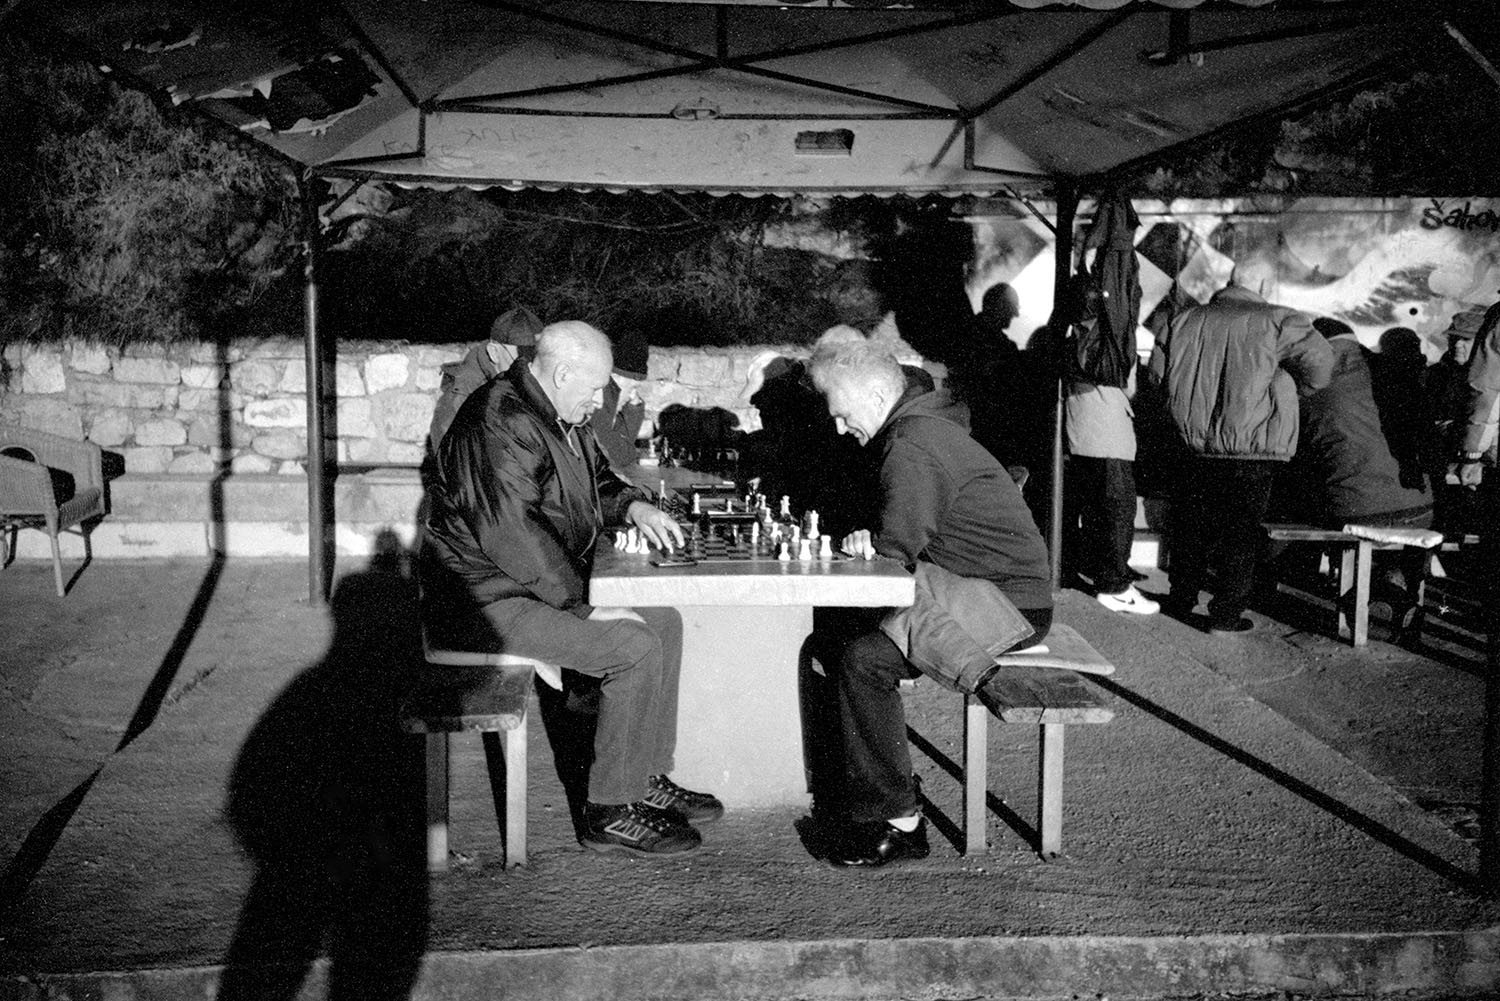
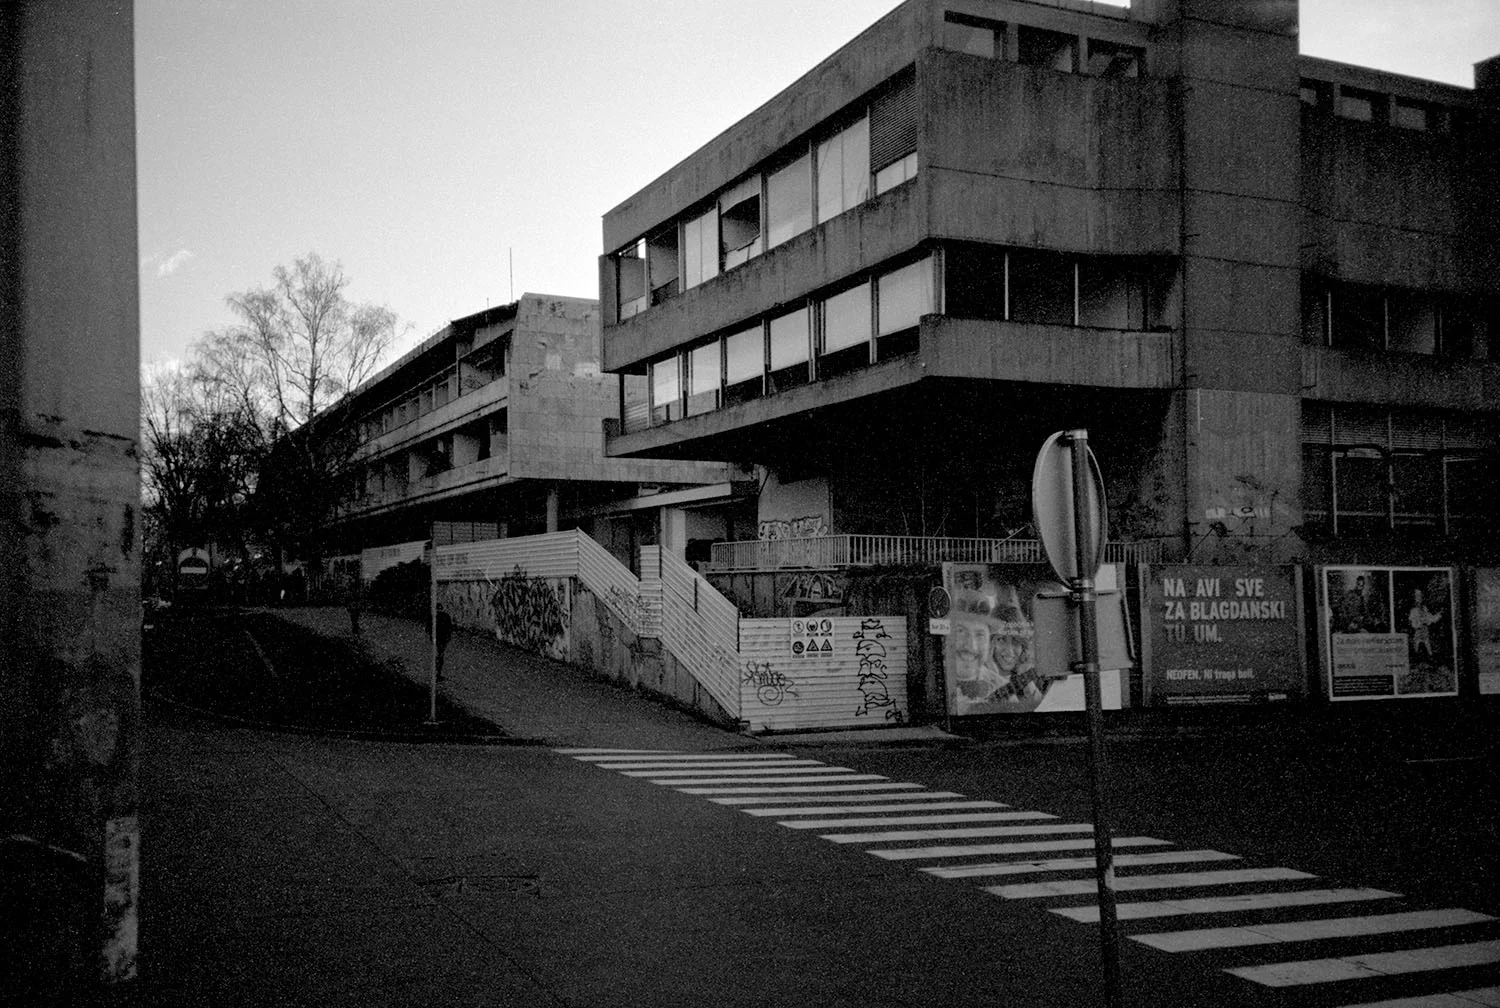
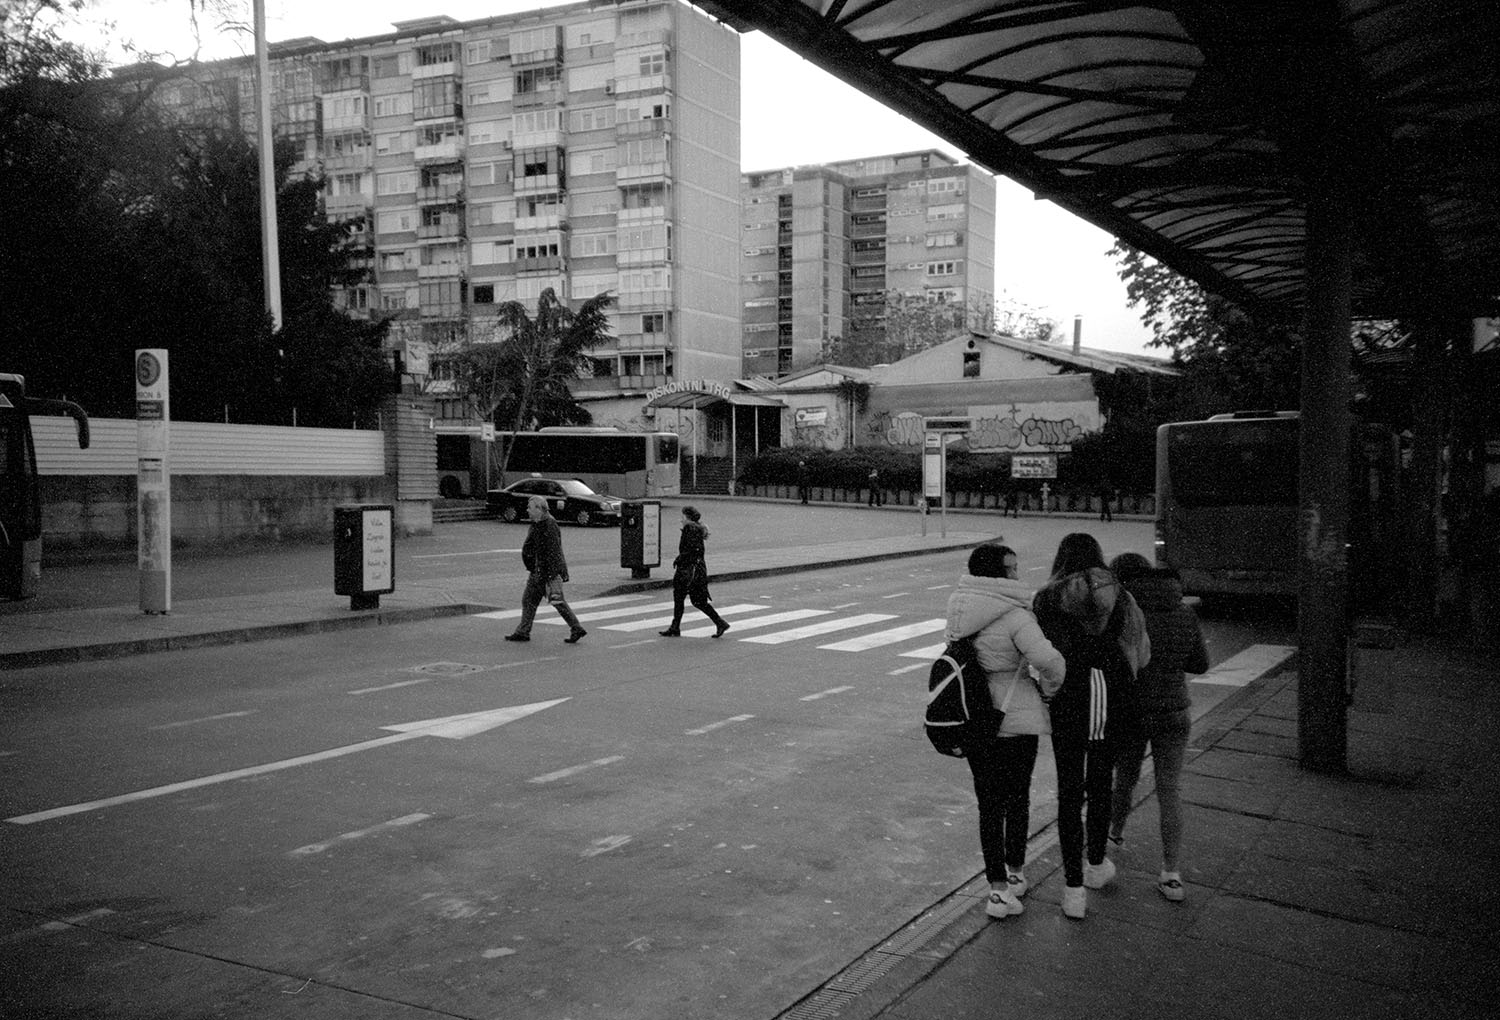
As expected, the images are quite low contrast, but on the other hand they have extreme latitude. There is information in the deep shadows and the almost blown out highlights. You can really edit the images to your liking easily. Skin tones especially have a nice creamy look that I like. It is not a “fun” film for stuff like sunsets or vivid nature scenes, but it does record exactly what it looked like at that time. Night time shots bring out that special cine film look with a slight cyan cast in the shadows, which I do like too.

I have currently developed 4 rolls, 1x 50D, 1x250D, 1x500T, and 1 Fuji Eterna 500T, and I still have plenty left to shoot, and I am looking forward to it. For me personally, these look better than Portra 160/400 which I find slightly too yellow and pastel colored.

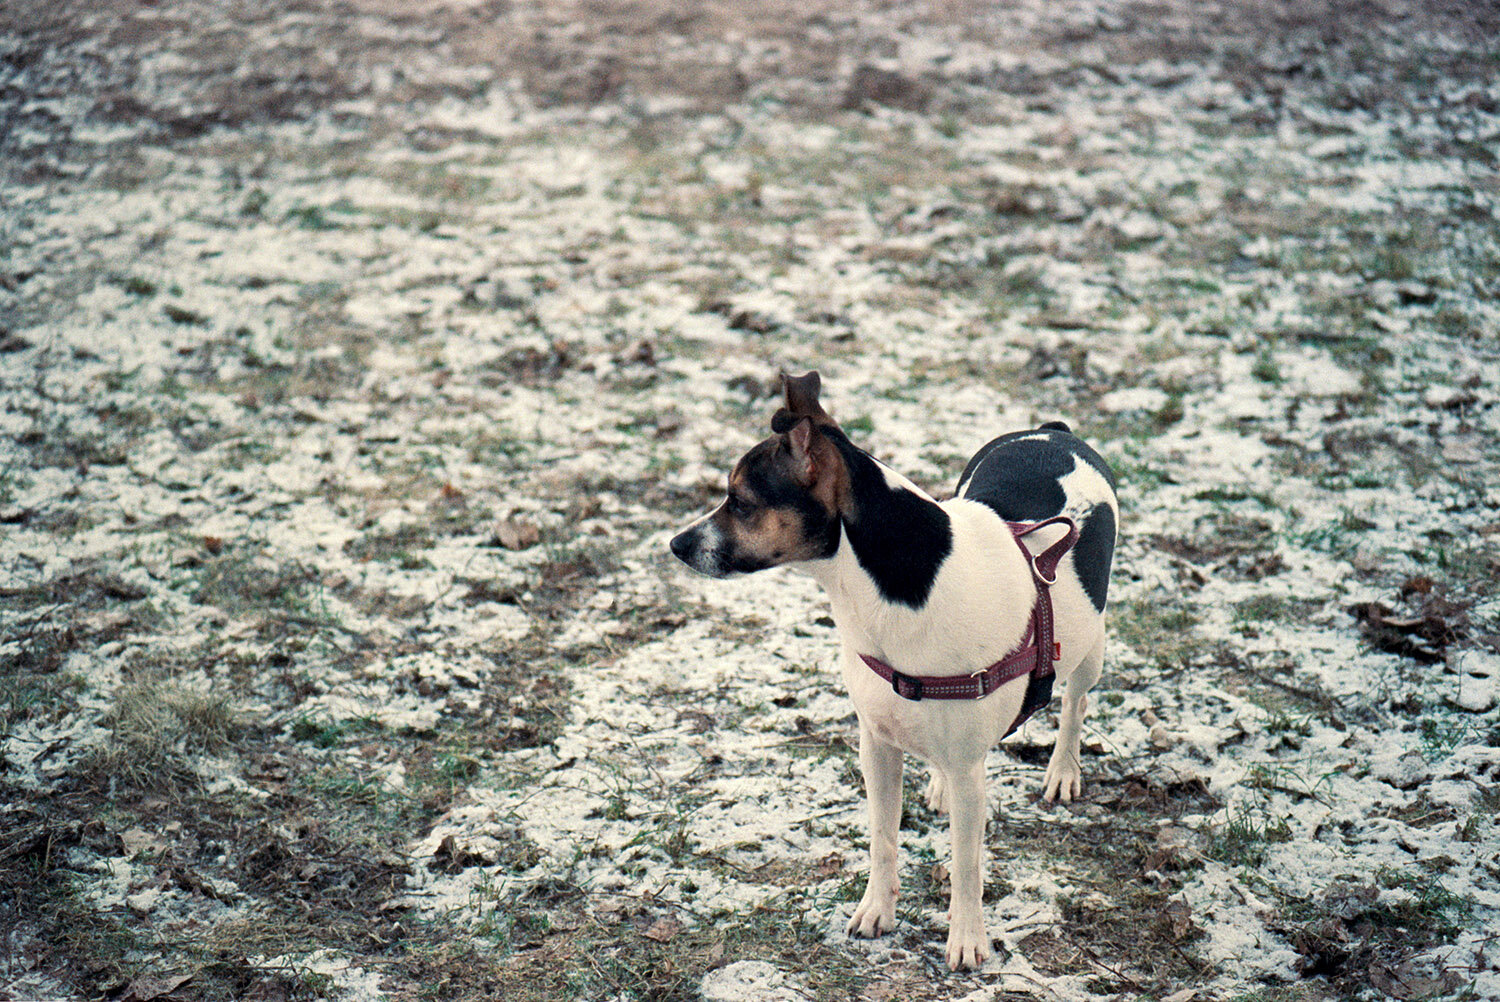
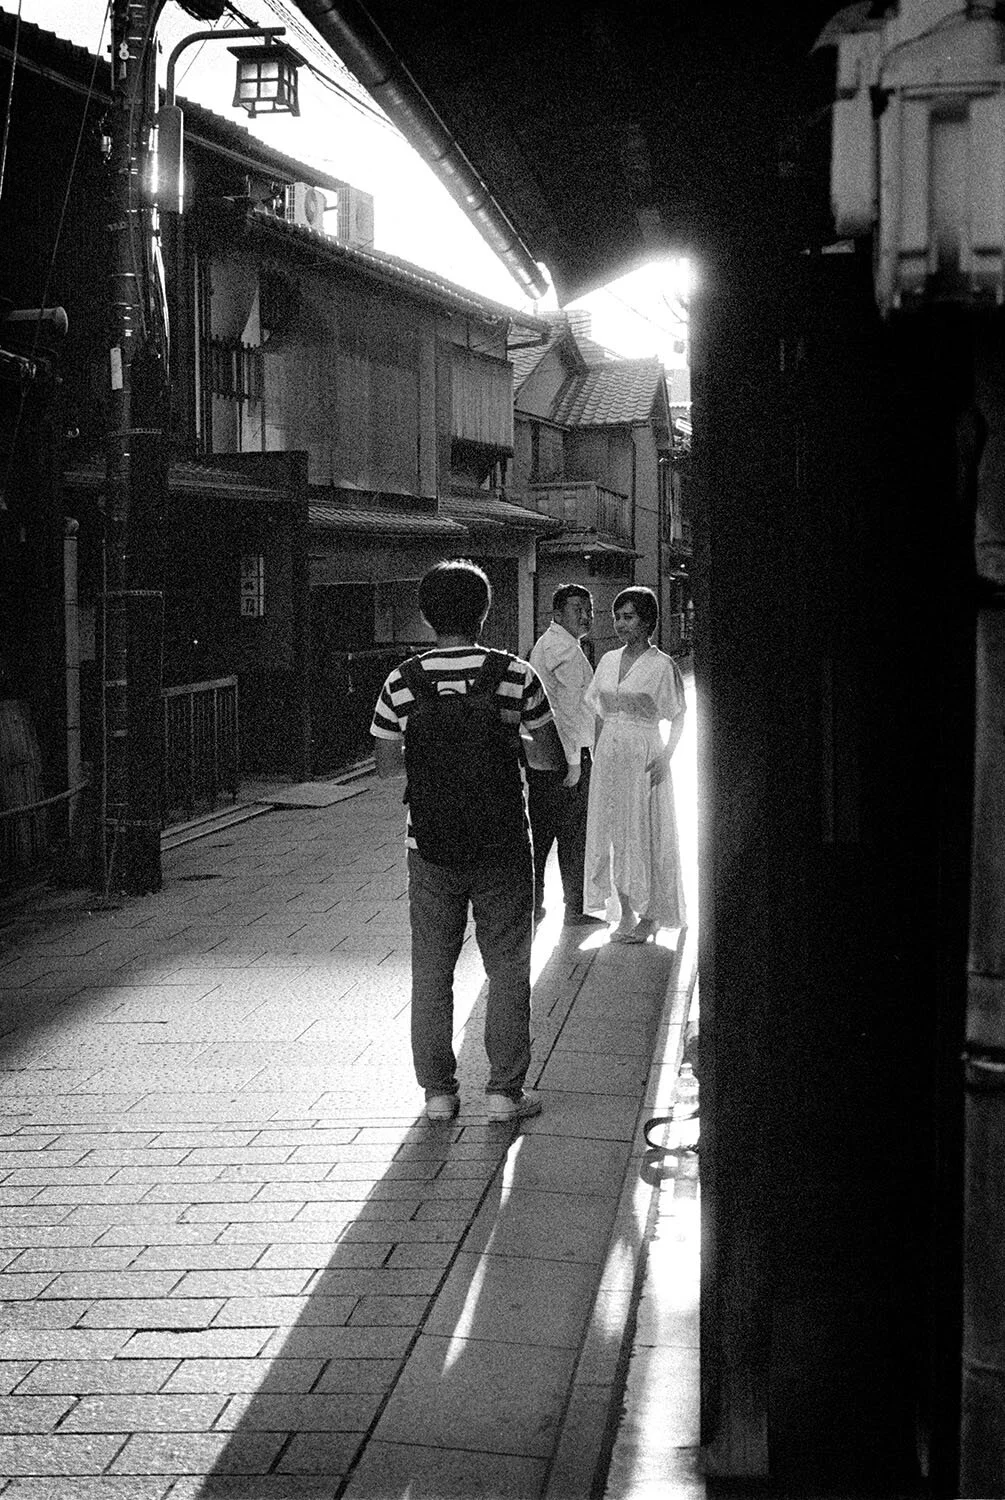
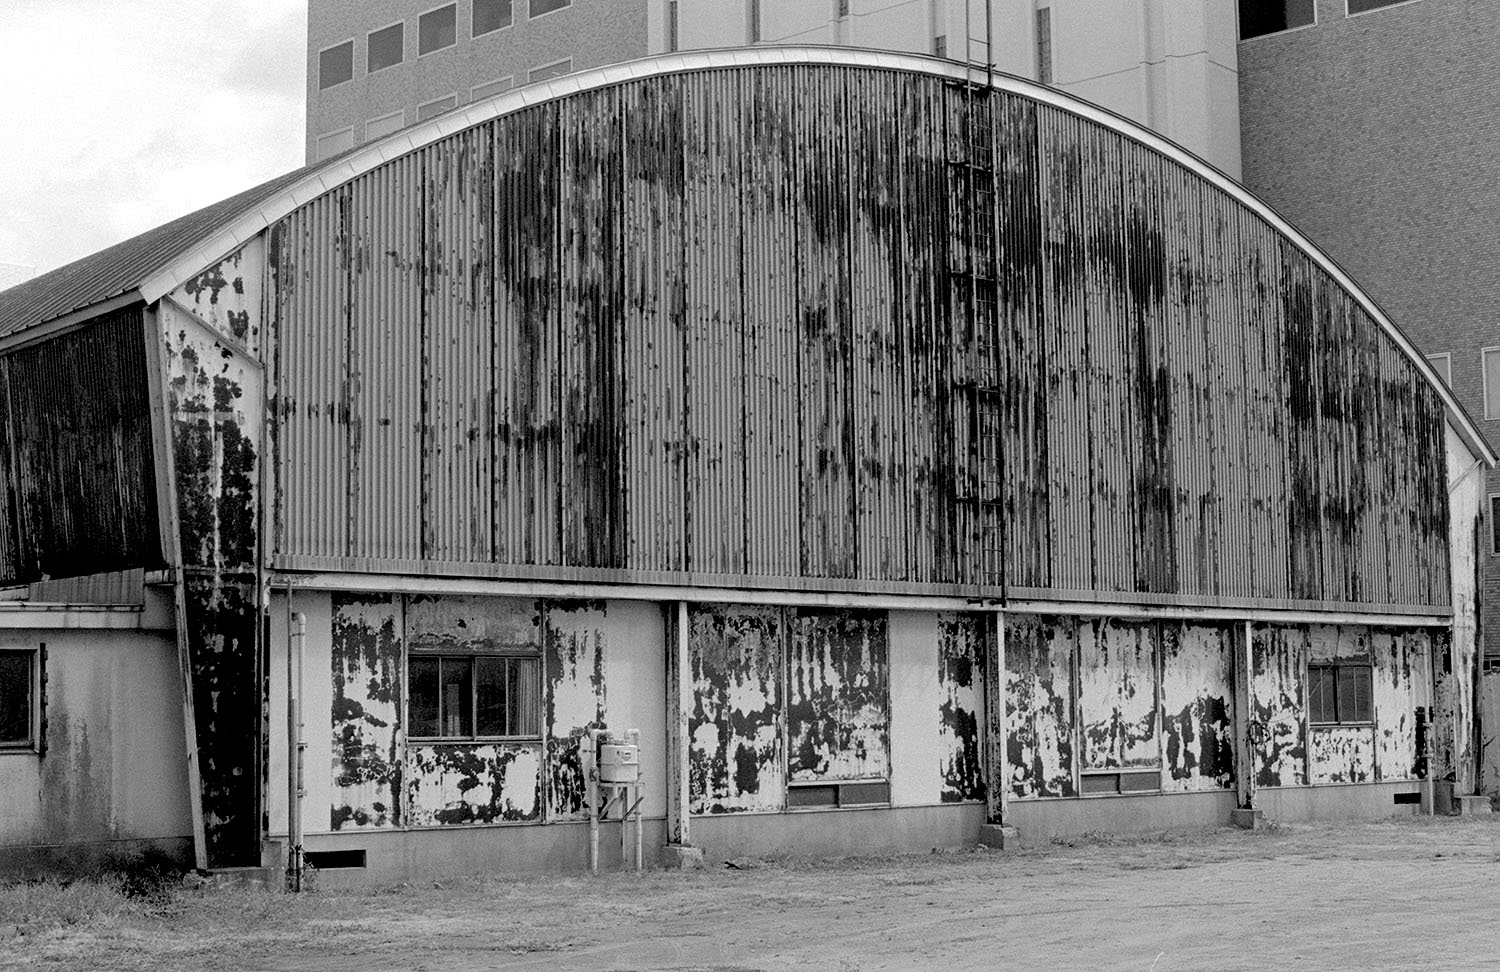
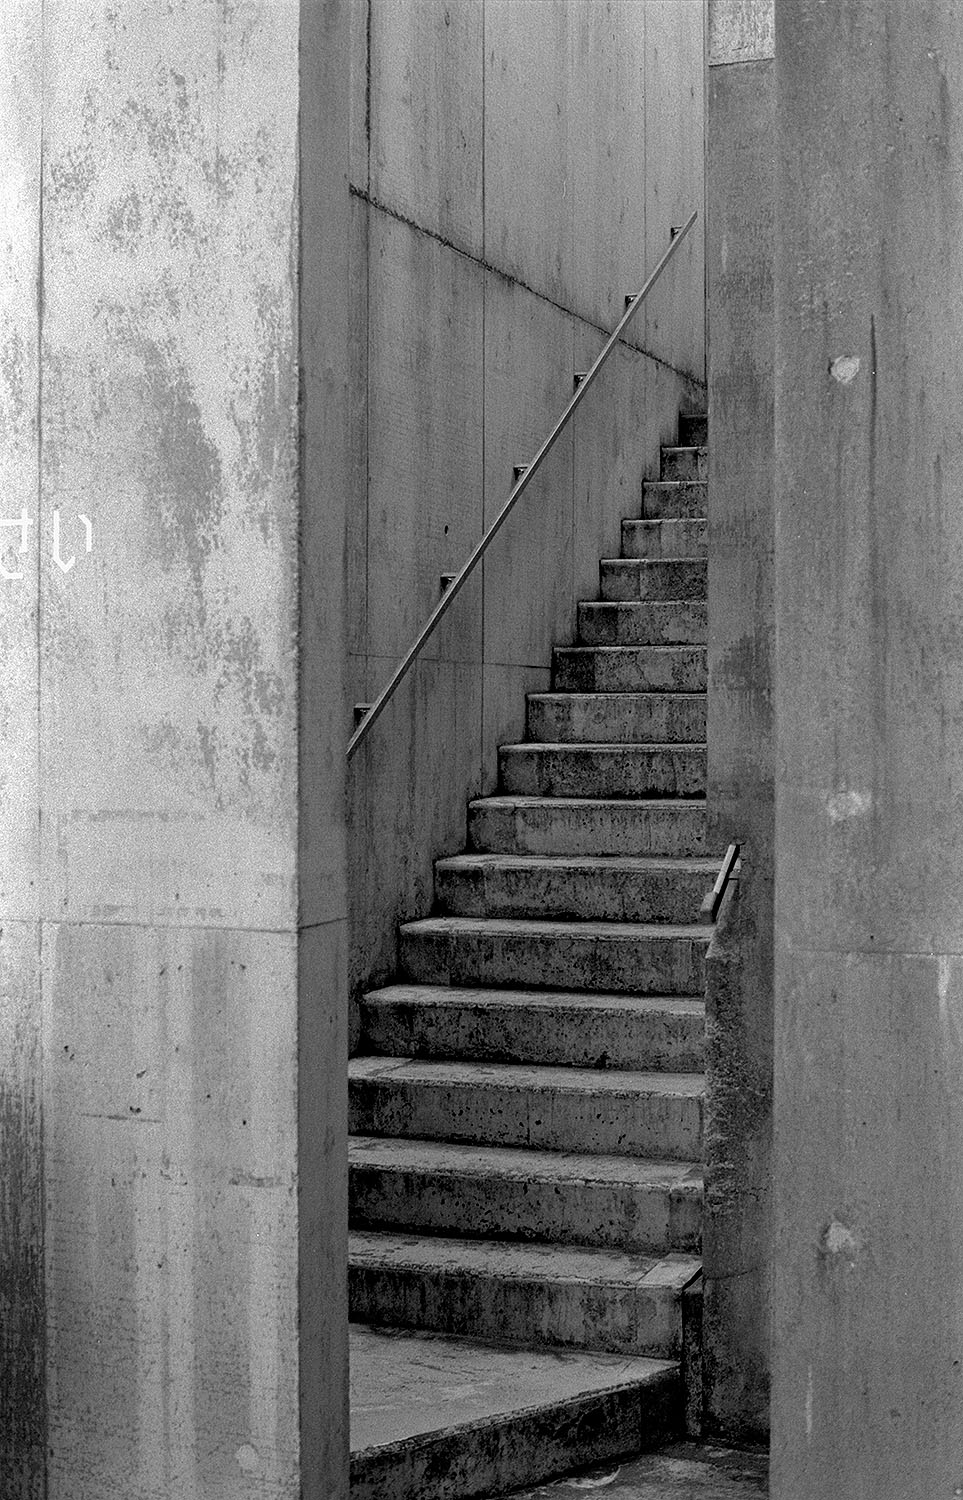
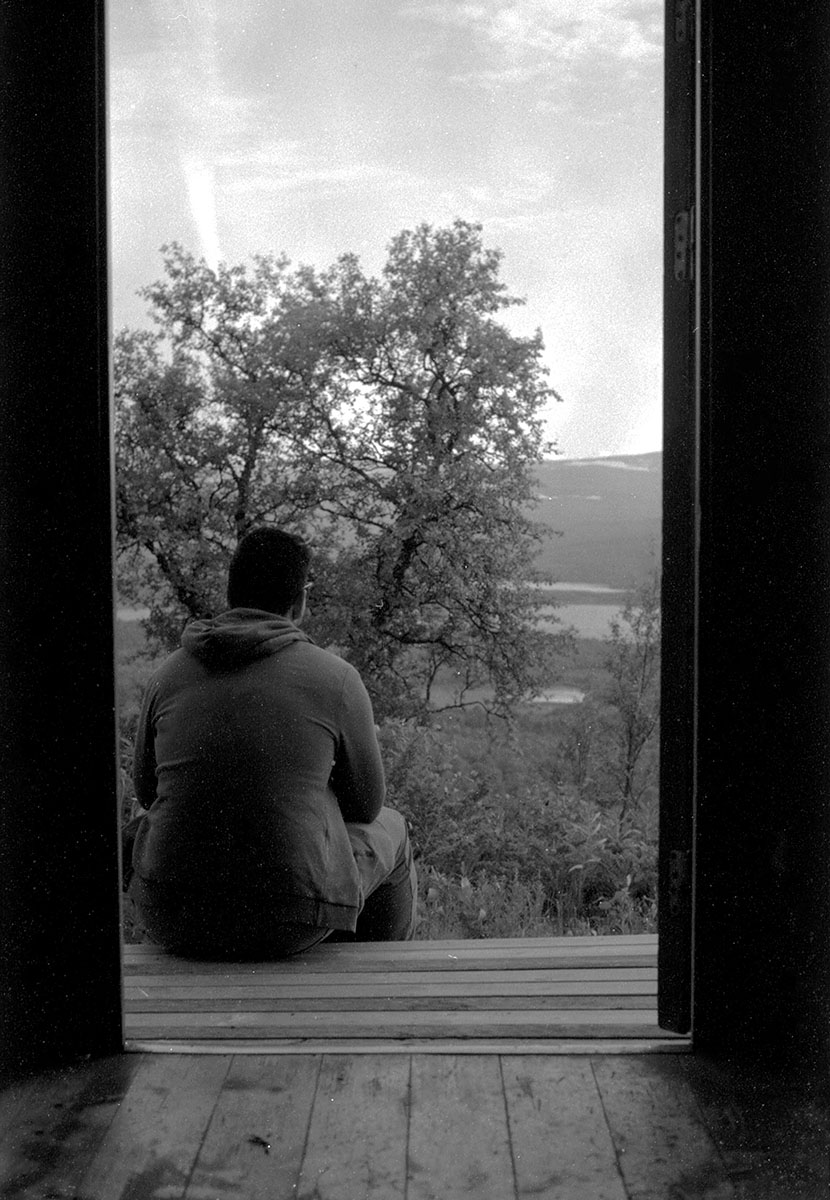
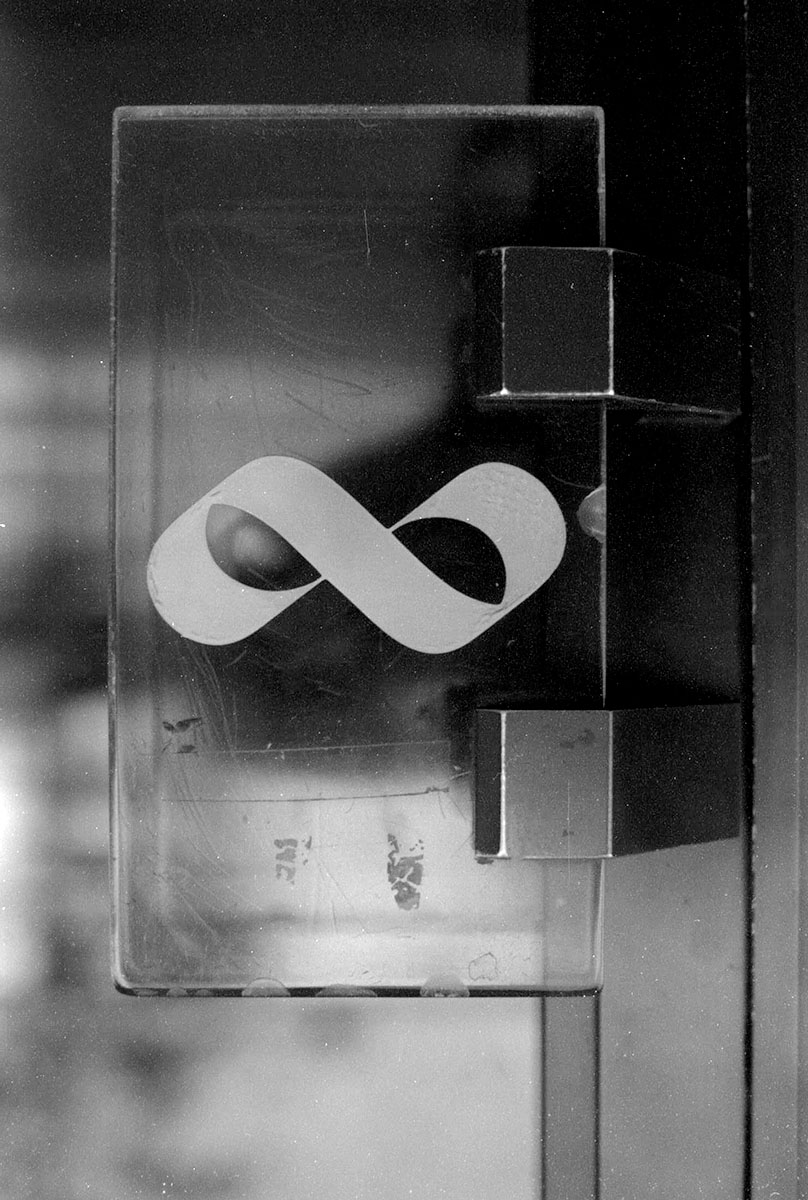
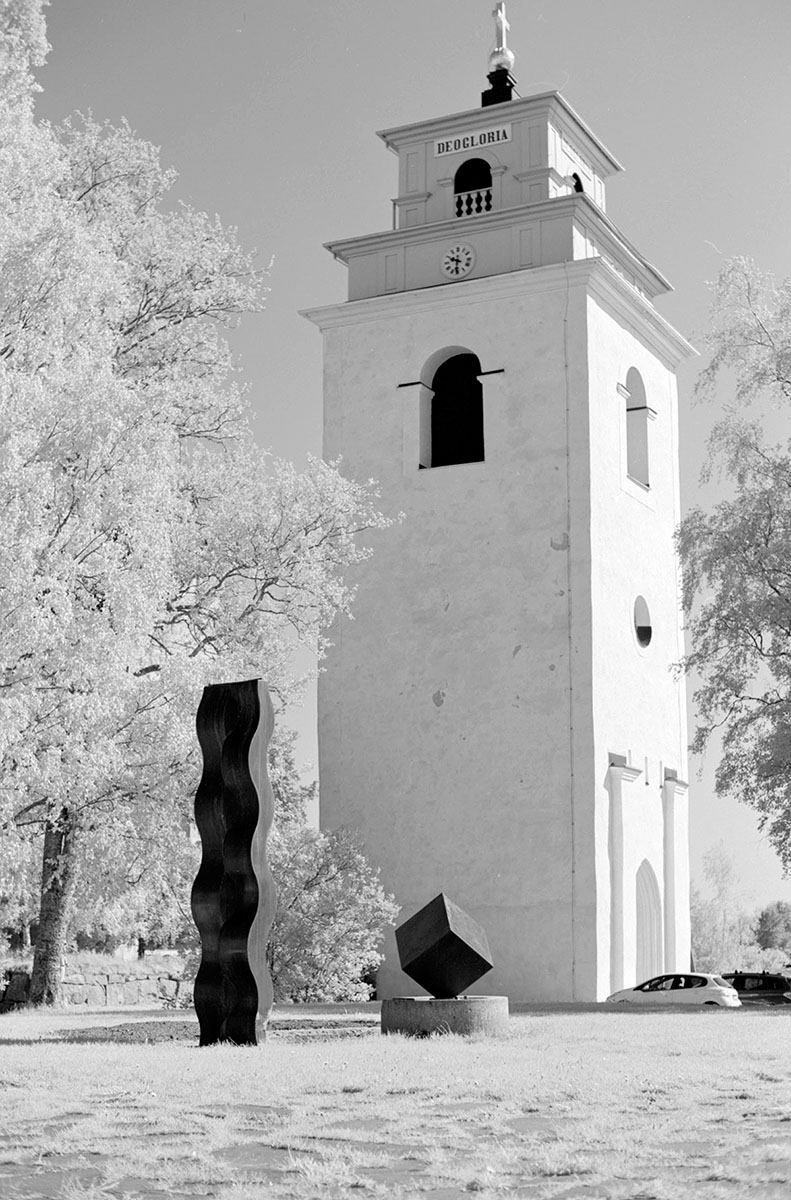
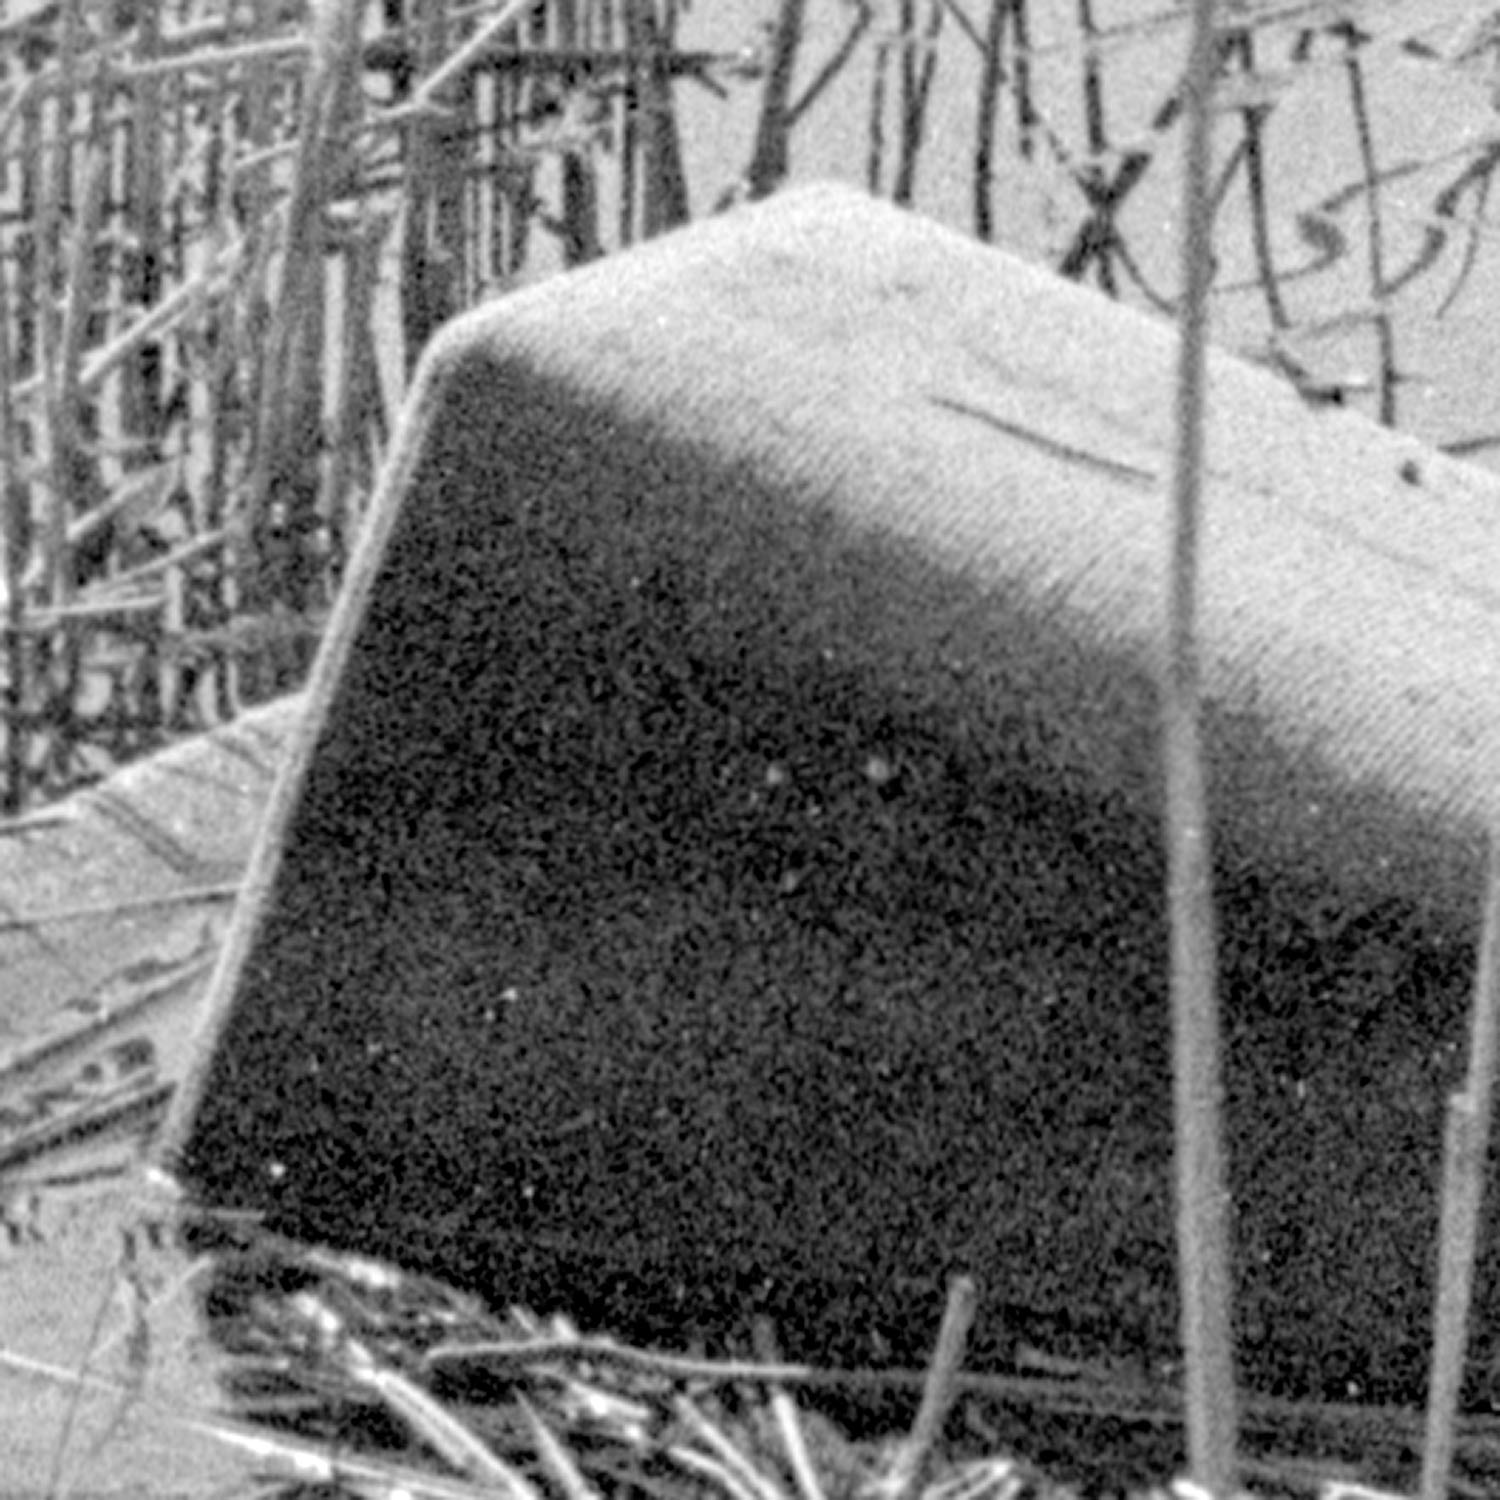
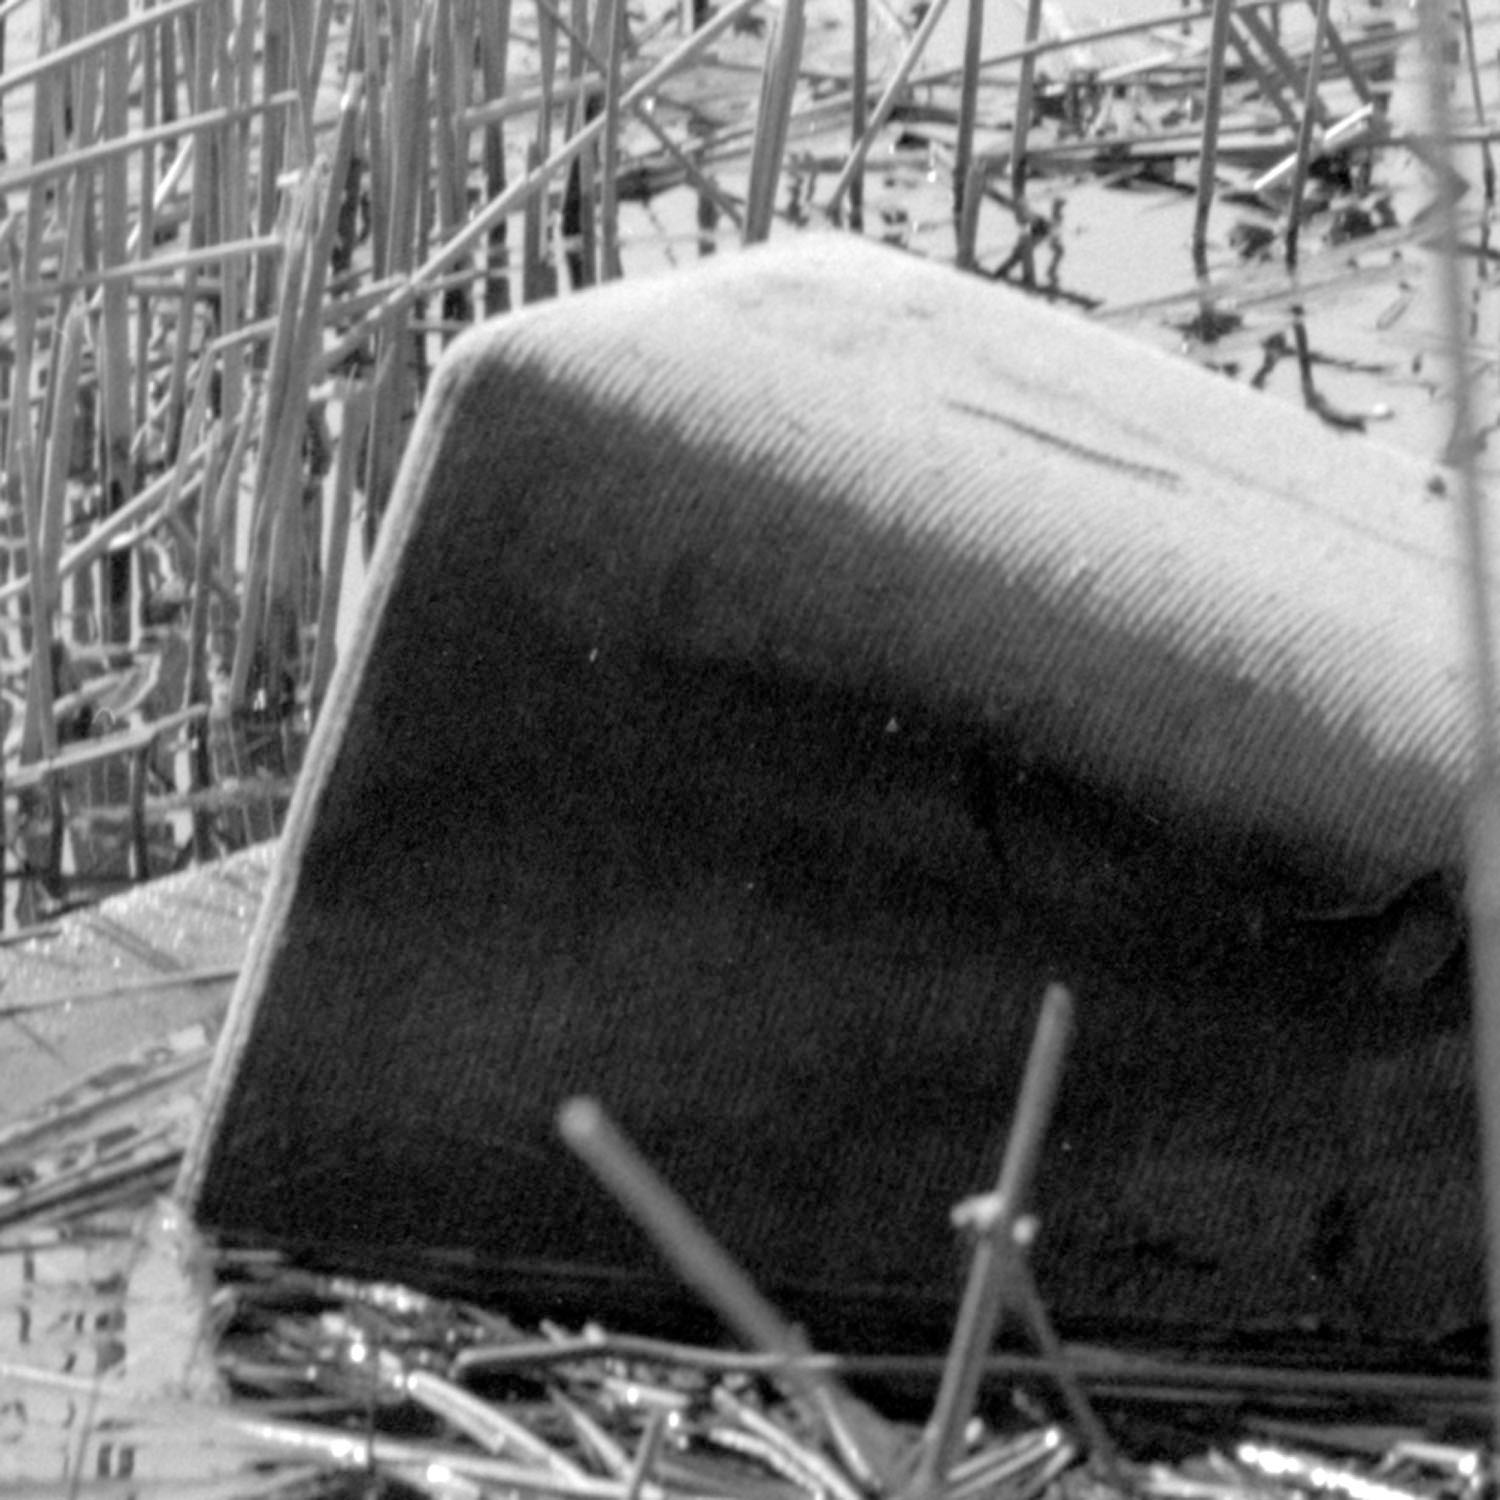
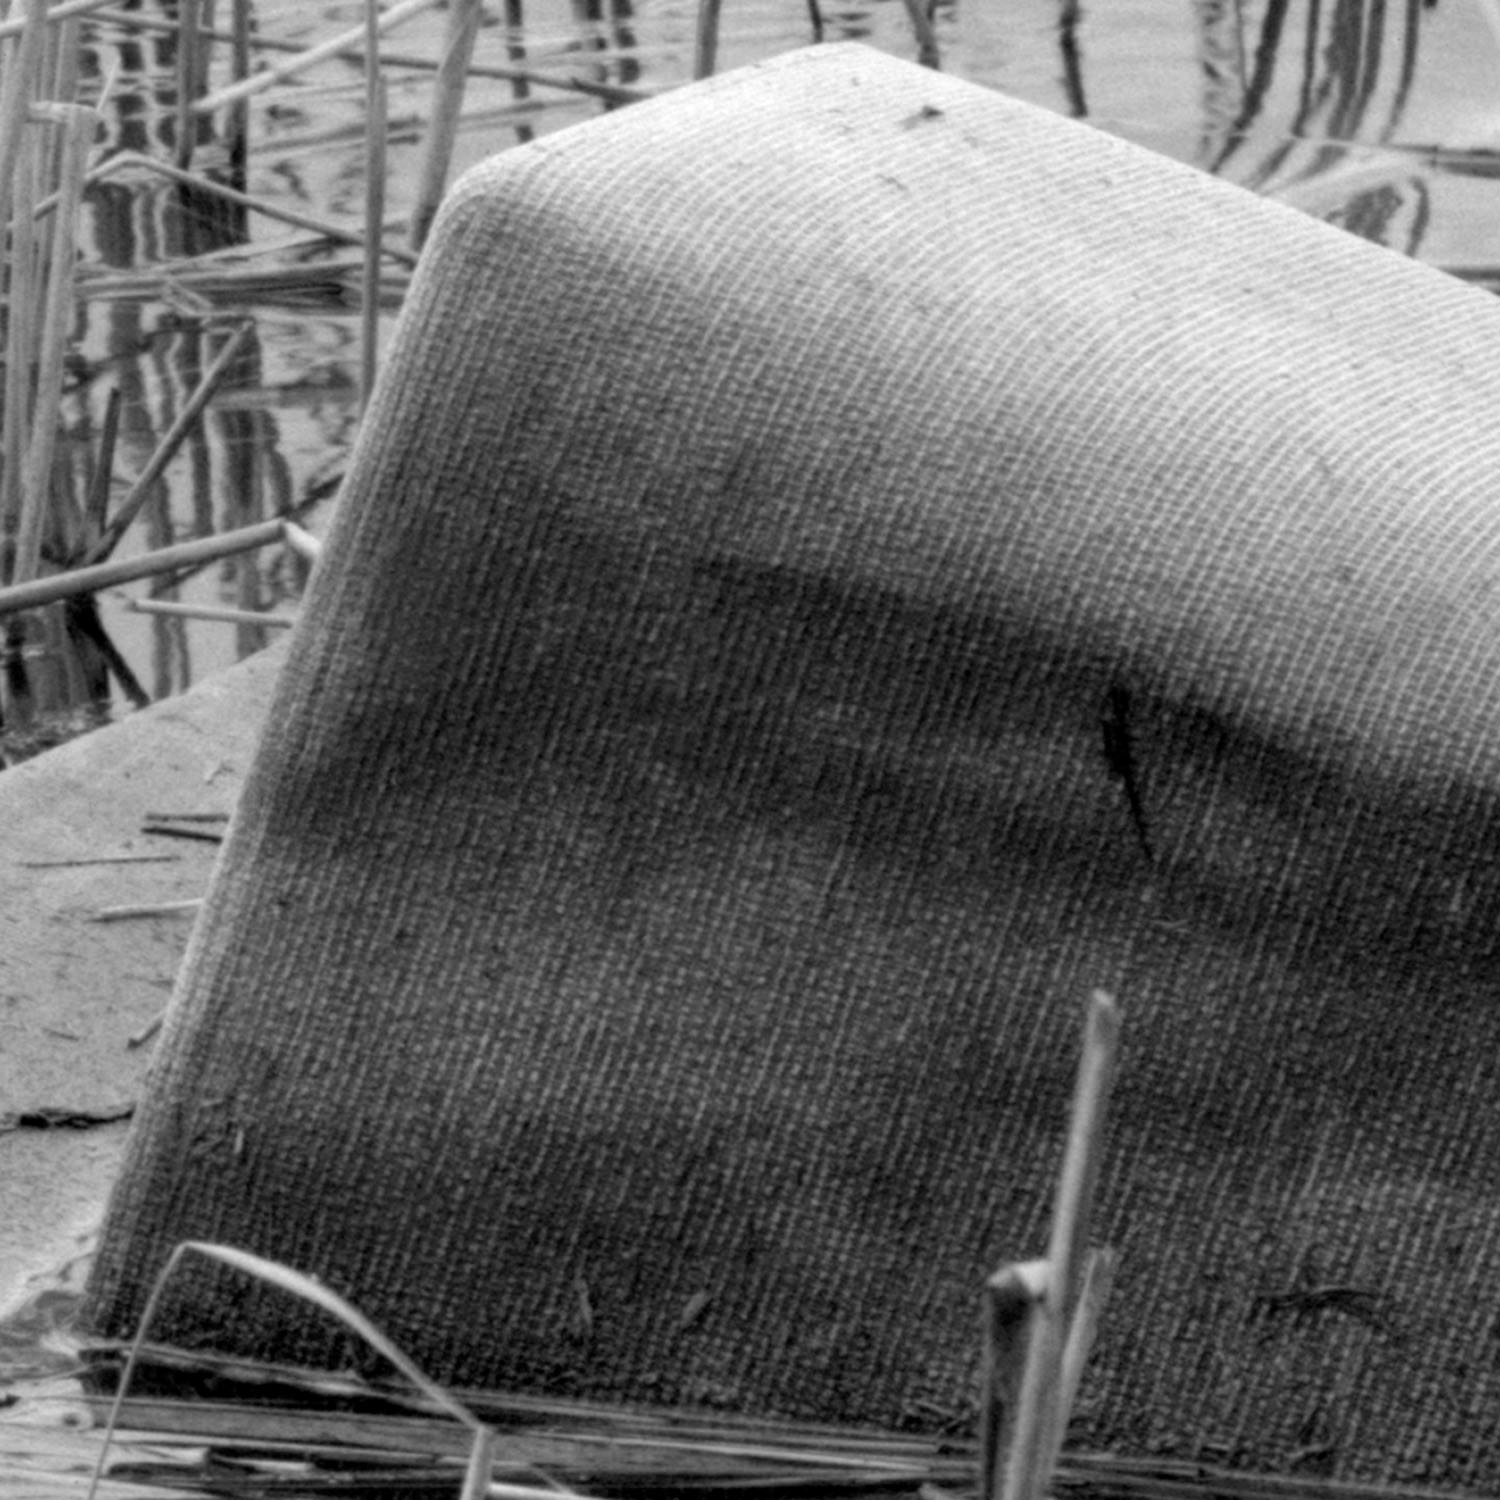
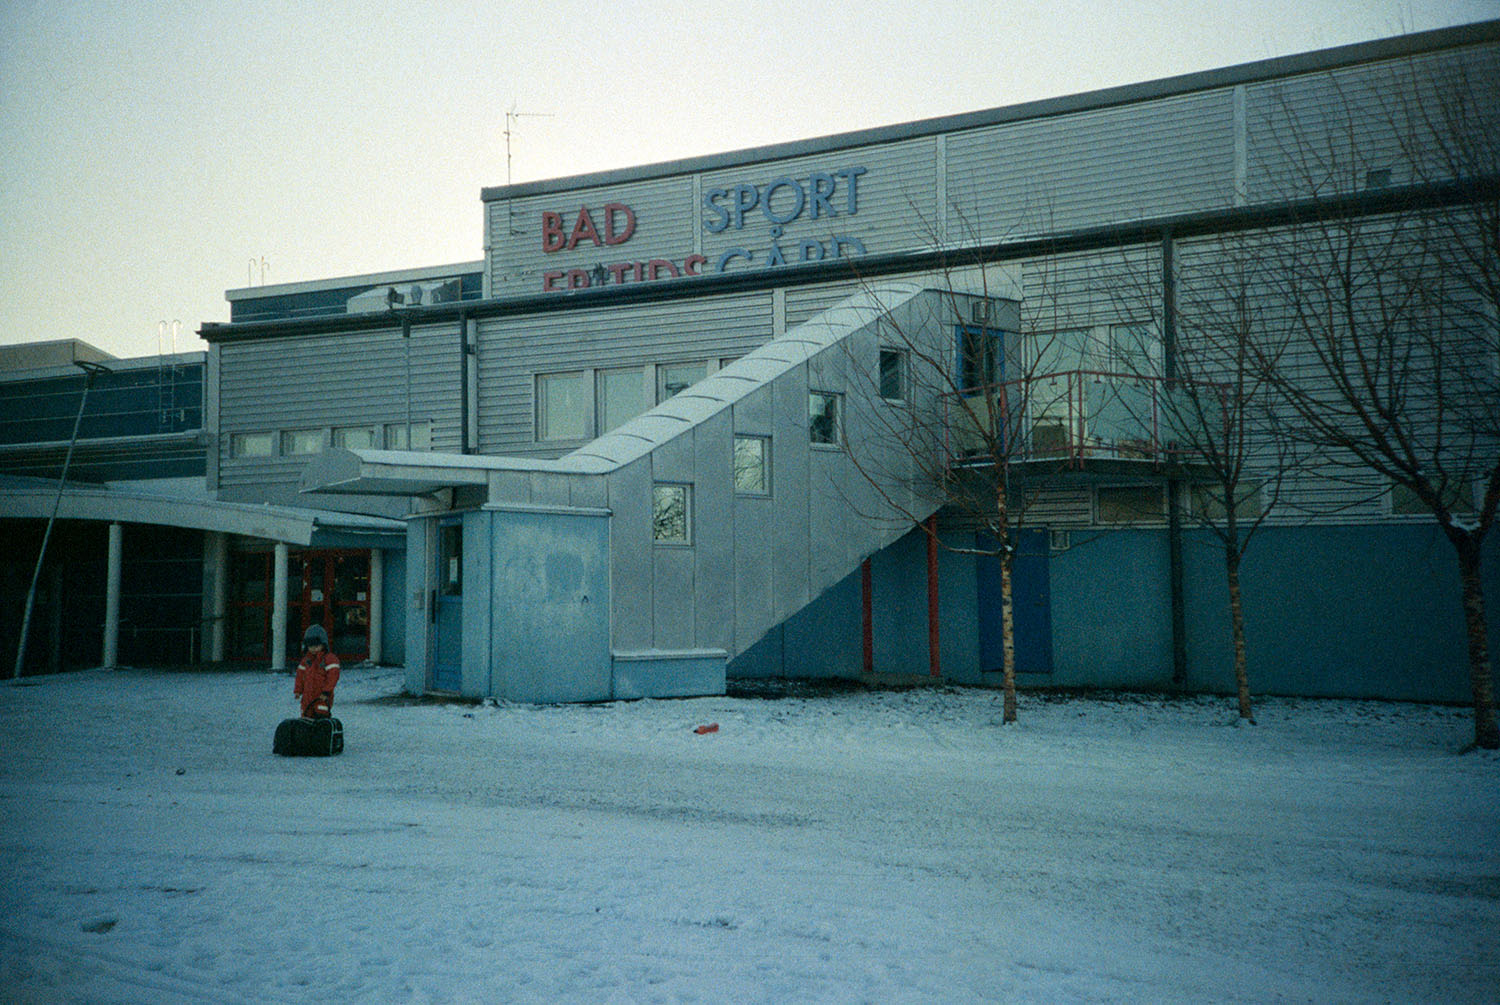
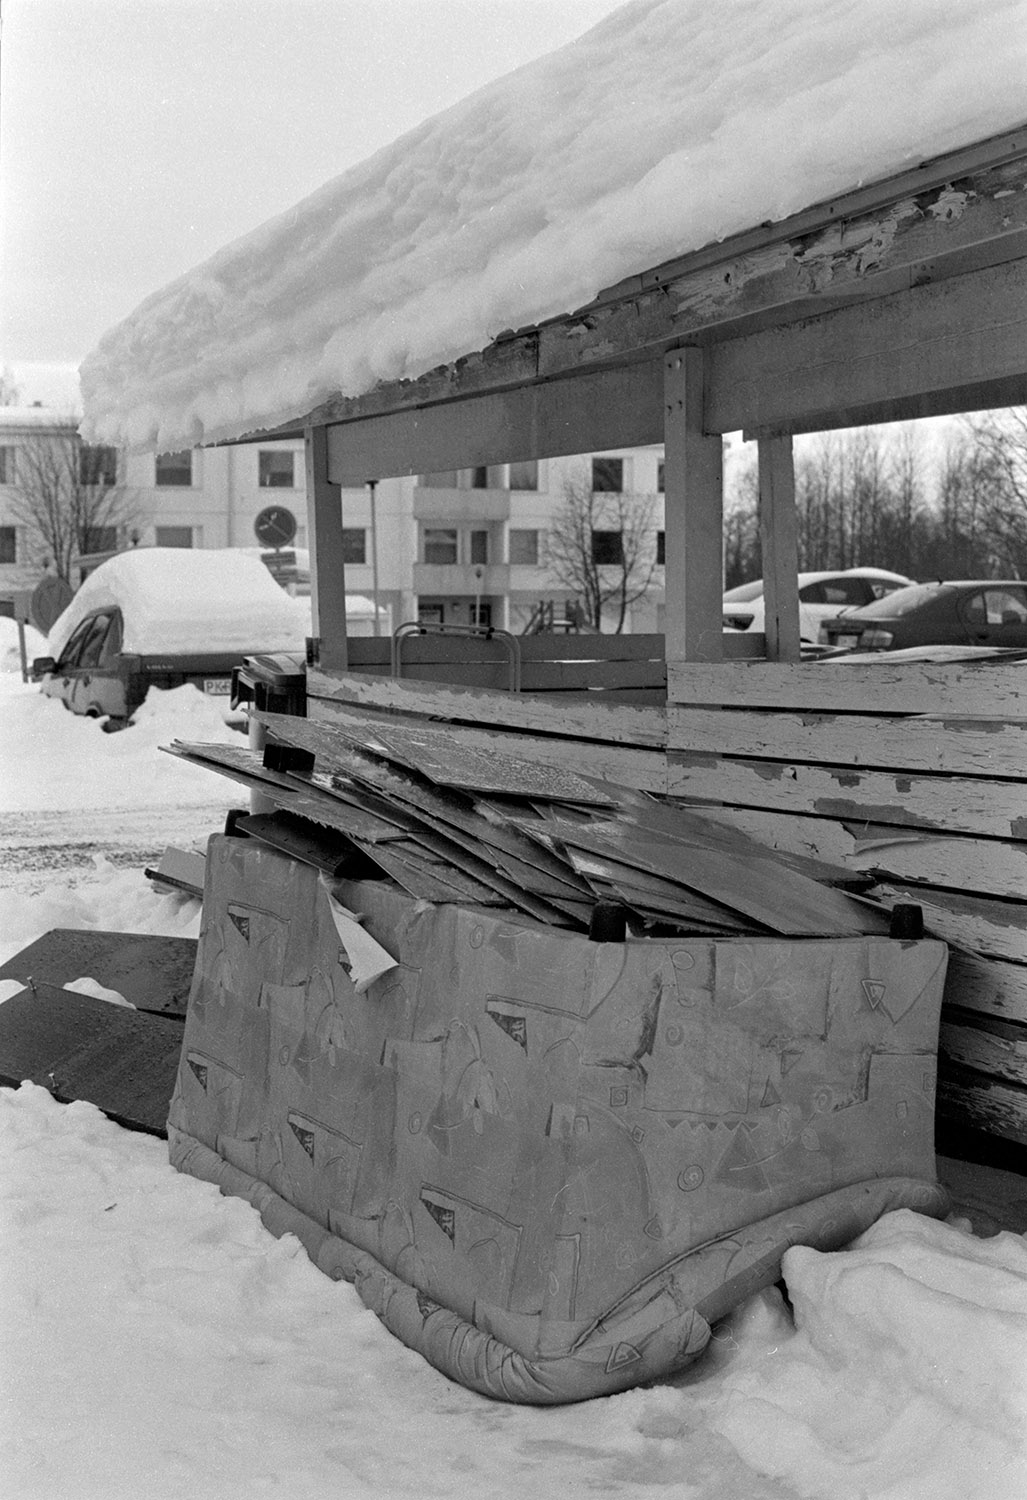
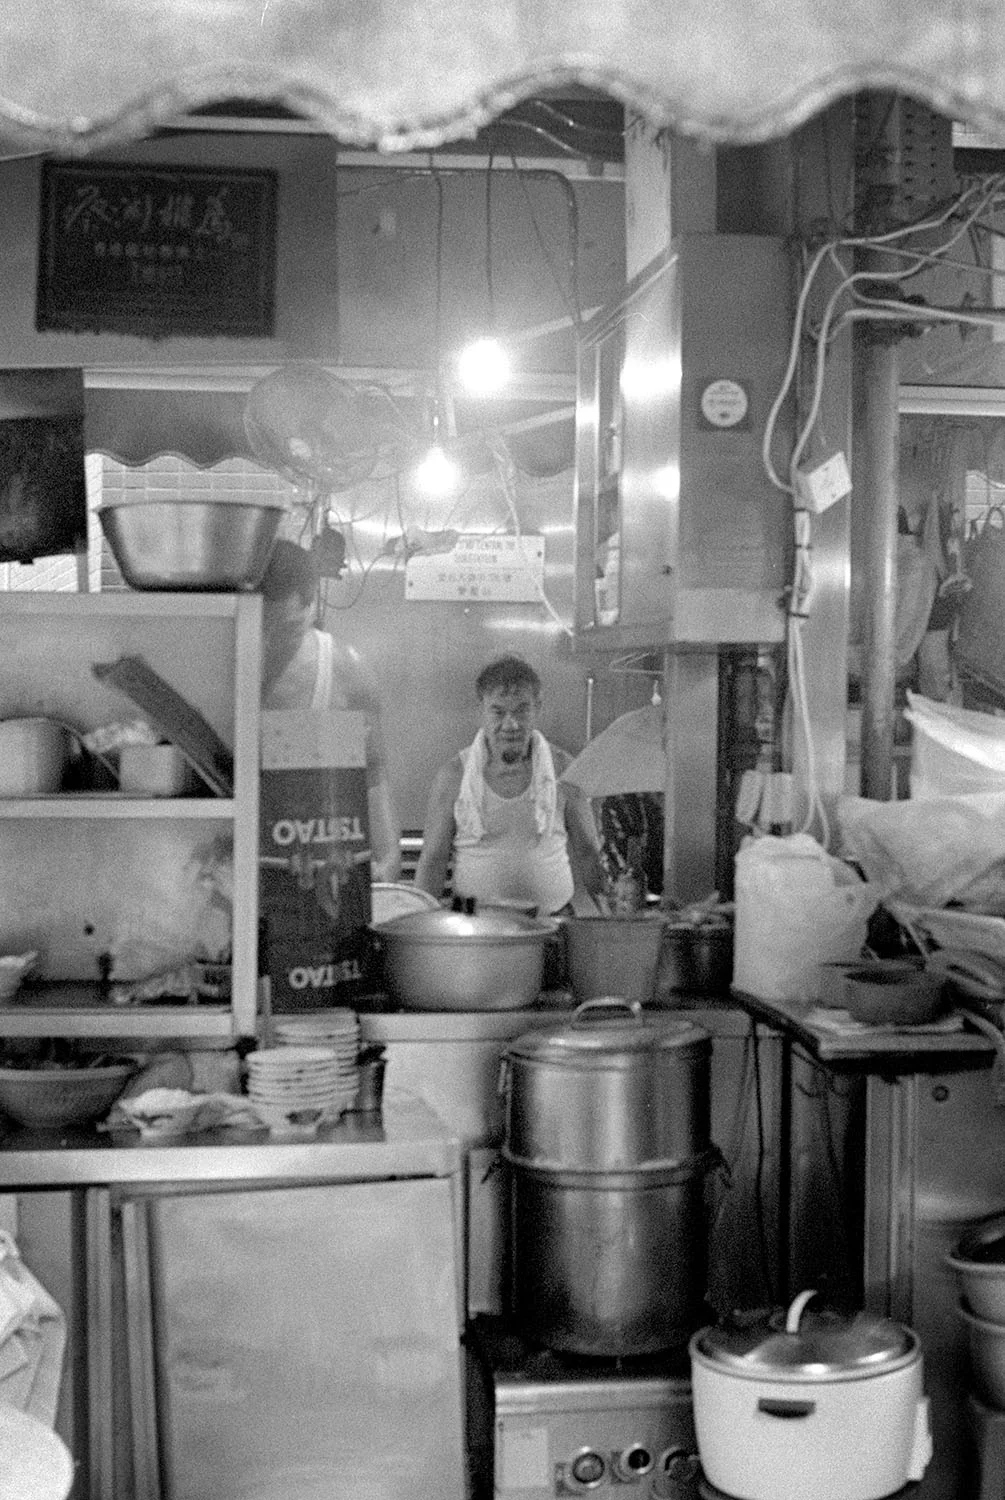
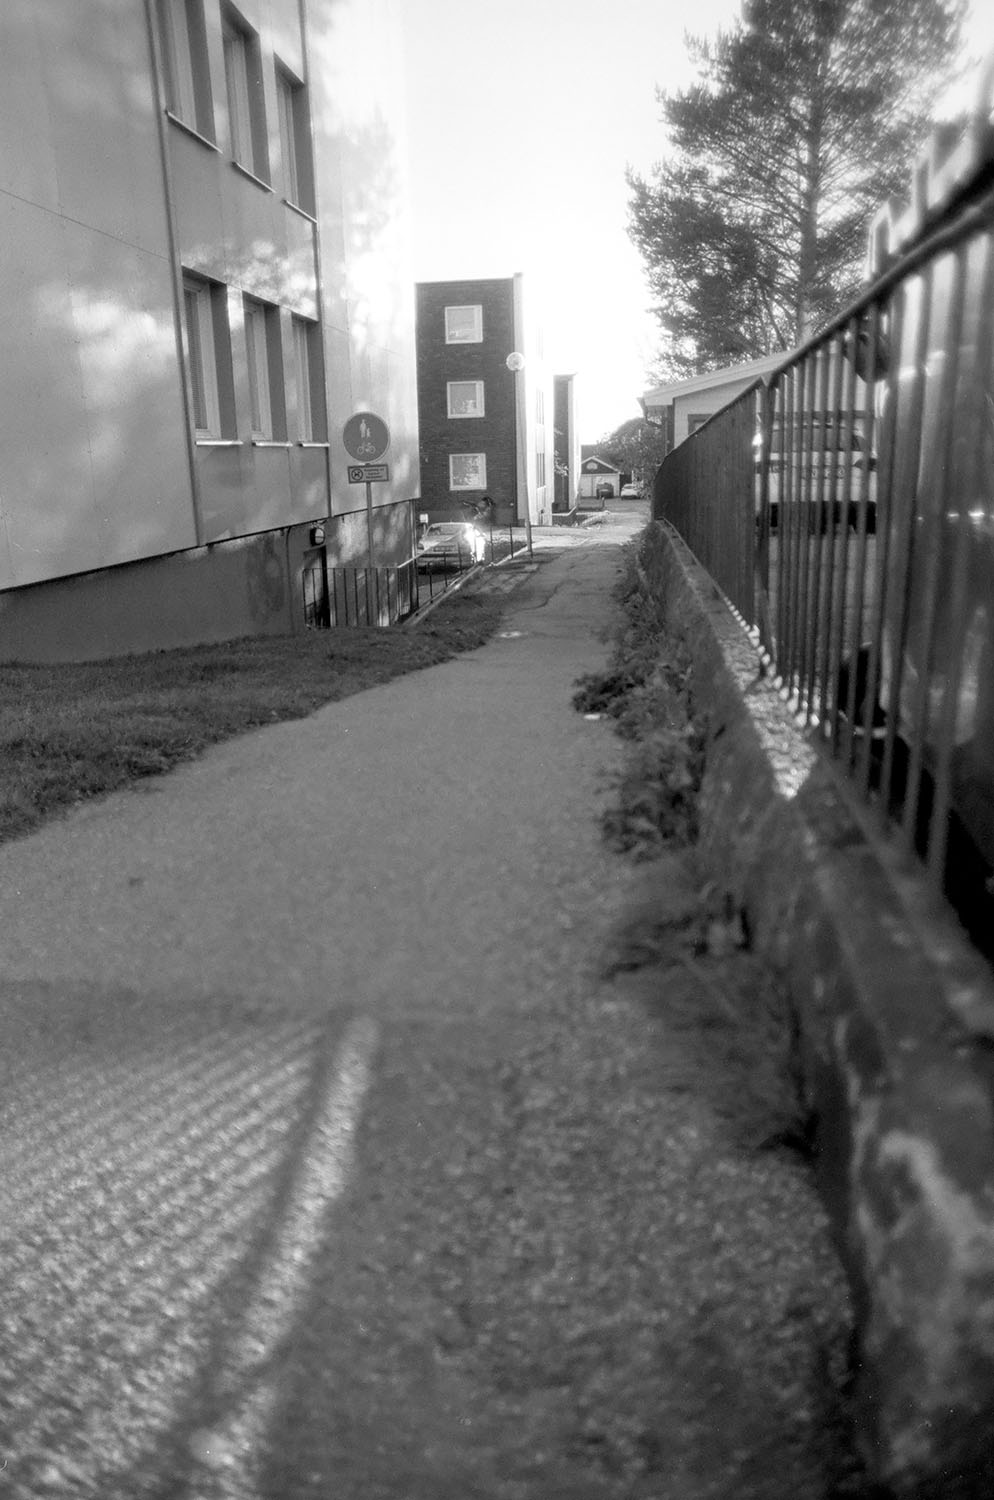
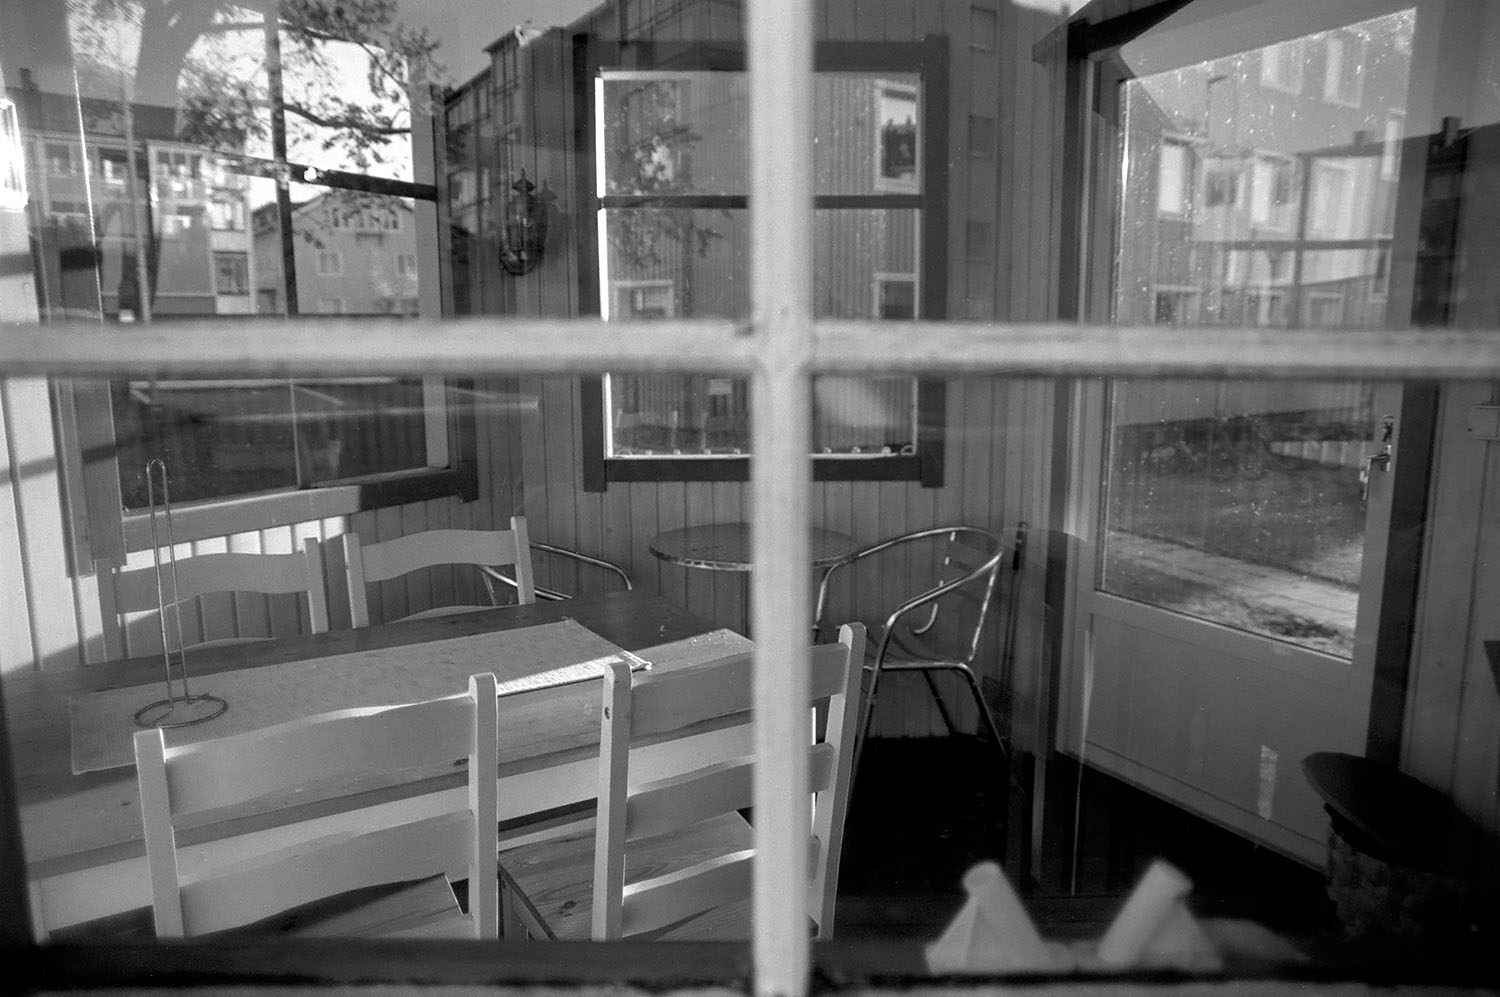
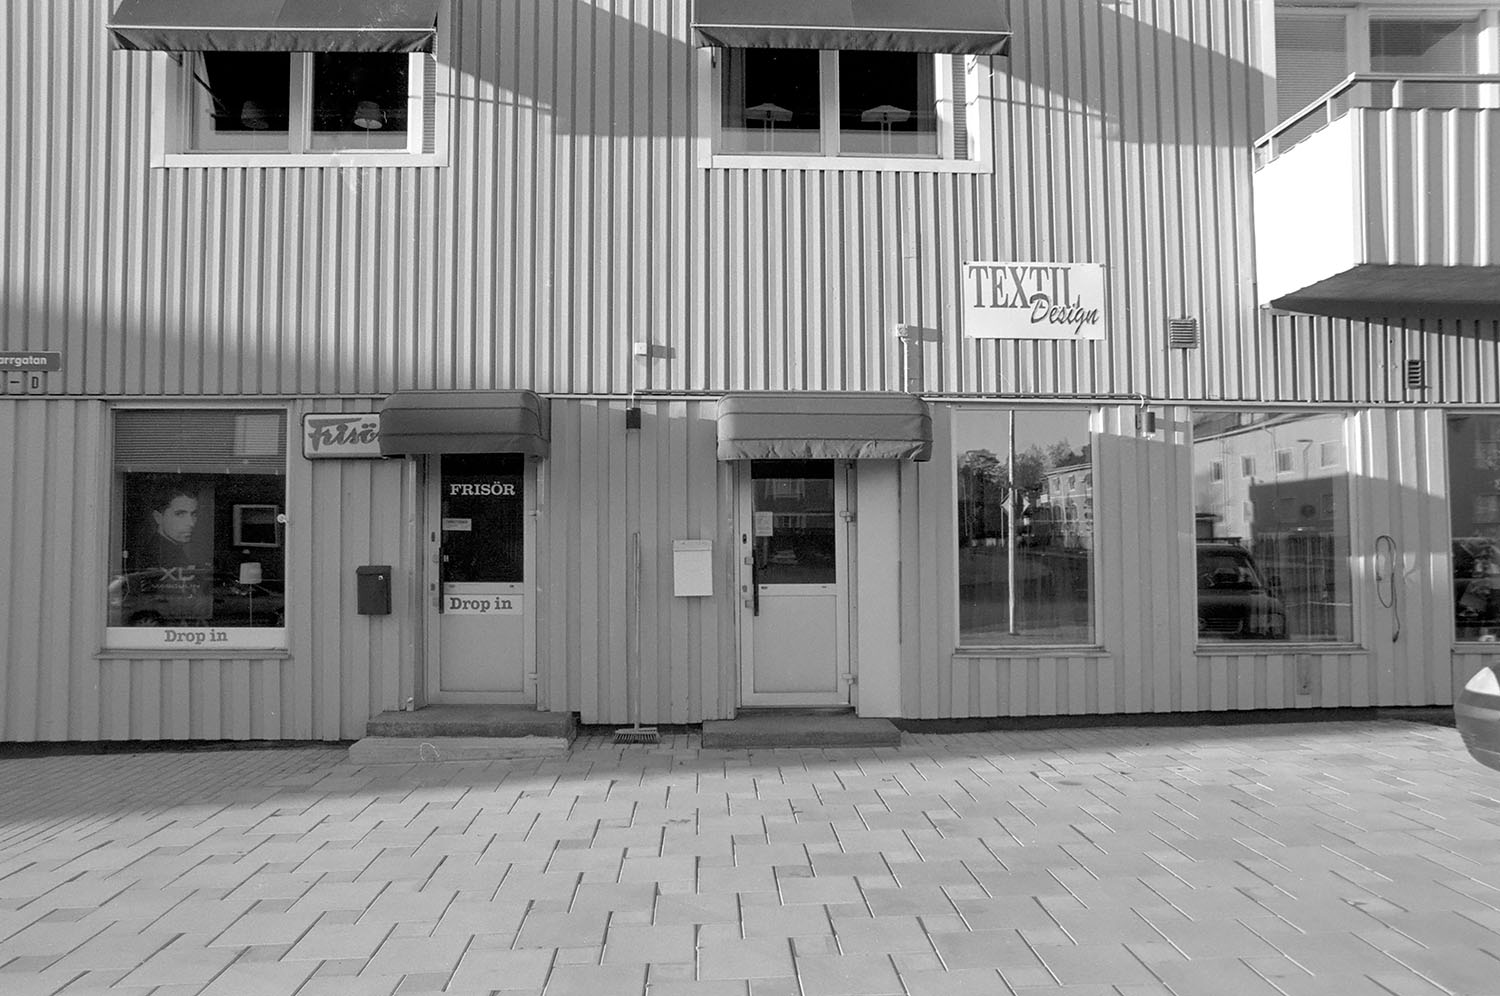
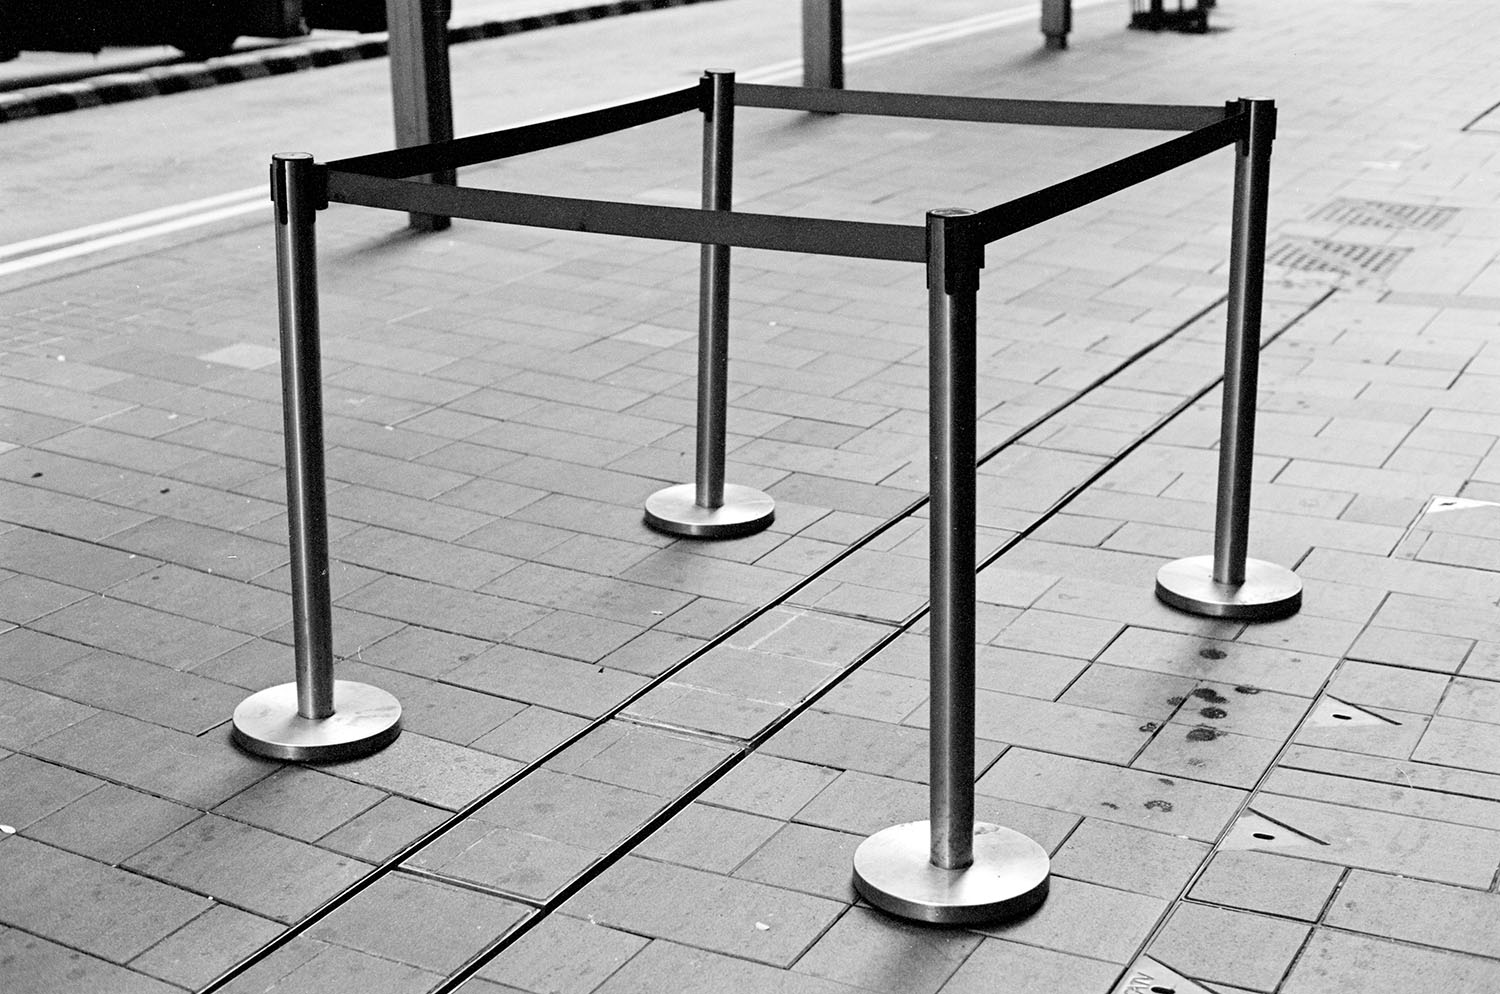
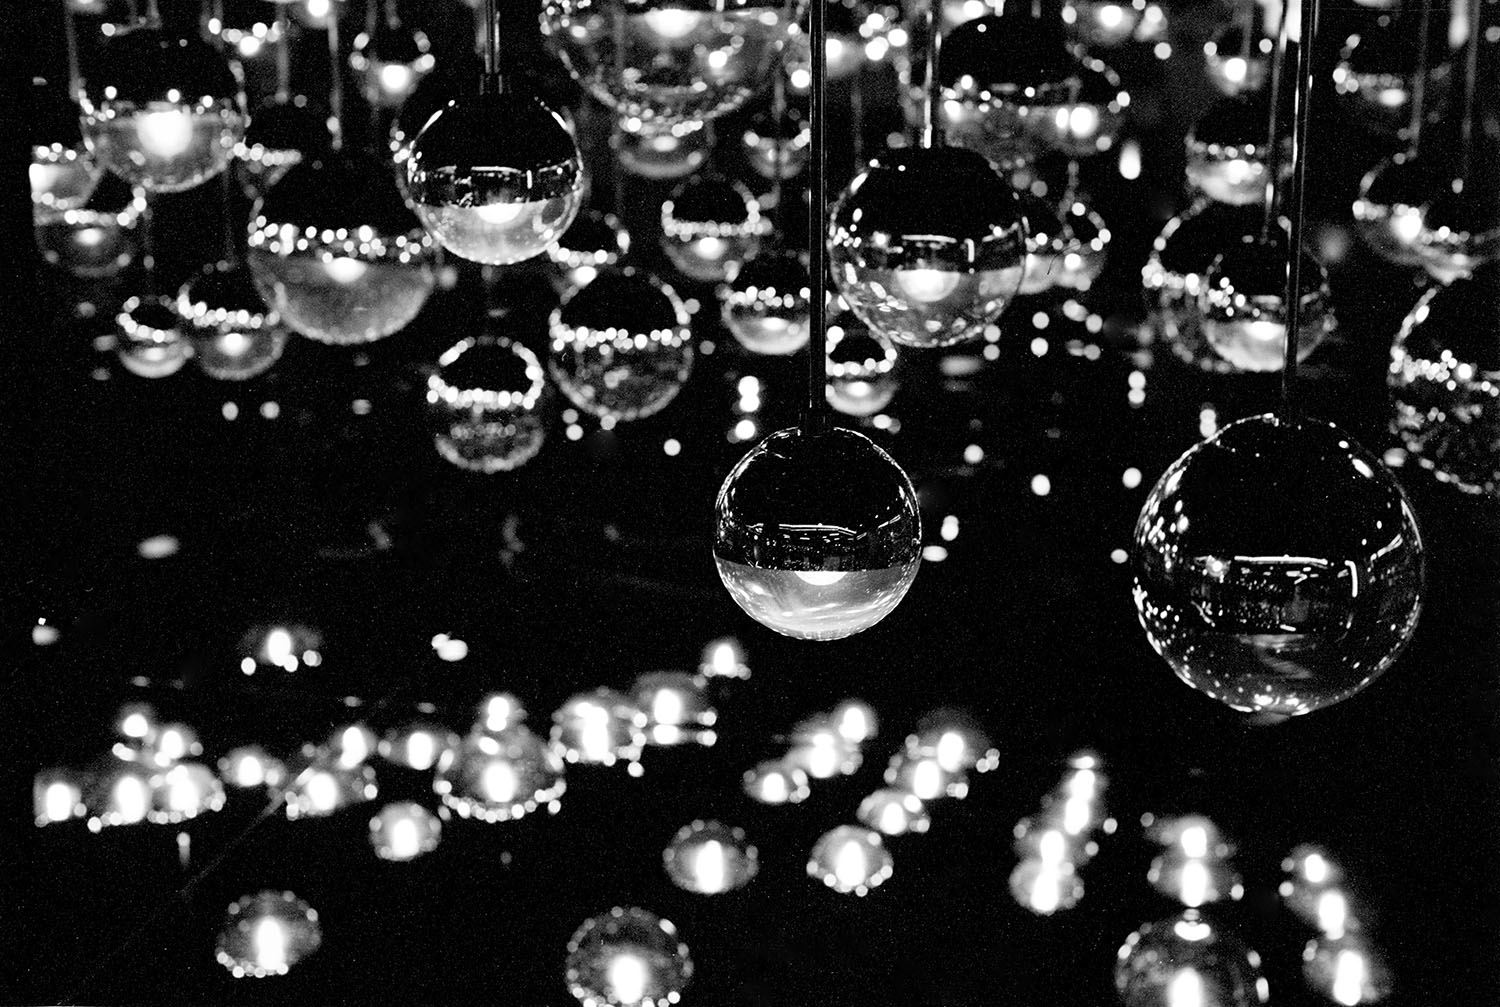
Alright, here are some sample images for you to enjoy. A few from 50D, 250D and 500T. Let me know your comments down below!

Fujifilm Neopan 1600 - A song for the fallen ones

I do love the black and white films that Fuji used to produce. I think most people that ever tried them, agree, that they were unique, special, and loved. I have a small bag of Acros, Neopan 400 and 1600 in my freezer that I take a couple of rolls from now and again.

A 1600 speed film is quite fast, and will not age well, I can already see some base fog and reduced speed in these rolls, but they are still good enough to shoot.

As with most negative black and white films, they tend to look better with a little bit more light, so I shoot them at ISO1000-1250, develop for 1600. During the past month I shot a roll during my trips in Japan, and I think it suits the subject matter really well. It is quite grainy of course, but the grain is not “In your face” like I feel with Tmax3200/Delta3200.

Here is an example of what I mean, Delta3200, D76 1+1.

But it also is actually a faster speed film, so it does not have the look of a pushed film, like HP5 with +2 push. Here is an example shot of that too, developed in Fuji SPD (Super prodol) 1+1, for 15min in 20c.

If you look at the coat of the dog you can see it lacks definition/sharpness. It looks like an evenly gray blob. If you look at the dark car in the upper right corner, you can see that the blacks are quite crushed in the shadows. However, compared to the Delta3200 shot I much prefer pushing HP5 2 stops than shooting Delta.. I think also that SPD is a very good developer for pushing! Too bad we can’t get it over here.

But going back to the main subject, Neopan 1600. Here are some shots from last years trip, developed in SPD 1+1, 6,5min 20c.

A very good combination here too. I shot this roll at 1600 and it would have gained from getting just a little bit more light, half a stop or so..

Here are shots from this years trip, so as I said shot between ISO1000 and 1250, developed in XTOL 1+1, 7,5min, 20c.

The monk in the first picture is a man I met in a small town called Kesennuma. I got a lesson in meditation and then we had a barbecue party. During that same day I visited a site where the big tsunami had caused a lot of destruction, and they had left parts of it as a reminder of the big earthquake and the following disaster. It was gut wrenching for sure.

Both Neopans sure were excellent films, maybe in the future, with help from the current resurgence in film photography, Fuji will consider making a batch or two of the stuff again. Acros is coming back after all.. Remember guys, if you want Fuji to keep on making film, buy Fuji films today!

That’s it for today, as always, please drop a comment and let me know what you think.

Kodak Double-X (5222) in Xtol 1+1

There has not been a lot of blog posts recently, I have been busy with other stuff and not really shooting that much film. But during September I go to Asia for a longer trip where I try to shoot as much as possible. This time I spent a few days in Taipei where I went to a couple of camera stores that also carried film and I found a roll of Kodak Double-X for cheap. I remember reading about how it can be quite contrasty, and better to pull process a little bit, so I shot it at ISO200 and developed in XTOL 1+1 for 9,5 minutes at 20c. I was careful to not let the liquid actually get warmer than that.

The film is stll quite contrasty, results would probably be better in the developer it was made for, namely D96, but I was very pleasantly surprised nonetheless. It is grainy and traditional, sure, but for a street photo film I think it really nails the look I am going for. It is gritty, contrasty but not lacking in shadow detail, grainy but the grain is not very large.

Judge for yourself, here are some example pictures taken from Aomori and Tokyo, Japan, during September 2019.

Astrum/Svema Foto 100 and Silberra Pan 100

As an ongoing series in trying to gather information about film stocks that have unknown origin, here is a continuation on the Astrum Foto 100 series. Read previous post here.

I was sure this was Agfa Aviphot 80, but then on Photrio a guy said that it can’t be, because it has no IR-sensitivity. Based on my previous tests, this sounded unlikely but possible. I had not tried an actual IR-filter, but saw the telltale signs of IR-sensitivity because people got that porceline skin type effect, with a slight glow.

So, I loaded up a roll of Astrum Foto 100 together with a Silberra Pan 100 which I am sure is Aviphot. Which version I am not sure about any more.

Silberra has Pan 50/100/160. Aviphot exists in ISO 20/40/80 and 200. I assumed both Silberra Pan 100 and Astrum foto 100 was the Aviphot 80 version.

I shot both films without filter, with deep red filter and with IR filter. Both films have IR-sensitivity for sure. Both films have identical sprocket holes, the film base is the same, flimsy PET, impossible to tear off. They had exact same color of AH-layer which comes off during washing. They take the same amount of time to clear in a fixer. All signs pointing towards them being an identical film.

But then came the surprise, I developed them both in Xtol 1+1 for 9 minutes. This was perfect for the Astrum but several minutes too short for the Silberra. I was very surprised, how can this be?

So they are not identical emulsions after all. It could be that Astrum Foto 100 is actually Aviphot 200 and Silberra Pan 100 is Aviphot 80, and that is why it needs a longer development time to build up suitable contrast.

But currently I am seeing more and more rumours about Svema, probably due to FPP starting to market Svema films. The facts that we know are that there is no Svema factory any more, there is no film being produced in a weird Ukranian factory. Nothing is “original recipie”, Svema is a brand name by Astrum, that probably bought whatever was left after Svema got dismanteled for cheap. If you look with Google maps at the address of the supposed factory you just see a lot of dirt roads and derelict buildings. There is no way any emulsions are getting produced there. Here you can see what the “factory” looks like inside. Here is a Ukranian news article about the factory. Quote: “As you know, the plant has long been abandoned, the premises are in poor condition.

Astrum is respooling aerial films, like Aviphot (and selling old expired FSU stock), and since it is difficult to find information about FSU stuff like this, people think it sounds cool with an original Ukranian film and spread this misinformation further. The same thing was happening with Silberra films once they started coming out. The feel of “russian films” as people know it now is just Agfa Aviphot. And you have been able to buy them through Maco for a long time. Same with Streetpan, it is much cheaper as Rollei Retro400S.

Anyway, sample images. Here is Silberra Pan 100 in Xtol 1+1 for 9 minutes, 20c:

And here is Astrum/Svema Foto 100 in Xtol 1+1, 9min, 20c:

Linhof Super Rollex 6x7 back

I got a Linhof Super Rollex 6x7 back for my 4x5 camera, because 4x5 is so damn expensive. I got this one pretty cheap because it doesn’t look too great on the outside.

I was thinking, this is a good way to get still high quality shots, be able to use movements, and get price down per shot into something more reasonable.

With this back you get 10 shots per roll, and you just swap the ground glass into this back when you’re ready to take a shot.

upload.jpg

For some reason a previous owner removed the Linhof badge that is supposed to sit there in the middle.

upload.jpg

But mechanically everything works fine.

Understanding how to load this back and how it works was actually quite tricky. You need to put the unexposed film into the middle, and then just pull out a good 20cm of backing paper, attach it to the other side (top side in pic above), and then crank until the film is tight. The rubber roller will NOT turn before you have everything shut and in place, which was confusing. You need to, BY HAND, remove more backing paper and roll it over to the other side, until you see the arrow in the little window in the middle, and then align it with the red arrow next to it.

After that, you close it up, and crank it until it won’t let you crank any more, and you are at frame 1, ready to shoot. After each shot, you nudge the button towards the direction of the arrow, to release the crank lock, and a little window will tell you which shot you are on.

There is a big downside to using a roll film back which I did not consider before I bought this one. The main one is, you get crop factor. I have a normal lens, and a wide angle lens, but with the crop factor I instead have a too long lens and a too short lens. This makes composition difficult, since I mostly shoot with normal lenses. I don’t really want to buy a third lens just for when I am shooting with this back, I don’t like to lug around a lot of gear.

The second downside is that it is much more a hassle to swap with the ground glass, than it is to insert a film holder. The ground glass is sensitive, and made from glass. When out in the forest or something, this is an extra step that takes time, and you have to place your ground glass somewhere safe for taking the shot.

I think for me personally, I will probably not use this as much as I thought I would. Probably for portraits and such, where you want to take a few shots “for safety” and having a short telephoto lens is preferrable.

What are you thoughts on roll film backs, I am curious?

How much better image quality do you get with 4x5?

Quick post this time. Before I got my large format camera, I knew that the image quality is much better, that there is much less grain, etc. But I did not know how big the difference would be. I am just blown away each time I scan my large format negs.

By coincidence I shot the same scene with 35mm, 120 and 4x5 film. Here is the same crop, blown up to 1500x1500px. White and black points set, but no other editing. The films are all really different so ignore the difference in grey tones.

MPP Mk VIII 4x5 Large format camera

Edit: I have made a lens board for the MPP Mk8 since they have gotten so expensive. Check it out in the shop.

For about a year I have been thinking of getting a large format camera. Or a medium format camera that has tilt/shift, OR getting a Flexbody for the Hasselblad lenses I already own.

But there is something about a large format camera.. it is even slower than medium format to work with, the image quality is exceptional, there are a lot of cool vintage lenses.. So I started looking to buy something cheap to start with. There are a lot of monorail cameras out there, for pretty cheap, so this is where I started. I guess there’s a lot of people like me who want to try out large format, get a monorail and then decide that it isn’t worth the hassle.

And I think it was good I thought about it for a good while before I decided what I really wanted.

Monorail cameras are for studio work. They are not something you want to put into a backpack and go somewhere with. What most people really want, but don’t realize it, is a field camera. Kinda like the Intrepid cameras, something lightweight, foldable, but still flexible enough for most situations.

For some reason I ended up looking at the british MPP cameras, based on what I read and saw, they looked very underappreciated and cost much less than other brands. They are post war copies of the Linhof Technikas, which cost around twice as much. The Mk VII and Mk VIII are the most popular, built in the 1960s. They both have a normal sized universal back, so regular film holders work fine. Both models feature all the movements a beginner large format photographer would need. For me, it’s all about front rise and front tilt. The rest are pretty much not interesting at this point in time for me.

Information about these cameras is scarce though, there exists a MPP users club, but all the information is nowadays behind a pay wall. You can find the manuals in PDF format luckily, but it is very short and a lot of small details got me confused even though I was having the manual in front of me.

Here are some hints if somebody else is googling for this stuff.

How to get the back cover plates out of the way when focusing with a loupe. Press this button:

How to get front tilt (lens angle forwards or backwards):

Loosen with the screw on the left side, then pull the centering tab on the right side while pushing or pulling it carefully.

How to get front rise (drop is not possible):

Loosen the lower left side screw, and turn the right side lower screw. Don’t use force, if you have to, you need to give it some new lubrication.

How to get triple extension (careful with this, you can push the rails too far back and its a hassle to get them back into the slot):

How to get front shift:

If you want to move the front standard sideways you loosen the screw in the middle there on it.

How to rotate back (portrait or landscape):

How to remove ground glass when using roll film back:

If you decide to get one of these cameras, I do recommend you grease up every place where moving metal touches metal! Get rid of all gunk with some isopropyl alcohol, q-tips and wipes, and then reapply something suitable. I think lithium grease works the best. Do not use anything like 5-56! And a little goes a long way, don’t overapply anything.

Also try to make sure you don’t get a camera that has holes in the bellows, getting a new bellows is possible but costs probably the same amount you are paying for the camera. These pop up quite often so don’t be in a rush and you’ll get a good deal.

Write in comments if you have any questions I can help you with!

More Orwo madness, NP22 and NP27

Since I got a freezer full of random Orwo films, I need to start shooting them more. So on my recent trip to Budapest I brought with me two rolls for my trusty LC-A (the perfect travel camera).

One was a roll of NP27 that expired a couple of decades ago, that I shot at ISO100. The other is a bulk loaded NP22, that I do not know when it expired. Compared to other NP22 rolls I have shot, this bulk roll has not aged very well. It doesn’t have a huge amount of base fog, but it just seems to lack speed. I shot it at ISO50 (not having looked at my notes I did the same mistake twice) and again I got very thin negs.

Both rolls were souped in HC110 dil. B (1+31) with an extra addition of 2ml 1% Benzotriazole (BZT) for 8,5min. The BZT will reduce the base fog but also reduce the film speed. A slightly lower base fog makes for easier scanning, dense negs will make the scanner show a lot of banding and that really bad, so I’d rather lose a little bit of shadow detail. I have also noticed that a key factor when working with expired films and trying to get minimal base fog is to develop for a shorter amount of time if possible. Hence, dil. B is better than dil. E. The difference is not huge, but still, it is visible.

I think I should have given them both a stop more light, and maybe develop for a little bit longer.. but I think also the batteries are running out on my LC-A, and when they do that, the camera starts underexposing shots now and again for no apparent reason. So there’s that too..

As always, here are some example shots. First, some NP22:

And here is some NP27.

Alright, that’s it for this time. If you want to read more about my experiments with Orwo films here are my previous posts:

ORWO NP22 in HC110 dil. E

ORWO A03

Orwo NP27 in D76 1+1

A couple of rolls of JCH StreetPan 400

I noticed I never wrote anything about Streetpan so I thought I’d write a couple of lines and if nothing else, have my development times and notes here in the blog for safekeeping.

I don’t care much for this film. It is not a true 400 speed film, it is at least a stop slower than advertised.

The extended red sensitivity sounds cool in theory, but in practice it gives too bright skin tones, blown out skies, and so on.

If you have no IR-spectrum light going on, ie. no bright sunshine, the speed drop significantly and you end up with mostly just black images.

Here are some examples, developed in Rodinal, 1+50, 20c for 22minutes. As you can see you get very grainy images, but since this is basically Aviphot (see other post), rodinal works pretty well with aviphot-films, with D76 1+1 I have bad experience with weird grain structure that looks blotchy.

Here is the other roll I have shot. This one was also at ISO400, with my Lomo LC-A. Development was in XTOL 1+1, 17min at 20c. Out of these two developers I would recommend the rodinal. Or shoot the roll at 200 and maybe pull development with a minute. But the negs are seriously thin, especially everything not shot in bright sunlight.

That’s it for today. As always, write a comment, let me know what you think.

Lomography Color XPro Sunset strip in E6

I got my hands on a slighly expired 3-pack of this film for cheap, and I thought, what the heck. In general I am not a fan of Lomography films. I don’t like pre-flashed films and stuff like redscale is in my opinion a huge waste of film.

Oh well, this film is supposedly meant to be cross processed, which means that it is really an E6 film. So I thought I’d soup it in E6 (since I just mixed up a batch of chems) to see what’s going on.

It was pretty much what I guessed beforehand, the film is just preflashed (in other words, exposed to light) with a orange/yellow light. The preflashing reduces contrast and makes the film more susceptible for color-shifts towards the colors used in the pre-flashing, in this case, orange/yellow. This kinda gives a “sunset” vibe to your pictures, and with the reduced contrast, when cross-processing you increase contrast - you can get some decent looking pictures.

The problem for me is that I always color correct my scans, and try to fix any color shifts I might see, so I always “fix” problems like this and just get sub-par images in the end. I have the same problem with cross-processing, I just end up with high contrast images that I usually don’t like.

Anyway, I tried to leave these example pics more close to original than I would normally do. It looks to me like it’s some consumer grade, not that great, slidefilm that got this pre-flashing treatment. I don’t think it’s Fuji film, because it curls alot and Fuji films are fantastic in this sense, they never curl too much.

Would I buy again? Nope. Do I regret this purchase? Nah, this is gonna be fun for some random Lomo LC-A shots. Oh well, that’s it for this short review! Here are some shots!

Washi "D" ISO500 - first impressions

Another Russian film, this time hand rolled by the Washi guys. I got this film pretty cheaply, I paid around €7 for it from a Swedish retailer who had a sale going on. According to Washi, this is:

Originally coated for aerial surveillance and cartography, "D" is a panchromatic negative film, offering high contrast and moderate grain.

The datasheet says it is ISO500, thin polyester base.

According to the same, you can develop it in stock XTOL for 6,5min. My rule of thumb is that you can convert stock XTOL times to 1+1 times by adding 40%. That brings us to 9min, in 20c.

I’d say the development was pretty spot on with that, no complaints there. It’s actually not that contrasty as I initially feared, but it does have the same characteristics as Agfa Aviphot. Near-IR response, weird blotchy grain and highlights block up very easily.

Sometimes the sensitivity curve can work to your benefit, especially in portraits you can get a really nice “glow”. Here’s one of my nephew.

It’s not the sharpest film I ever used, but I’m not sure if that matters very much for me. But it is not grainy really, not for an ISO500 film. Usually the ISO rating is exaggarated but in this case, it does actually feel like ISO500 is pretty spot on. Here is a crop from one of the pictures that will be in the gallery:

As is really common with these films, it’s not bad, but it just isn’t that good either. The polyester base is a super pain in the ass. It’s so thin, you get light piping into the cartridge if you load it in daylight. You will have problems getting the film onto your developing reel. You will have problems getting the negatives into sleeves. They attract dust like crazy.

For the same money I could just shoot HP5, and the results would be better. From this roll I got 35 exposures, the first one was gone due to light leaking into the cartridge.

Having said that, I enjoy trying out these various emulsions while they are still around. Most of them are probably new old stock found in some warehouse, and when they are gone, they are gone. So hey, what the heck, let’s support small time entrepreneurs who are trying to do something creative in our little industry.

That’s it for today. As always, I love getting comments, so let me know your thoughts.

Is film photography more art than digital?

i’m in the midst of creating the first issue of my photo-zine, and for it I need some written content. So to get some material, I thought I would write some blogs in a more think-piece style instead of my usual highly technical research oriented reviews/tests.

A few months ago I was having some self-doubt as to the value of my photography work. I got into reading a few of the classic when it comes to photography/art, namely:

  • Susan Sontag - On Photography

  • Susan Sontag - Regarding the Pain of Others

  • Vilém Flusser - Towards a Philosophy of Photography

  • Roland Barthes - Camera Lucida: Reflections on Photography

  • Annie Leibovitz - At Work

Reading all these books, I found that all of the authors were dealing with some self-doubt and negative emotions. It is also fascinating for how long people have been contemplating whether or not photography can be classified as art. Today, it feels like the discussion is over and has been for a couple of decades. Of course photography is art. But since digital cameras became so ubiquitous there is of now a pendulum swing. When something becomes too commonplace and too easy, it doesn’t feel like art anymore.

This is probably the main reason why a lot of young photographers who want to see themselves as artist are starting to get into film photography. They talk about how it is more real, how no editing is supposedly done even though they are shooting color negative. They leave the dust on the scans so that it makes the image feel more real.

Probably they have some sort of misconception that this is how photos looked liked before they were born. With a strong cyan cast and filled with specks of dust.

But I can understand where they are coming from. I like my mechanical cameras because they feel more real. I like vinyl records because I want to be able to hold the album and look at the cover. And since it is more difficult to change songs, I just listen to the whole album. Some times things need to be enjoyed at a slower pace. Some times the journey matters as much as the destination.

There is no point in trying to be different by using film cameras, there’s a lot of people who beat you to it. But if you feel that you create better work because the camera slows you down, and because you enjoy to use the camera itself - go ahead. I have found that different film cameras make me shoot in different ways, but I have never experienced this with digital cameras. And I have found that having limitations on myself makes me stop snapping and instead trying to shoot something meaningful.

So is film photography more art than digital photography? Of course not. It’s like arguing if oil paintings are more art than watercolors, how you got to your end result doesn’t really matter for anybody else than yourself.

Agfa Copex HDP13 in C41 (cross-processed black and white microfilm)

If you’re new to my blog, check out the first part of my adventures with HDP13.

A short re-cap. HDP13 is a microfilm that was manufactured by Agfa. It was made in Belgium. The last rolls of film in Agfa Belgium was made somewhere around 2004. My roll has an expiration date of 10/2011, which probably makes it one of the last rolls to get manufactured.

Finding information about this film is difficult. Agfa made a range of microfilms, there’s at least HDP06, HDP10 and HDP13. And then they have Copex Rapid PET06 and PET13. The numbers are related to size, the two Copex Rapid ones are just different thickness of the film base. So probably in essence they made just two different emulsions.

I have found some random bits and pieces about these films online from various sources:

  • Rapid is supposedly better than HDP13 for pictorial work due to less steep graduation curve but HDP13 shows better sharpness

  • HDP might stand for for High Definition Panchromatic

  • Copex Rapid is panchromatic and “High speed”

  • Gigabit film is really Copex Rapid with a custom developer (I have a blog post about Gigabit coming during summer, lots of stuff to test, so little time). Gigabit film is ISO40 in its own developer

  • HDP13 is somewhere between ISO12-25 depending on developer used

Somewhere, at some point, I read about using C41 developer for high contrast film (the article was about Tech Pan), and since I have a bulk roll of HDP13 and some C41 developer that is no longer good enough for important work, this was a good occasion to try it out. I have not been able to find much information about cross processing black and white film in C41 developer, just some people who (falsly) claim that it will just render blank negatives.

So, for my first trial I started out with ISO25 and bracketed one stop over, ISO12. The developer was at an ambient 22c, and I souped the negs for 10 minutes with just a few calm inversions. As before, I shot with my Hasselblad, 80/2.8. Hence the funky XPAN like form factor.

The negs were very very thin.

Second try, I tried again ISO25+12 and instead did 25c and 20min. The negs were much better, but still very thin. There was some weird wavy effects in highlights, and I remember reading that Gigabitfilm and Tech pan require VERY INTENSE agitation the first 30 seconds of contact with the developer.. I need to try this.

Third and final try for this time, I increased the temperature to 30C and time to 25min. ISO12. Very intense shaking for the first 30 seconds, a few good taps, and then just one inversion per 5 minutes.

The improvement was marginal at best. My metering might have been off since I used a flash. I also tried some long exposure ones, but I know nothing of the reciprocity characteristics of this film, so I did not adjust for it at all. But still, I find this surprising. With usual black and white development, an increase of 5c in the developer temperature HALVES the development time. So 25min in 30c should equal to around 12min in 25c, and try #2 was 20min. Could it be the low agitation interval? Or is my C41 developer just plain dead now?

It does however - have nice mids now. It’s very low contrast. After tweaking with levels in photoshop, you do actually get an useable image now with pretty mellow tones. If i were to use this film for pictorial work again in the future, I would probably increase the temperature yet again. But at some point the emulsion will start to melt. I would probably try 32c, 30min, and do agitation every 3 minutes or so.

Summary

This is not a good general use film. The film base is sooo thin, they attract every speck of dust within a miles radius, if you handle them without gloves you will get fingerprints, if you try to wipe them you will scratch the surface. You cant even wipe them with a microfiber cloth without scratching, that’s how delicate they are!

Then there’s the fact that they are not perforated, it kinda sorta works using the ‘blad, but sometimes you roll too much into the film can, and then they get too tightly wound and you cant advance the film in camera. And you have to flip the camera 90c if you want a landscape oriented shot, otherwise you will get a portrait shot but very very tall. Which looks stupid, and is impossible to compose shots with.

However, having said that, it is film that can be found very cheaply on the ebays. And it is fun to try out new things. And it is totally grainless and crazy sharp. If you have a datasheet on HDP13 I would like to have it please! If you have any experience of your own with Agfa microfilms, please write in the comments!

Addendum

It seems that Adox CMS20 is also HDP13:

“Adox CMS 20 II is fresh production Agfa-Gevaert HDP microfilm. The former CMS 20 (=Spur Orthopan UR film) is from a former version of Agfa HDP 13. “. Source.

And for this, we can actually find a datasheet.

Fuji Super Prodol (SPD) first impressions

As my regular followers know, I go to Japan once a year to visit friends and hang around in Tokyo.

I usually swing by Yodobashi Camera to pick up some Fuji Acros and other Japan only films. There’s not much left out there, but I have previously picked up som Japan only developers. One of the two I have is Super Prodol or SPD, made by Fuji camera.

Not much is know about it in the west. It is quite expensive to buy unless you pick it up yourself, but if you do it’s very cheap. I think I paid 290 yen for a liters worth of developer. That is something like $2,50USD.

Rummaging around on the interwebs I found this short description:

"Super Prodol (SPD) is a rapid processing, push process developer provided in dry powder package. The developing agent listed is hydroquinone (3.9%) which is probably augmented with phenidone or its derivative. The developer contains 70-90% of sodium sulfite, and buffered with metaboric acid (3.4%) and sodium carbonate (3-7%). This formula resembles Crawley's FX-37. This developer is likely to contain bromide restrainer or possibly other antifoggant."

I have never heard of, or used FX37 in the past, so that’s interesting..

I also found that as a baseline for development times, you can look at HC-110 dil. B for the stock solution and dil. H for 1+1. I have tried both stock and 1+1, and can’t say I find much difference. Not that I have yet developed a lot of rolls, I think it’s just 4 at this time.

I have found that pushing HP5 two stops to 1600, and developed in SPD 1+1 in 20c for 15 minutes gives great results. I also tried pushing HP5 three stops to 3200 and developed in SPD stock (20c) for 11 minutes gave great results. I think SPD is a really good developer for pushing.

Neopan 400 looked also great, but my Neopan 1600 was a little aged and I think it got more base fog than it deserved in SPD.

Here are some sample pictures. First off Neopan 400 shot at ISO320, it was developed in SPD 1+1 for 7min in 20c.

Here is HP5 pushed 2 stops to 1600, developed in SPD1+1 for 15 minutes in 20c.

Here is Neopan 1600, slightly expired. Shot at box speed, developed in SPD 1+1 for 6,5 min in 20c.

Lastly, here is HP5 pushed three stops to ISO3200. Developed in SPD stock for 11 minutes, 20c.

Summary

I think SPD works great for medium speed films, 400 ISO. Both HP5 and Neopan 400 look just fine. I can’t say it looks much different than say, D76. But it really does come into its own when pushing film. There seems to be more shadow detail, the grain feels controlled.. I am not sure, but it does feel alright.

I mixed up this liter back in October, it is now late January and the developer looks to be totally fine. It has changed color from a clear liquid into a very light yellow one. So shelf life seems to be fine. It comes in powder form, in sealed packages, and based on my experience these will last forever.

When it comes to developers, there is usually quite little difference between them. People would like to think that there is more difference than there actually is, because it is one of these things analog photographers like to quibble about, and have heated arguments about Rodinal and which developer is the best for pushing film. But I have used a dozen different developers and I can barely see any difference between them, really. And whatever the differences might be, you need to use that developer for a long time before you can really see what it is all about. I’ve done something like 5 rolls now in SPD and that is just not enough for a proper review. But I like writing these posts, for my own sake if nothing else. And finding the development times can be tricky for this one, so maybe it will help someone.

Alright, write in comments below if you have any questions. Until next time!

Fuji Neopan 400

Fuji films have a cult following, even though Fuji kind of ignores its fans and keeps discontinuing more and more films. Few films are as known as Velvia, or Fuji Acros. Velvia is still around, but who know for how long. I give it a couple of years, then I think Fuji will discontinue all of the film production.

Anyhow, this blog post is about one of the fallen ones, Neopan 400. When you talk about Neopan 400 with someone who has shot it in the past, they get misty eyed and start reminiscing about its tonal scale, it’s great grain, how fantastic it was to push process.

I have recently aquired around 15 rolls of pretty fresh Neopan 400, and have these past few months managed to shoot two of them. One was developed in Fuji Super prodol, aka Fuji SPD, 1:1. 20c, 7 min. The other one I did in HC110 dil. E (1+47) for 8min in 20c.

I have not yet tried any push processing, but I might. I think SPD might be a good fit, of which I have a few packs left (I’ll write about this Japan only developer at a later date).

The first thing that hit me was how it renders blue skies, they are a bit less white compared to other films I have used. Slightly reduced blue sensitivity or just great highlights? I don’t know. It seems to really keep detail in the highlights anyhow.

Grain in SPD is around the same as HP5, in HC110 it is less than HP5. Around same as Tmax400 I’d say, but with better tonal scale. I prefer it in HC110 I think, but looks like I got a little bit more speed out of SPD. Should have shot the HC110 at ISO320.

Here is a 100% crop in SPD:

neopan400-8.jpg

And here is a 100% crop in HC110:

9.jpg

Here are some sample pics, first when done in SPD:

And some pics in HC110:

Summary

I really like this film. It shares a lot of its characteristics with Acros 100, and I can very easily get the type of feel to the images that I want. I just set white and black point and pull the midtones down, way down. And it look so rough, grim, sad. It evokes exactly those feelings in me that I often want to portray with my images, the underbelly of the big city life. The loneliness of being in a big crowd, the absurdity of the way of life in a modern big city.

Alright, that’s it for today. Let me know in the comments if you have any questions or thoughts.

Foqus Type D (Тип-Д) - First impressions

Another “new” film, this time from Russia.

The short version - this is not Agfa Aviphot.

The long version: this is one peculiar film. The film base is thin, way thin. It seems to be polyester based, so it has this papery feeling that it might rip. And if youre not careful, it probably might.

Also you should be careful of light piping, since its so thin the felt gap is not really enough to safely protect the insides from light.

I got this film pretty cheap, I paid only 92SEK for 2 rolls, so around €4,50 per roll. I’ve seen very varied prices online for this stuff, but I wouldn’t pay full price for this film. It’s a fun experiment, but nothing I would use for important stuff.

The reason for this is that it is quite grainy for an ISO200 film, it has this “salt and pepper” type grain which means that you get a bunch of white dots in the shadowy areas. It also seems to have pretty low blue sensitivity, which leads to quite dark and dramatic skies and shadows. Contrast is pretty high.

I developed this roll in HC110 dil. B which gave a development time of just 3,5min in 20c. I try to avoid such short development times since temperature and timing becomes much more important. But I couldn’t find any reliable development times other than this one. I have another roll so I might try some other developer or dilution at least.

Alright, time for pictures, can’t say I can at this stage say much more about this film, but I am looking forward to shooting the other roll with the Pentax LX. These pictures are with my Lomo LC-A.

Developing Svema CO-32 as black and white

After a year of experiments and different methods I have now found a development method I am so satisfied with I won’t try to improve it. So I will write it down here, for safekeeping.

Expose with 1 stop over per decade of expiration. So if it expired in 1998, that is two stops extra.

Svema CO32 is ISO32, so by this rule of thumb you should aim for something around ISO8. I shot a roll of 16mm at ISO12 and it turned out fine too, but you can probably reduce development time with a minute if you do ISO8.

I developed in D76 stock, D76 1+1 and HC110. All turned out fine.

With D76 stock I did 13 minutes in 24c. I think results are better at 24c than 20c. Just reduce development time accordingly. I also added 5ml of Benzotriazole (BZT) 1% in 500ml, that is 1 part per 100 should be BZT 1%. You can probably increase this, and prolong development time accordingly. BZT is a restrainer that helps with the base fog.

After this, fix for normal times for your fixer, and here now comes the trick. After fix, bleach the negs in Povidone-iodine (PVP-I). This is the orange stuff they use in hospitals to clean cuts. You can get it in stronger version and larger bottles from veterinary supply stores. You want at least 5%, anything less and you will not bleach it in a reasonable amount of time.

Let the negs sit in the PVP-I for at least 12 minutes. I found that after this you get benefits but diminishing returns.

Now fix the negs again, for your normal amount of time.

Wash, dry, and we are done.

For 35mm this is totally not worth it. If you want to experiment with russian film, get something that was black and white to begin with. However, there is a good supply of expired 16mm films out there in the old Soviet bloc, and this can be a cheap and cool way to do some cine stuff.

I also tried to bleach with citric acid, without results.

I tried to bleach before dev, and got blank negs.

I tried weaker bleach, shorter times, no difference.

Without the BZT the base fog was greater.

upload.jpg

Pentax LX

For over a decade I wanted to have the Pentax LX. Instead I got a MX.. and then another MX.. eventually both of them starting developing problems. Neither of them really do shutter speeds faster than 1/250. Mirror got sticky. One started eating a pair of batteries per day.

I started to feel like I am holding on to these two bodies just for nostalgia, it was time for a new work horse. Looking at the LX prices, it felt like it wasn’t really such a big deal. I wanted a tool for my trade, one that I can rely on. And the LX is probably the most professional camera Pentax ever built.

So I got one on a local auction site. Mirror was slighly misaligned, because the mirror resting pad gets all mushy and eventually crumbles to pieces, and there is supposed to be a millimeter thick pad there.

But found a great guy to do a CLA (Clean, Lube, Adjust) in Stockholm for decent money (shoutout to analogakameror.se, really nice guy!), a couple of weeks later I had a working LX body in my hands and was ready for my yearly big asia trip.

Now I’ve been shooting with it since the beginning of September and felt that the time was ripe for a short review of it:

  • Sure feels like a well built professional camera. Everything is just so.. built with finesse

  • The killer feature for me is the built in dioptry adjustment. So nice since I wear glasses!

  • The automatic shutter speed is just incredible for night time shots. It does automatic adjustments of the time on the fly, so if lighting condiitons change, it will shorten the exposure

  • Viewfinder bright and clear

  • Mirror slap and shutter noise is a bit louder than the MX but less loud than a Spotmatic

  • I liked the metering indicator better on the MX (Green = OK, Yellow = Careful, Red = No go). Now it shoes what speed I should be shooting at based on the aperture setting, or which speed it will shoot at if I have automatic speed

  • The extra wood grip accessory is great, feels really great in the hand, but then you have the neck strap hooked to just one side so it is resting sideways on your body, not as quick to pick up and take a picture (I can probably pick up/focus/meter/shoot in less than 2s with my MX)

  • Shutter speeds up to 1/2000! What a difference after years of shooting 1/250 at the most

All in all, it’s a fantastic little camera for the film photographer, and I can highly recommend it. But I can also highly recommend the MX, just find one that works. And please guys, don’t forget to service your cameras!

39504467_270685700208255_5114453064736047104_n.jpg

Kiron 24mm f2

Found a Kiron 24mm f2.0 cheaply and since I don’t have anything wider than 28mm for my Pentax system I thought it would be a nice lens to try out.

I have read that it is very soft wide open, and that it has some issues with the coating coming off, and I can agree to both of those statements. The lens that I have seems to have permanent polish marks or something on the front lens, and there is either a lot of dust or something else in one of the middle elements.

Here are a couple of wide open shots:

A dreamlike quality, very soft indeed but pretty cool in a way.

Here are a couple of stopped down shots:

Not bad sharpness actually, it’s not crazy sharp like my K28/3.5 but good enough.

Just a short post this time, so that’s it!

Astrum Foto 100

Edit:

Guys, I might be wrong on this one. It has come to my attention that this film has NO IR SENSITIVITY, this would mean that it is NOT Aviphot but some other aerial photography film. One rumour says it might be Tasma Type-42L. I have dug up another roll from the fridge and my IR-filter to verify this. However, even if it is not actually Aviphot, I think it looks awfully similar.

Edit2:

The information I got was totally wrong. I took some shots with an IR-filter and it does indeed have sensitivity up to infrared. However, I shot a rool of Astrum and another roll of Silberra Pan 100, and developed them both the same length of time, and the Silberra roll came out way underdeveloped. So tests inconclusive.

Short version: It’s Agfa Aviphot Pan 80. Also sold as Rollei Retro 80s.

Longer version: Maybe you are not familiar with the Aviphot line of films. They have been made for a long time Agfa (who are actually still around in a way). The films come on a clear polyester base, have extended IR sensitivity and harsh contrast. It had something to do with how aerial photography works, it’s taken from straight above straight down, so there are no shadows.

Silberras Pan line of films are also Aviphot, and JCH Streetpan.

Anyway, what I have concluded about all the different Aviphot:s I’ve shot is that they are difficult films to work with. The harsh contrast, bad shadow detail and extended IR-sensitivity lead to images having blown out skies, too bright skin tones, no shadow detail. All of them benefit from some pull processing, rate at maybe 0.5-1 stop lower, develop for ~15% less than instructed.

QC seems to be a bit lacking also, there is some strangeness here and there on a few frames. So don’t shoot anything really critical with this film..

Grain is a little bit blotchy and strange, although smooth. Skin looks really smooth and nice if you manage to expose it just right. If you dont, you will get blotchy grain. Example:

Capture.JPG

As you can see it looks very grainy, consdering it is an ISO100 film. And the grain is not uniform and small like HP5. But if you look at some other examples here below you can see it is sometimes very smooth.

All the Aviphots dry very flat, and very quickly. That is a nice plus. They are pretty easy to scan too, maybe since they are on a clear base.

D76 1+1 looked worse than HC110 I think. Here are some shots of D76 1+1.

And here are some shots done in HC110, several of these were with a yellow/green filter, and the one of the building with a 3 on it is with red filter:

Some good sides of Astrum is that they come in reusable cartridges, the old USSR type that have a screw top you can just open up by twisting. Also, it’s cheap. If you use a red filter I suggest giving it a stop or two more light than the light meter says. Always err on the side of overexposure, the grain in the shadows is not nice.

All in all, if you find this film cheaply and you havent tried any Aviphot - go for it. It’s not crap. There are just better films out there.

That’s it from me this time. As always, would make me happy if you dropped some comments on your thoughts!